There are a few hidden Waddle Dees to find in the Natural Plains in Kirby and the Forgotten Land. Some locations are relatively easy to find, while other locations can be harder to uncover.
Each of the six main worlds in Kirby and the Forgotten Land has four levels apiece with three to five specific Hidden Waddle Dees to find. Rescuing these captured friends is often the reward for solving optional puzzles and finding secret areas.
Finding them is the easiest way to increase your total count and unlock everything that Waddle Dee Town has to offer. The more you collect, the more stores and mini-games unlock in the hub.
Where to Find All Hidden Waddle Dees in Natural Plains
There are 15 Waddle Dees hiding in the four non-boss stages in Natural Plains. For clarity’s sake, we have separated these out from the 16 you find by completing the Hidden Missions in Kirby and the Forgotten Land. Our Hidden Mission guide for Natural Plains can be found here.
Use the links below to jump to each level:
All Hidden Waddle Dees in Natural Plains’ Downtown Grassland
There are three Waddle Dees to find in Natural Plains’ Downtown Grassland level.
Downtown Grassland Waddle Dee 1
The very one in Kirby and the Forgotten Land is hard to miss. After you defeat the very first required Wild Edge boss, this Waddle Dee will appear as your reward.
Downtown Grassland Waddle Dee 2
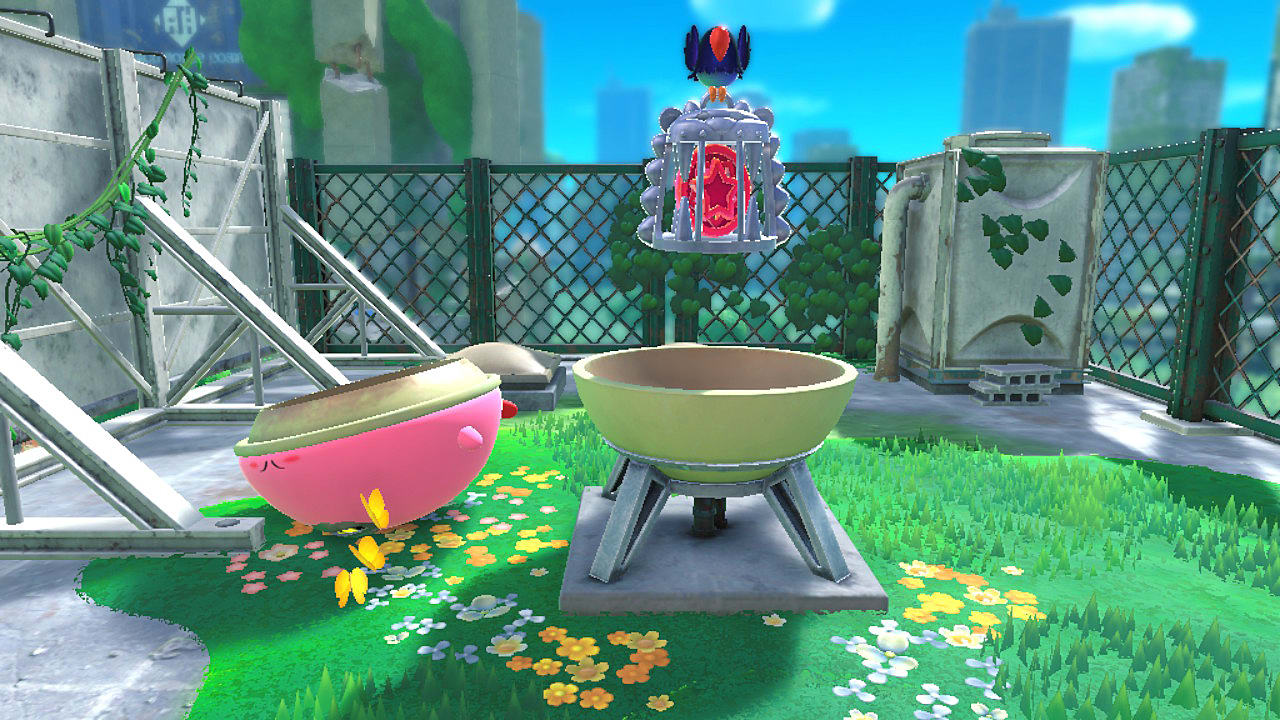
When you enter the next area, look to your right and you’ll see a ladder that leads to the roof of a building. Go up the ladder. you’ll see a dome on the roof that requires Mouthful Mode to open. Do so to free another hidden Waddle Dee.
Downtown Grassland Waddle Dee 3
The third and final hidden Waddle Dee in Downtown Grassland comes later in this same area. Ahead and to the left of the rooftop dome is another ladder that leads to a different rooftop. Here you’ll find a traffic cone suspended by vines. Release the cone by using the Sword or Cutter ability. Once the cone is free, return to the surface level to inhale it. Use Cone Mouth to break the concrete back of the Tortorner roaming this area.
All Hidden Waddle Dees in Natural Plains’ Through the Tunnel
There are four Hidden Waddle Dees to find in Natural Plains’ Through the Tunnel level.
Through the Tunnel Waddle Dee 1
The first Waddle Dee is in the tunnel’s secret room. To access the room, you must be in the cavern with a dome and steel boxes in the wall. you’ll have to use Mouthful Mode on the dome to reveal a switch that destroys the boxes. This reveals an entrance, and this one is in a chest in the room beyond.
Through the Tunnel Waddle Dee 2
Later in the level, you’ll find more steel boxes in a room with a three-star door that will not allow you to come back. Follow the coin path and platform up to a secret passage that will lead you to a bomb block above the boxes. Attack the bomb block and the boxes will reveal another Waddle Dee below.
Through the Tunnel Waddle Dee 3
In the next room, there will be a fuse puzzle on the floor. Light the fuse and follow the rope to a canon that will launch you up to where the next Waddle Dee is hidden.
Through the Tunnel Waddle Dee 4
The final Waddle Dee in Through the Tunnel is another but more complex fuse puzzle, requiring you to use stairs to reach the canon. To avoid putting the stairs on the fuse, use Mouthful Mode to move them to the right of the canon. Here you should be able to climb up and reach the platform to get the last one in Through the Tunnel.
All Hidden Waddle Dees in Natural Plains’ Rocky Rollin’ Road
There are four Hidden Waddle Dees to find in Natural Plains’ Rocky Rollin’ Road level.
Rocky Rollin’ Road Waddle Dee 1
The first hidden Waddle Dee in Rocky Rollin’ Road is a reward for completing the Ranger tutorial. you’ll see a gun-touting Ranger near a floating target early in the stage. Inhale him and hold the attack button while aiming to shoot the target. Destroy the nearby blocks to reveal this one.
Rocky Rollin’ Road Waddle Dee 2
The next Waddle Dee will be found in a similar fashion. When crossing a bridge, you’ll see a Ranger in front of you and a target in the background. Inhale for the Copy Ability and shoot the target to spawn a cloud bridge to the room where your captured friend is. There is a target practice mini-game in this room you must complete.
Rocky Rollin’ Road Waddle Dee 3
The third Waddle Dee is a bit tricky compared to what’s come so far. you’ll see a blue switch at the end of the section where Kirby is running from a boulder. You must hit the switch before the boulder destroys it, or you’ll not be able to get this hidden one. If done in time, he will be on the bench near a hot dog after the sequence.
Rocky Rollin’ Road Waddle Dee 4
The final hidden Waddle Dee in Rocky Rollin’ Road is pretty simple to find. Once you get the ability to Mouthful Mode copy the car, just follow the elevated ramps, boosting and jumping in order to crash into the weak side of the building.
All Hidden Waddle Dees in Natural Plains’ Trip to Alivel Mall
There are four Hidden Waddle Dees to find in Natural Plains’ Trip to Alivel Mall level.
Trip to Alivel Mall Waddle Dee 1
The first hidden Waddle Dee in Alivel Mall is found right after you get the Invincible Candy. Move your invincible little self through the corridor ahead to hit the bomb block on your left. This will reveal a ladder to the second floor where this one is being held. The faster you go, the less you have to worry about all the enemies due to the invincible power-up.
Trip to Alivel Mall Waddle Dee 2
In the next room, you should swallow a storage locker using Mouthful Mode to reveal a map showing the solution to the puzzle ahead. The trap room ahead has three exits, but two lead to enemy rooms. The map shows you that the path under the burger sign is safe. The next Waddle Dee is another reward for solving this riddle.
Trip to Alivel Mall Waddle Dee 3
The next hidden Waddle Dee is in the conveyor belt room with the spikes in the center. There are barrels on fire in the upper left-hand corner. you’ll need to have the Ice Copy Ability or inhale a nearby Frosty to destroy the barrels and reveal a ladder leading to a blue switch. Hit the switch for this one.
Trip to Alivel Mall Waddle Dee 4
The final hidden Waddle Dee in Natural Plains is in the next trap room. Here you have to enable Mouthful Mode on the lockers again to reveal a map, but this time, it has a piece missing. It shows an arrow to the left under a cake.
The catch is there are multiple cake signs on this floor. Go all the way to the right-hand side of the area to find another locker blocking a door to a room. The final piece of the puzzle is inside the room, showing you the exit is across from the ice cream shop.
And those are all of the hidden Waddle Dee locations in Natural Plains. For more on Kirby and the Forgotten Land, like a comprehensive list of every Present Code we know so far, check out our other Kirby and the Forgotten Land guides.


Published: Mar 30, 2022 03:19 pm