Starpoint Gemini Warlords is a space sim RPG with overarching 4X elements. As such, there is a lot to learn before you can effectively construct a fleet to conquer your enemies — or at least use as a deterrent in the case of ever-escalating tensions with an “ally”.
In short, SPGW is complex, but that’s why we here at Gameskinny went through the school of hard knocks — so that you don’t have to. This guide will cover:
- Options
- Resources
- Research and Development
- Boarding and Capturing Enemy Ships
- And More
Let’s get started.
Options in Starpoint Gemini Warlords
Turning the Fog of War On or Off
In this game, fog of war refers to whether or not you want everything on your starchart (map) to be hidden from the outset or not. If the fog of war is on, then you must explore the map to see what lies ahead in the great beyond. If not, then you will automatically see all the bases on the massive world map.You can not, however, turn the fog of war off once you have started a playthrough.
Pause While In Context Menu or Starchart
You can also choose whether or not the game pauses while you are in the context menu or starchart. Personally, I preferred to have it pause in both of these menus since it reduces the chaos of the world map and strategy elements respectively. Although, seeing the starchart update in real time is really awesome.
Resources
There are three resources used for much of your research and construction in SPGW: ores, gases, and materials. However, only materials are used to craft ships for your fleet. This, combined with the fact that you receive fewer materials than other resources, means that they are highly sought after.
Research & Development

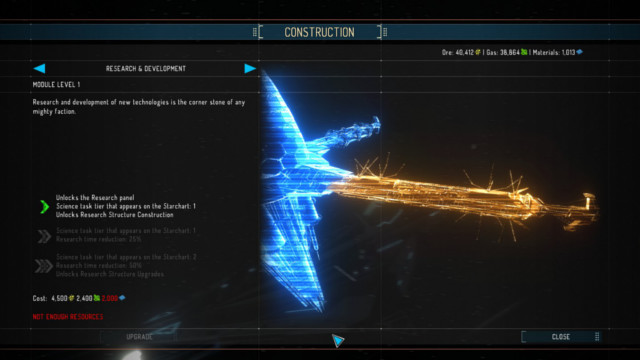
At the beginning of the game, you will not actually have access to the research facilities. You will want to change that fast, as there are many things you will need to research, some of which are mentioned below. By going to Concordia Headquarters, or by accessing your construction tab, you can build your R&D facilities.
Boarding & Capturing Enemy Ships
Luckily, there is a way to get more materials by boarding enemy ships. To board an enemy ship, you need to target them, then open the context menu and choose to board using your ground troops. Once you do this, a minigame of sorts will pop up on your radar.
To be breached, each room will require a certain amount of troops. The middle option, represented by a fist, is called pillaging. Pillaging more advanced systems, like the shield generator, can result in effective bonuses for you in combat. Once you get to the last room, you have the option to try and force surrender for the crew; this will be presented by a % symbol.
What You Can Do With A Captured Ship
Once a ship has been pacified, you are given several different options. You can scrap the ship for materials. You can add the ship to your fleet, which costs materials. You can add the ship to your personal collection, which costs credits. Or you can send the ship in for research, which lets you build more of that ship for your own fleet.
There is no best option, per se, but it is always useful to get more materials for your troubles.
How to Get Good At Space-Swashbuckling
Sadly, this is all RNG-based, which means you have to hope that the RNG gods are on your side. But there are several perks, as well as research options, that help you get better at boarding ships while also reducing boarding cooldown times.
Boarding Perks

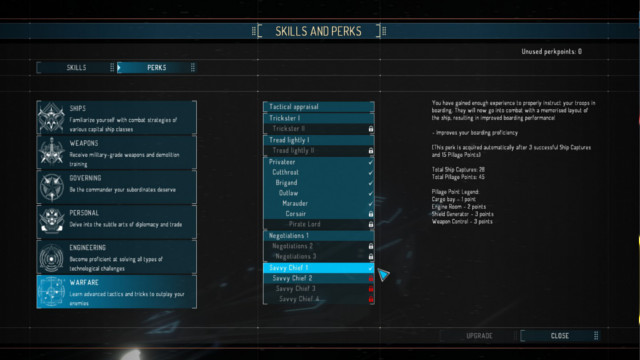
Specifically, there are a set of perks listed under the Warfare tab that is worth investing in whenever possible. The first set includes the largest family of perks in the game (7) and goes from Privateer to Pirate Lord.
The second set of perks is the Savvy Chief perks. These are the only perks that you earn by completing specific requirements. To earn each rank, you must both capture ships and pillage them, gaining worth up to a certain number. The requirements are listed in the description of each rank of the skill.
Boarding Research

There are also several different research topics you will want to invest in for boarding. These are all found under the Support tab. Boarding Armor increases your efficiency (just like the above perks). Boarding Training reduces the cooldown for boarding. And Boarding Angel makes the med bay, which is found on each ship you are trying to capture, give you more troops.
Unlike the perks mentioned above, it will be harder to solely invest in research from the beginning of the game. However, it should be conducted as soon as possible to maximize its benefits.
Keep Tara (and other Ships) With You
Early in the game, you won’t have many ships available except for Tara Higgs’ ship. Keep her with you. There are two reasons for this.
Tara’s Ship Is Expensive
Tara levels up alongside you, which means that her ship is always getting more expensive to replace. You can be careful with where you send her, but you can never ensure that she won’t get destroyed unless she’s with you.
Case and point: Around level 20 or so, I sent her and a small detachment to protect a zone I had captured. They greatly outnumbered the enemy contingent… until they sent a lot of reinforcements from a neighboring zone. Then I was footing a ~6,000 materials bill to replace her ship. Yikes.

Tara’s ship cost significantly more than any ship I could build at the time.
More Ships = Easier Combat
Early in the game, you won’t get into many large scale battles, so keeping Tara with you will ensure that you are outnumbered less often and that you even sometimes outnumber your foes. Remember, you can never outnumber your foes alone!
Find the Class that Best Suits You
Currently, there are three classes in Starpoint Gemini Warlords: The Vanguard, The Sharpshooter, and The Marauder.
The Vanguard concentrates on close quarters combat and receives a damage bonus the closer you are to your target. The Sharpshooter concentrates on long range combat and receives a damage bonus the further you are from your target. And The Marauder receives a critical hit increase while also using a tactical cloak to pick and choose when it strikes.
But Don’t Worry If You Don’t Love Your Class
At the arena, called the Gladiatrix, you can respec your character. This will allow you to mismatch abilities from various classes. For instance, you could grab The Marauder’s tactical cloak, The Vanguard’s pull ability, and The Sharpshooter’s push ability to ensure that you always have control over the battlefield.

The Gladiatrix is found between Concordia Headquarters & Phaneros.
Respecing your skills will cost roughly 100,000 credits per level. This can be a decent amount later on, but even around level 20, this won’t take very long to earn. Respecing your perks will usually cost about a third as much as this. You can also swap your class for 1 million credits.
Freelancer Perk
Another perk that you will want early in the game is the freelancer perk. This increases the rewards you earn from tasks you receive from the job board. It’s really straightforward. You get more money for less work. This ensures this perk always stays relevant as long as you need to keep getting more money.
Managing Your Ship
The Rev Plays has made some great tutorials that
help players learn the strings when starting out.
Your ship has a lot going on at any given moment. Even your first ship will have about six or more equipment slots, and this will only drastically accelerate as you get into larger ships, like Cruisers.
Equipment
You can purchase equipment, which is set to your hotkeys. Some equipment is used for non-combat activities, like borehole torpedos (mining) and scavenger drones (scavenging), while other equipment is used for combat-related purposes, like various repair drones and mines.
Weapons
You can upgrade your light weapons and heavy weapons. The placement of each of these on your ship does make a difference since guns that are on the front of your ship can not shoot enemies that are behind you.
On top of this, each battlement can have multiple turrets. You should see a fraction underneath your battlement when equipped, such as 1/5. By highlighting the gun and clicking configure, you can buy all the turrets available for that particular battlement, which obviously makes the gun much more powerful.
Enhancements
You can also enhance your light guns and heavy guns, as well as your shields, propulsors, and all of the other parts of your ship. In particular, I recommend enhancing your propulsors. These enhancements can make your ship faster and/or more maneuverable, which is not only helpful in combat but is also a quality of life upgrade.
Note: If something already has an enhancement on it, buying a new enhancement and placing it on that item will destroy the previous enhancement unless you first unmount the original one.
Swapping Ships
You should also know one tip about ships: remove all your equipment from a ship when you swap it or sell it. This will either save you from having to swap back and remove it or from having to rebuy said equipment later on.
—
Surely there is still a lot of learning left to do in SPGW, but with these tips, you should now be well on your way to conquering Gemini the way only a true warlord ever could. Don’t be the warlord Gemini needs, be the warlord it deserves.


Published: May 24, 2017 07:33 pm