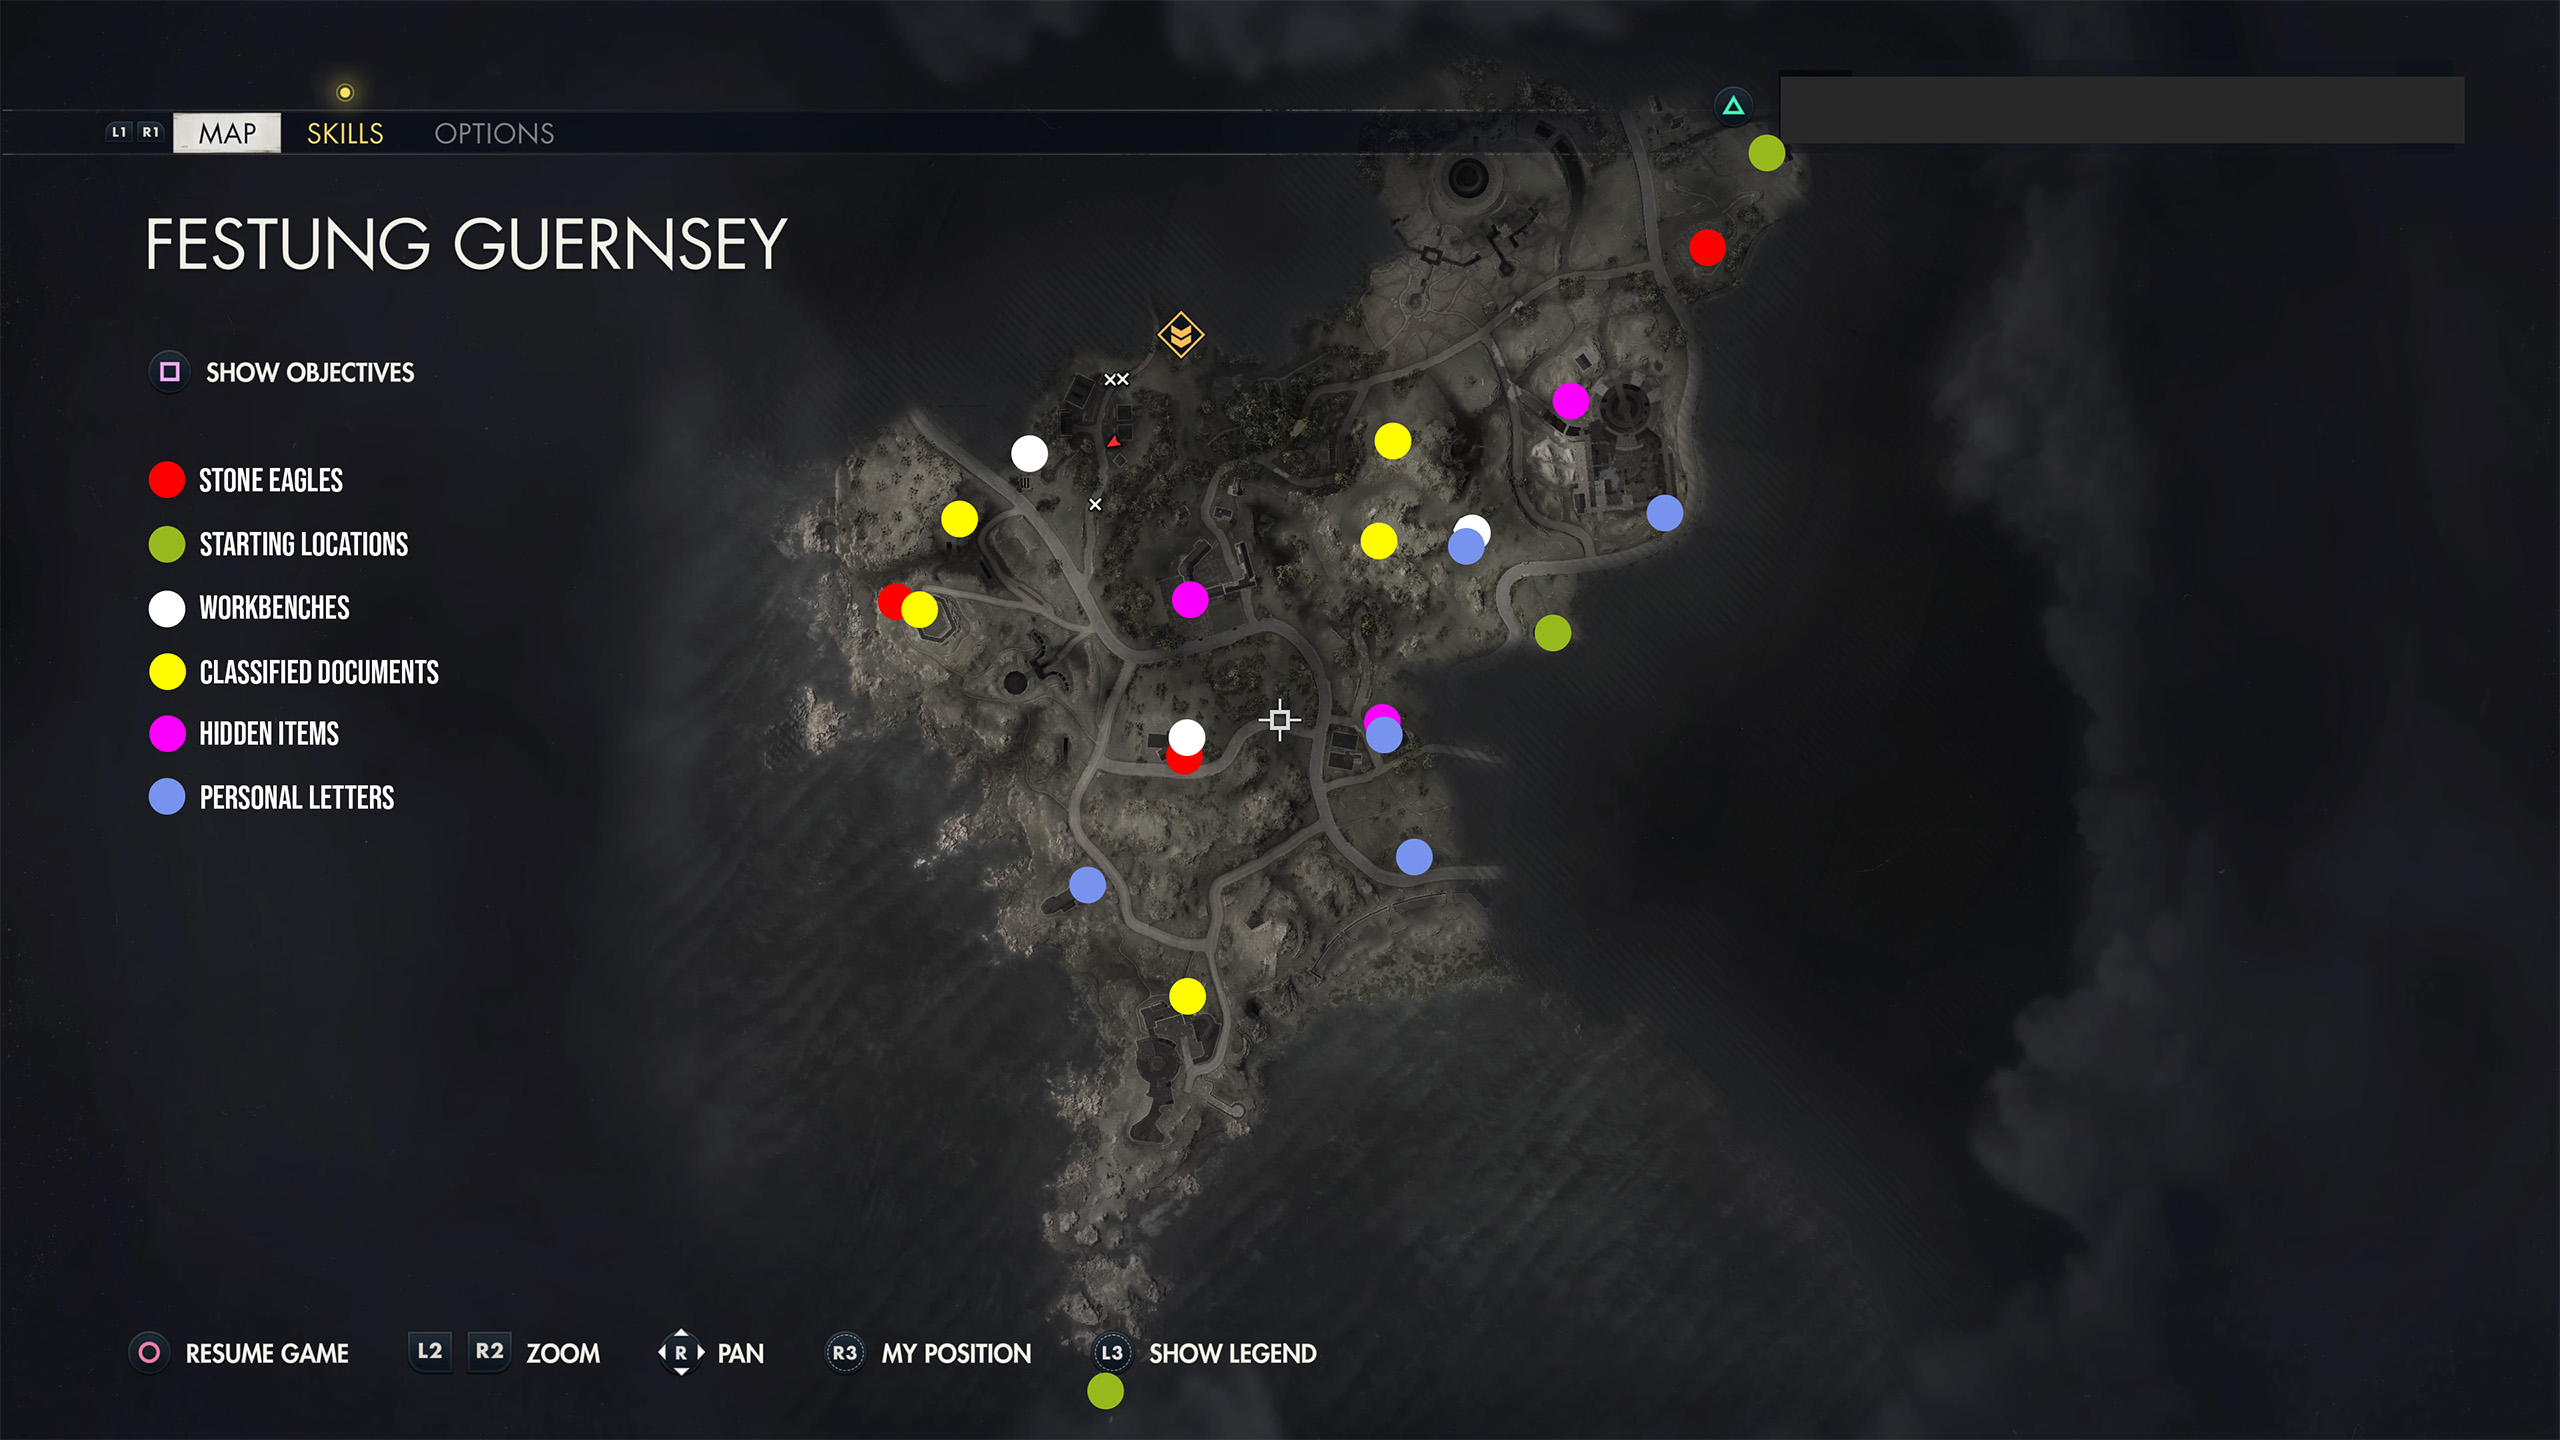
There are 19 more collectibles to find in Sniper Elite 5‘s fifth level, Festung Guernsey, as well as two additional starting locations. Unlike the previous two levels, Mission 5 returns to the more open and expansive structures of The Atlantic Wall and Occupied Residence.
The guide below shows you where to find all of the stone eagles, classified documents, personal letters, hidden items, and workbenches in Festung Guernsey. It also highlights where each of the extra starting locations can be found. We’ll go mostly counter-clockwise, but the mission’s structure doesn’t completely allow for that. Be sure to bury Baumann in concrete, too.
Festung Guernsey Collectibles and Starting Locations
Grin and Bear It! (Classified Document 1)
Start the level, and go to the radio tower on the peninsula. Stay on the right (eastern) side past the bunker, then climb the stairs on the same side, past the alarm, when you see the beige brick building behind the bunker. Get the safe code off of the wooden table in the room with lockers at the top of the stairs.
Then go to the northeast side of the building and climb the vines to enter a second-story window. The safe is on the left inside.
Escaping Islanders (Personal Letter 1)
Take the road west to the Western Observation tower from the radio tower (the bunker immediately to the west). Enter from the eastern side on the hill, and go up one story to the top. Turn right at the top of the stairwell and enter the room with the U.boot poster next to it. This personal letter is on the shelf to the right.
Stone Eagle 1
Now go outside on the same level (there are three Nazis guarding the “roof”). Dispatch them, and look at the top of the bunker to the west/northwest for this stone eagle.
No Need to Worry (Personal Letter 2)
Leave the observation tower and follow the road east, back toward the radio tower. Follow it north (left when it turns), toward the northeast. You’ll come to an east/west (left/right) crossroads and see a tower with a Nazi flag flying above it to your right.
This is Martello Tower; go to it while watching out for the tank, and kill the office on the bottom floor. Search them for this personal letter.
Getting Off the Island (Personal Letter 3) and Crystal Radio (Hidden Item 1)
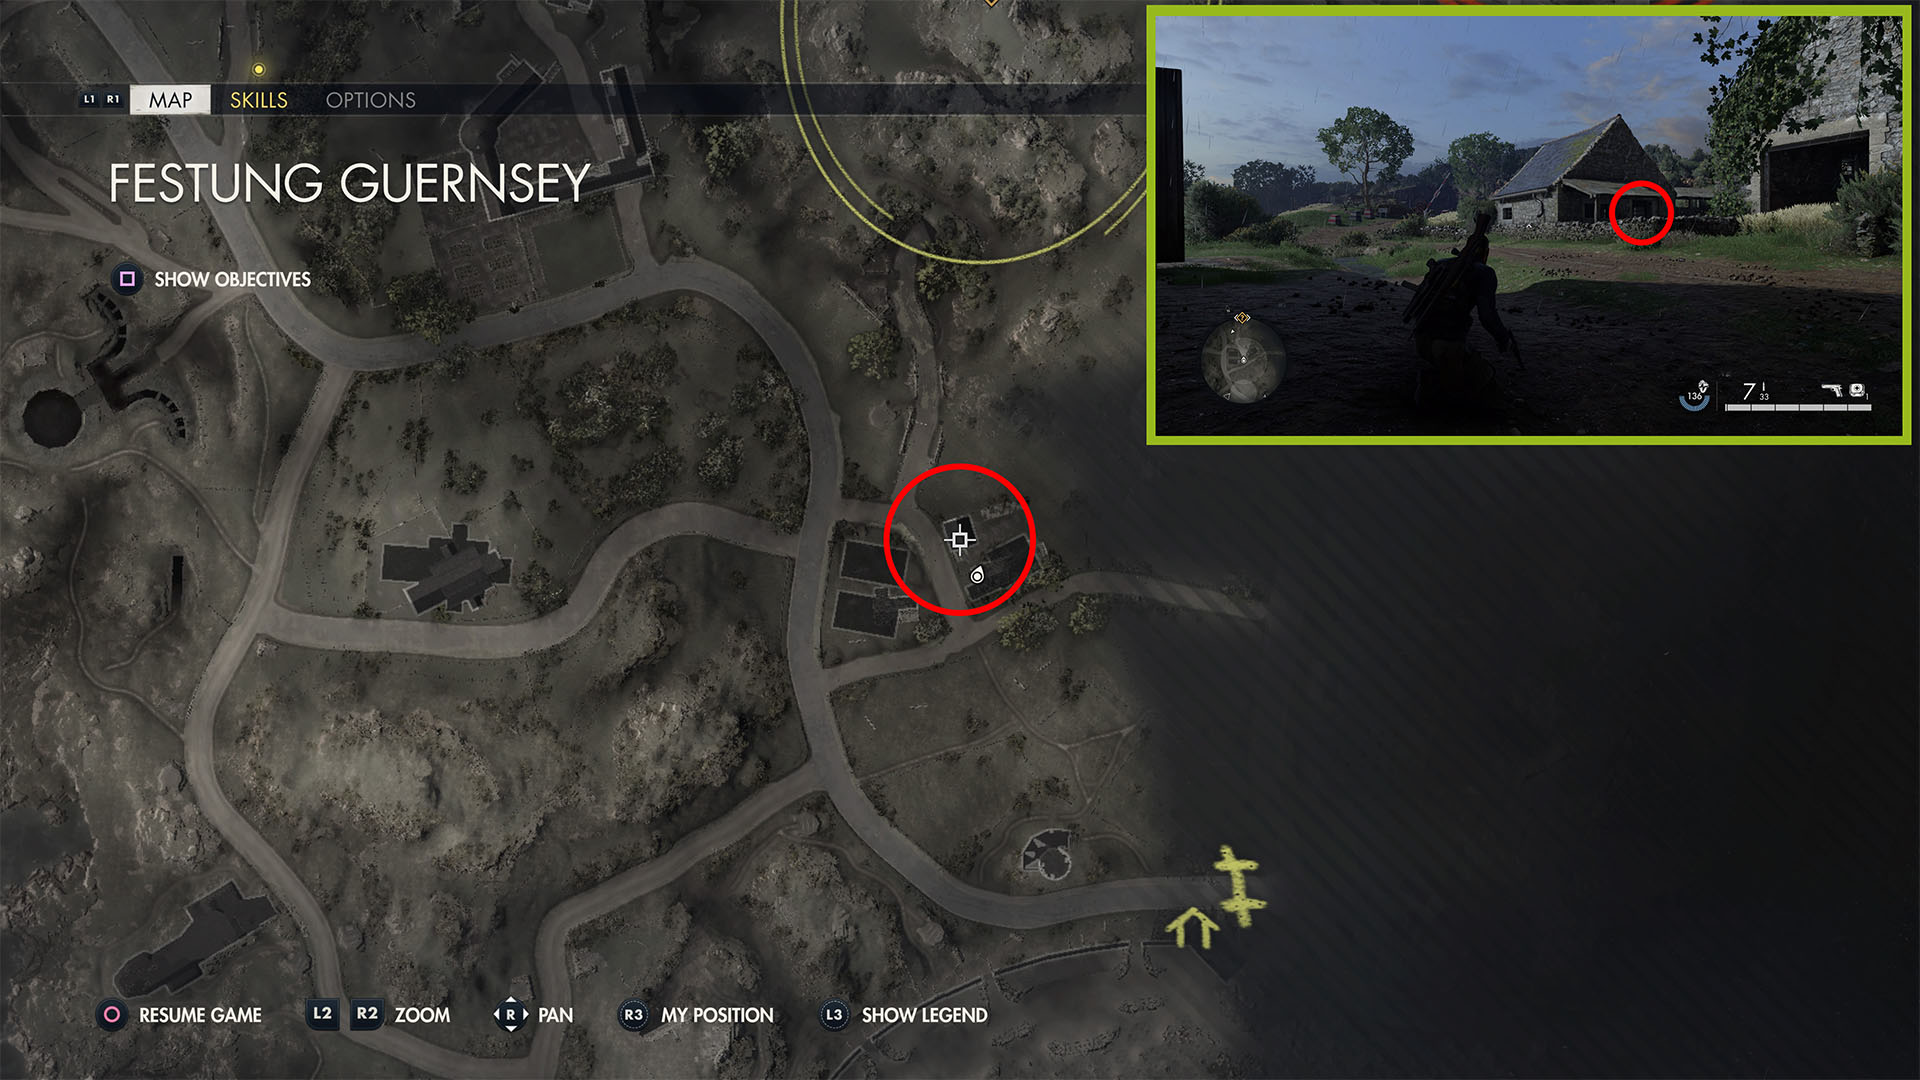
From Martello Tower, head north to the farmhouse, across the field with the tank. Go into the second building on the right, past the destroyed barn on the right. Take the ladder down to find both of these collectibles on a desk.
Stone Eagle 2
Go back up and into the front yard of the farm. Look west, and you’ll see St. Hamilton’s Church. This stone eagle is on the left-hand side of the roof.
Rifle Workbench
Go to the church and climb the vines and bars on the southeastern side to reach the tower window. The workbench is inside.
Oafish Officers (Classified Document 2)
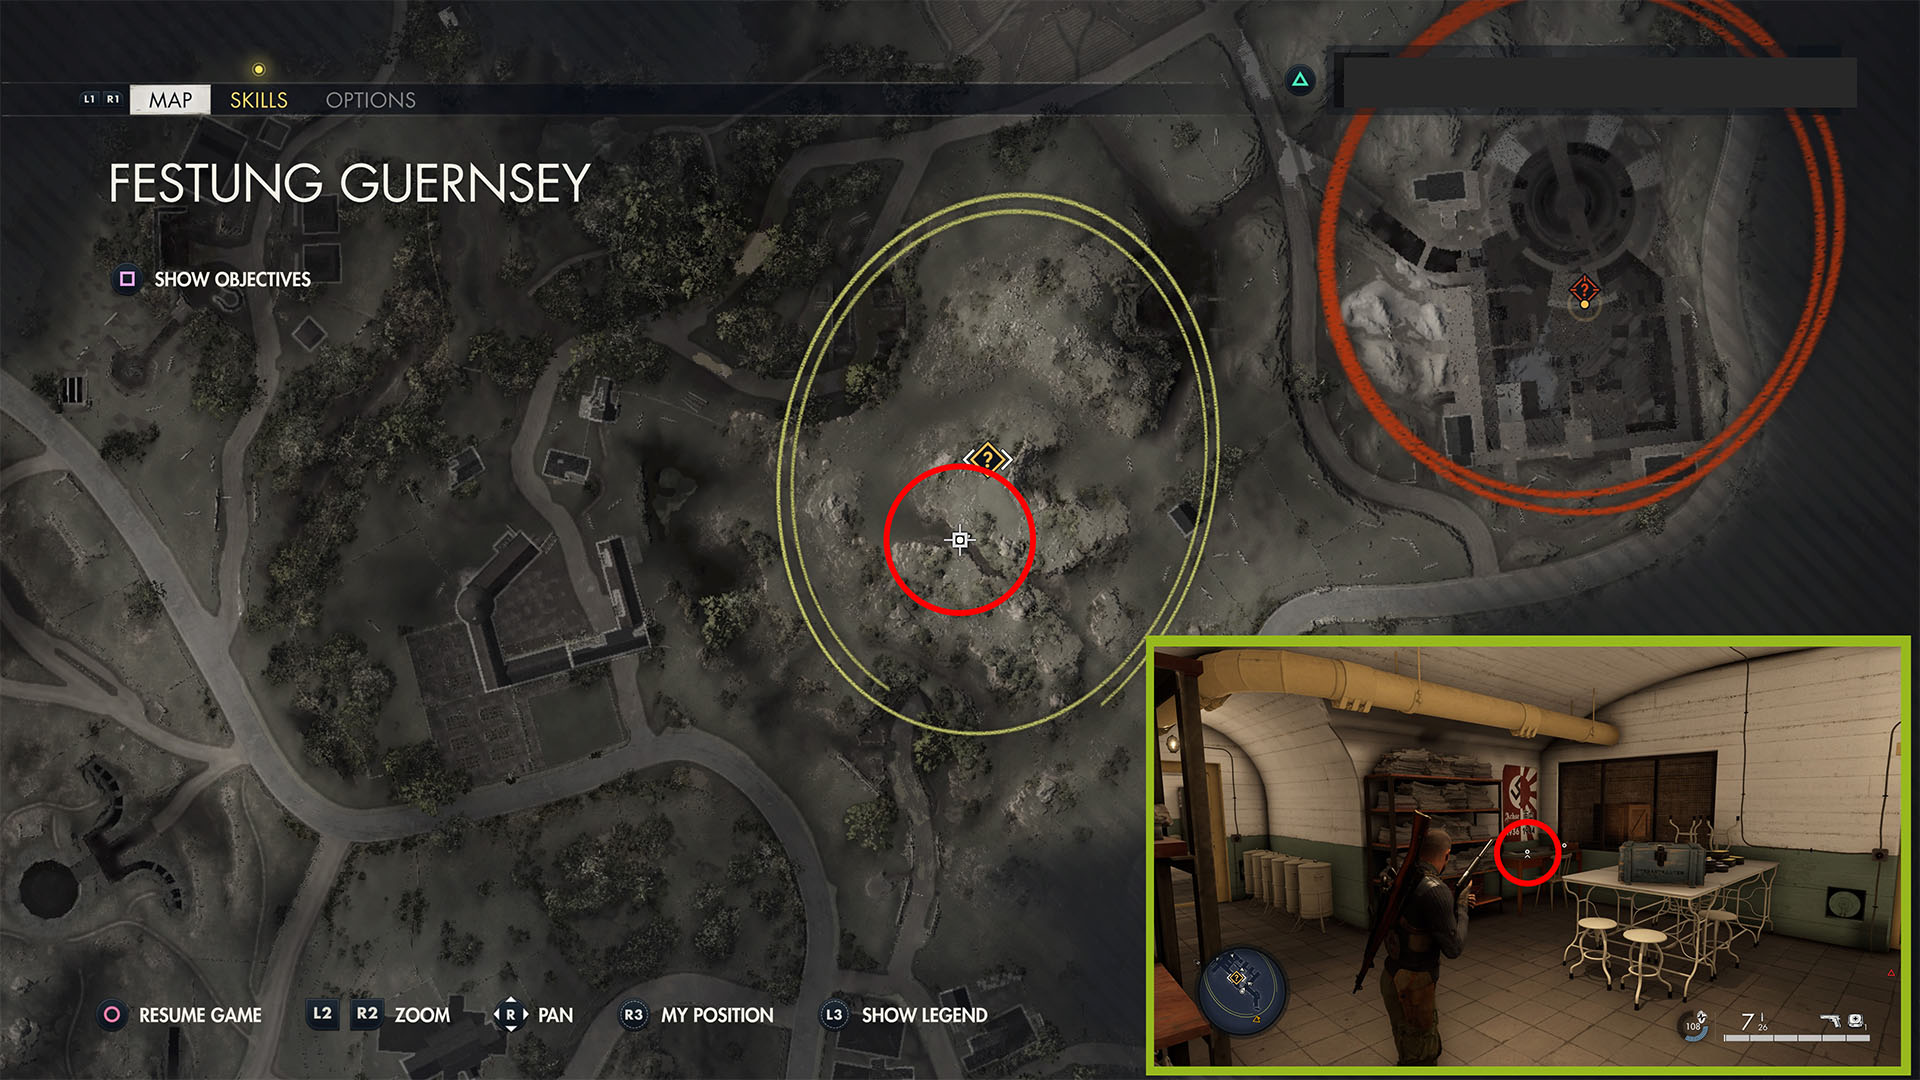
Use the zipline to reach the Underground Hospital entrance, in the hill past the checkpoint leading from the farm. Follow the path as it curves left, then enter the first room on the left. This document is on a desk in a linen/medical room; it’s under a half Nazi Flag, half Rising Sun poster.
Transport Troubles (Classified Document 3)
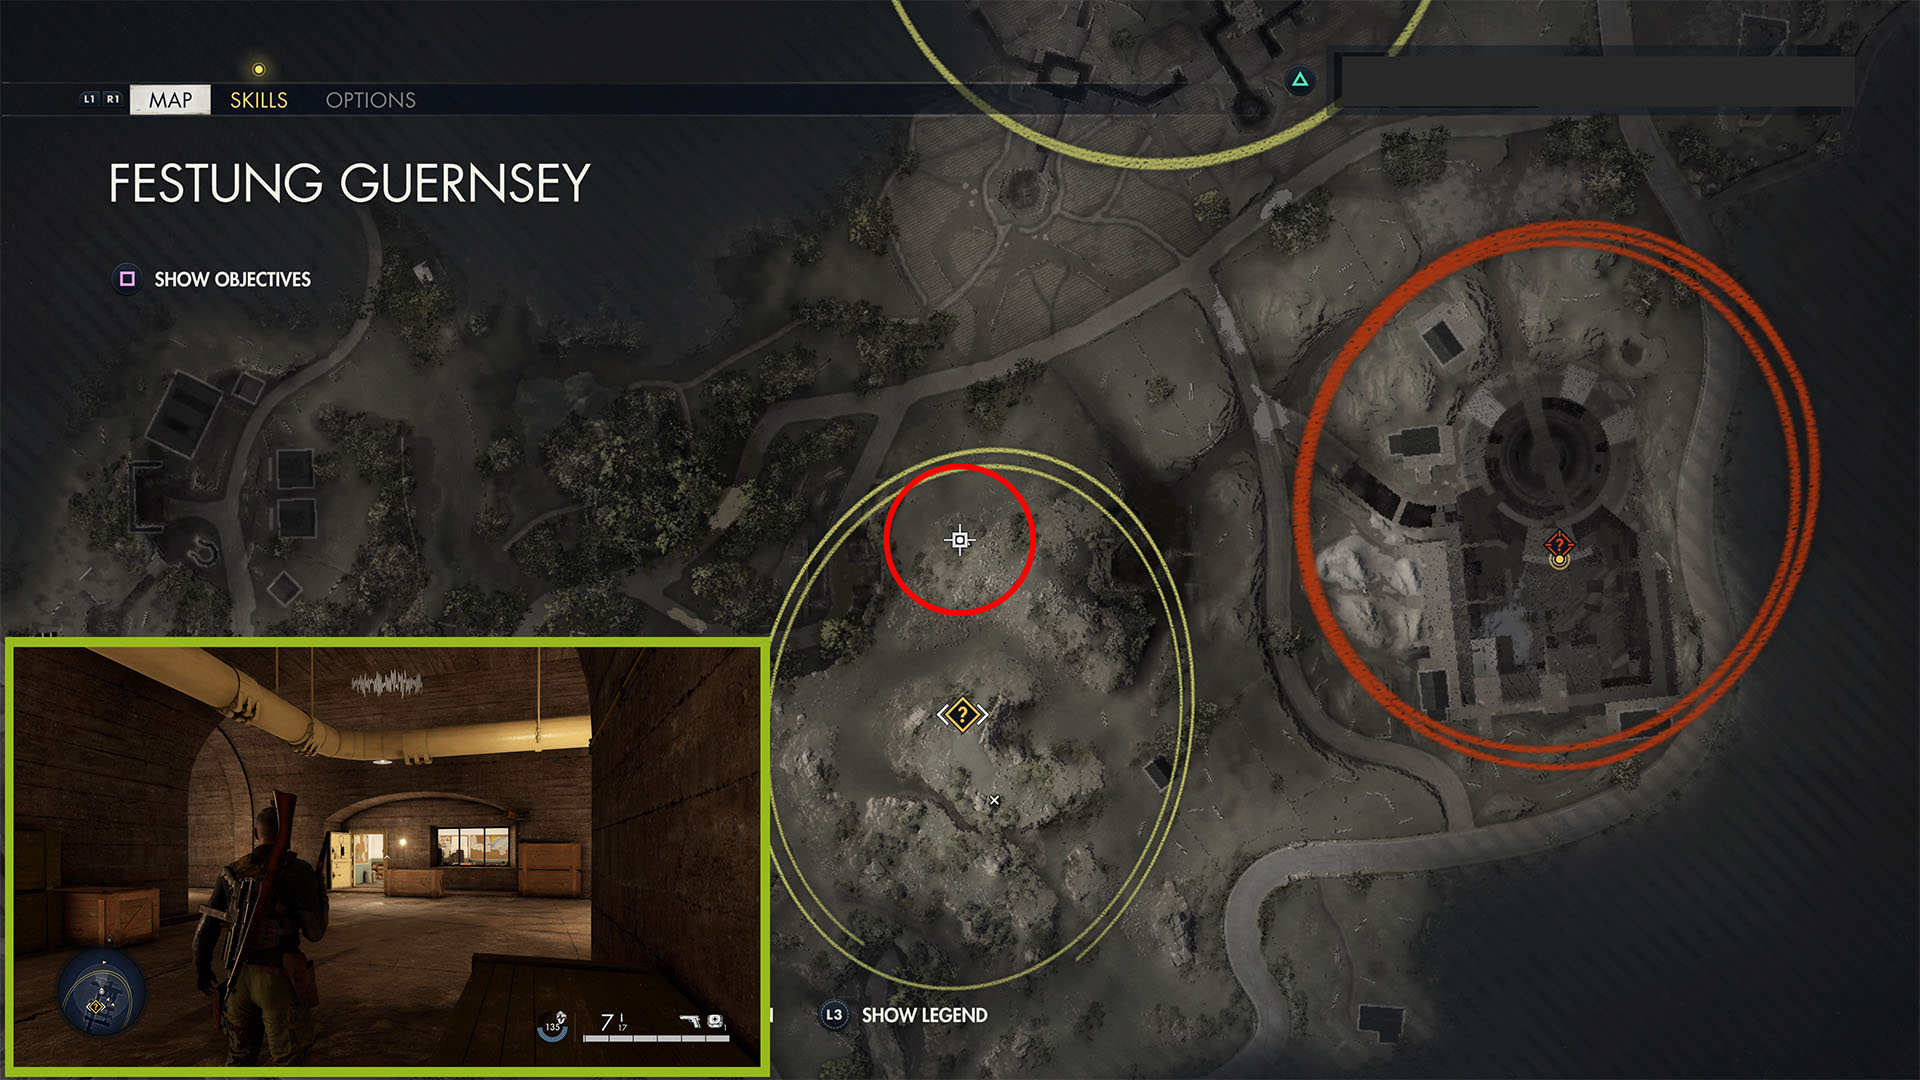
Leave that room the way you entered and turn left. Follow the path all the way down to the room you see in front of you at the end. This is on the double-sided desk just inside to the right.
Harass the Huns (Personal Letter 4) and SMG Workbench
Exit that room and turn left. Leave the underground hospital and turn right once you’re outside. Go up the hill to the right and break open the door to the small stone building at the top. Crawl under the table and debris to the left, then climb down the ladder to find the personal letter on a desk in front of you and the workbench on the left.
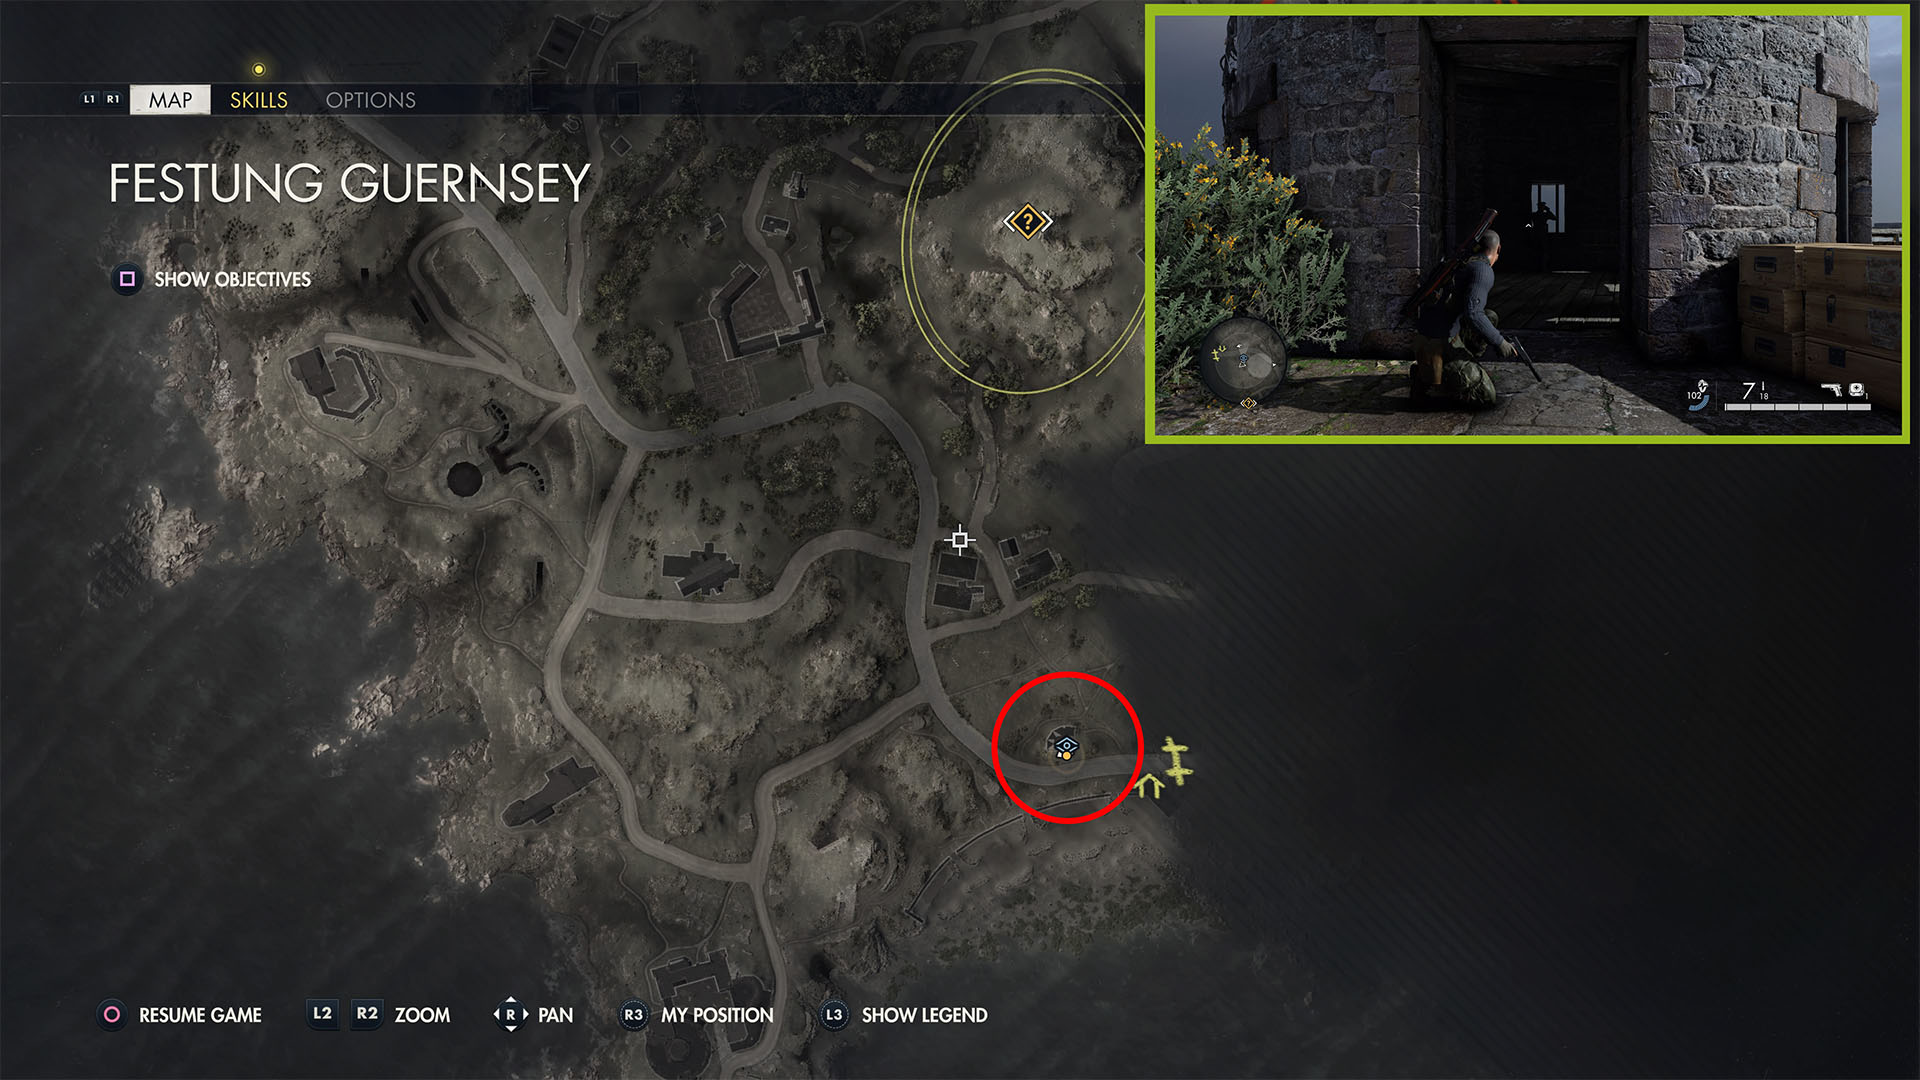
Roadside House Starting Location
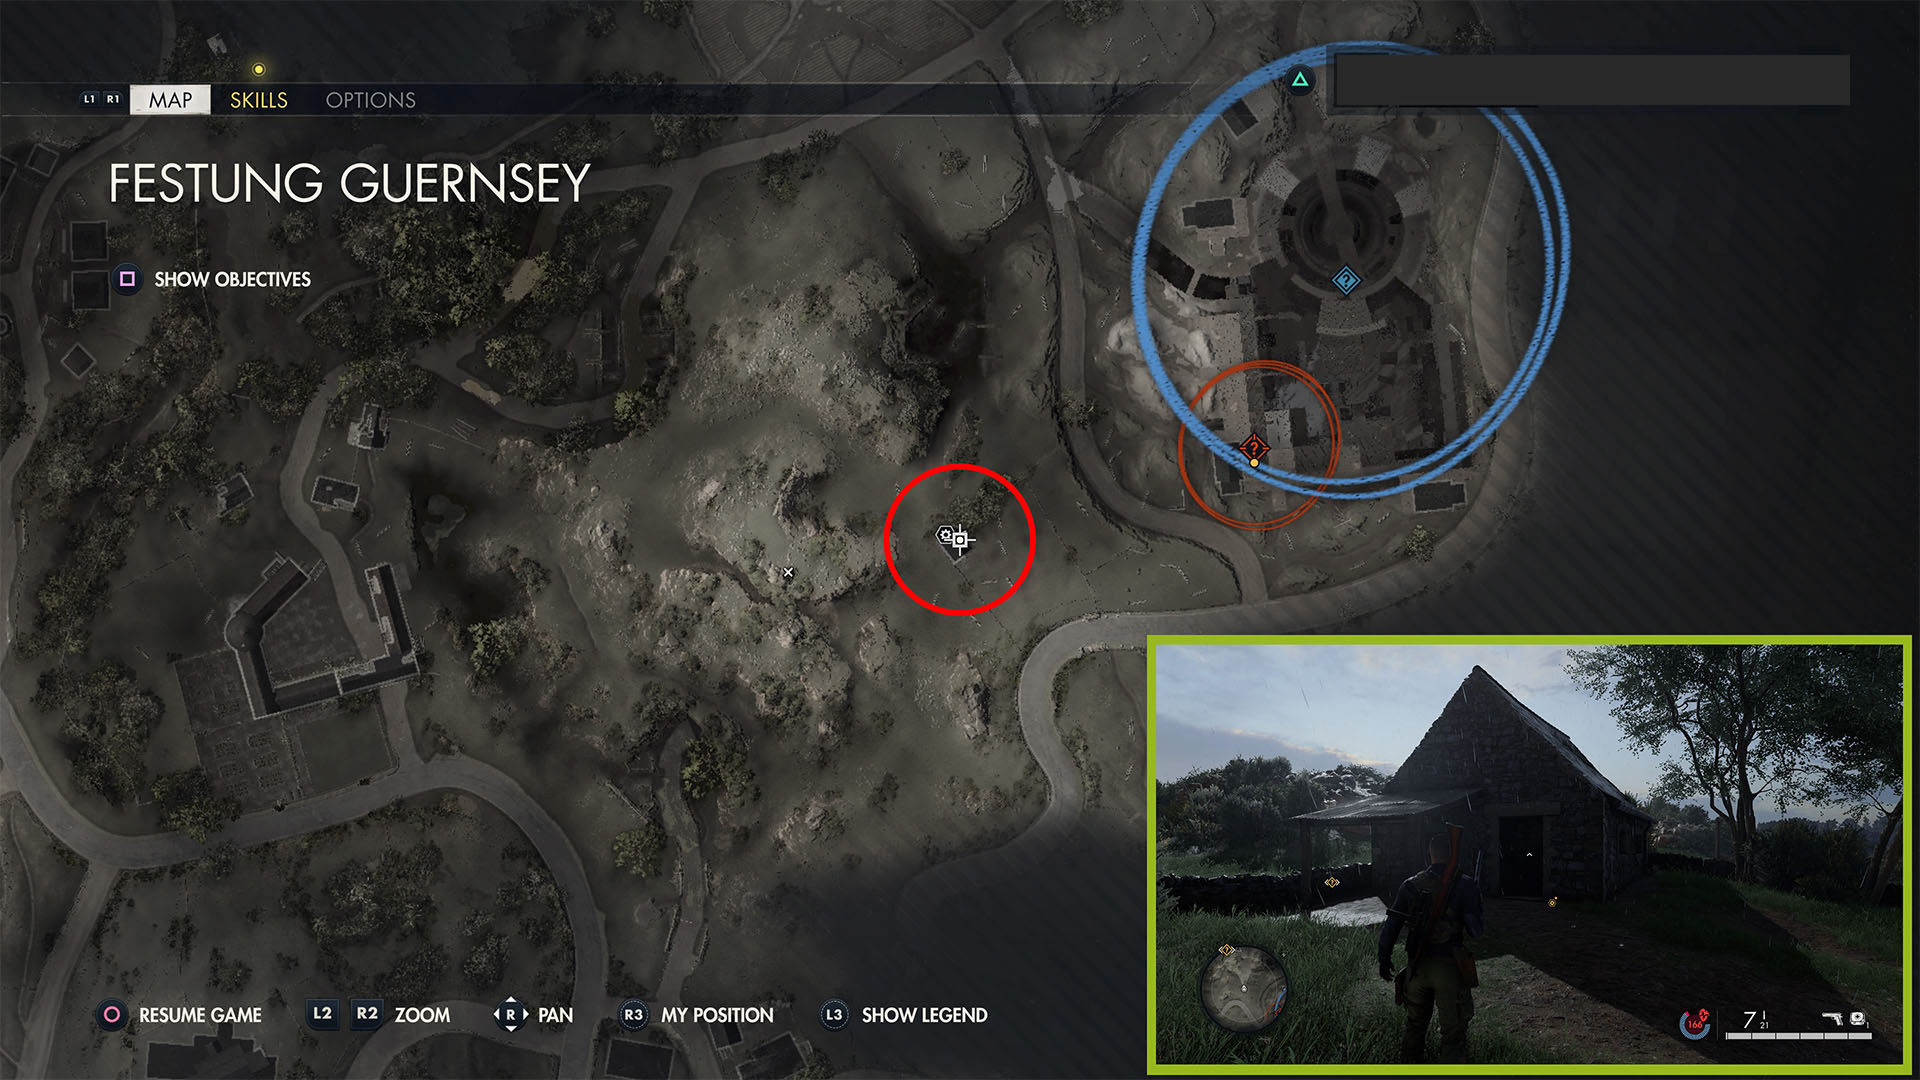
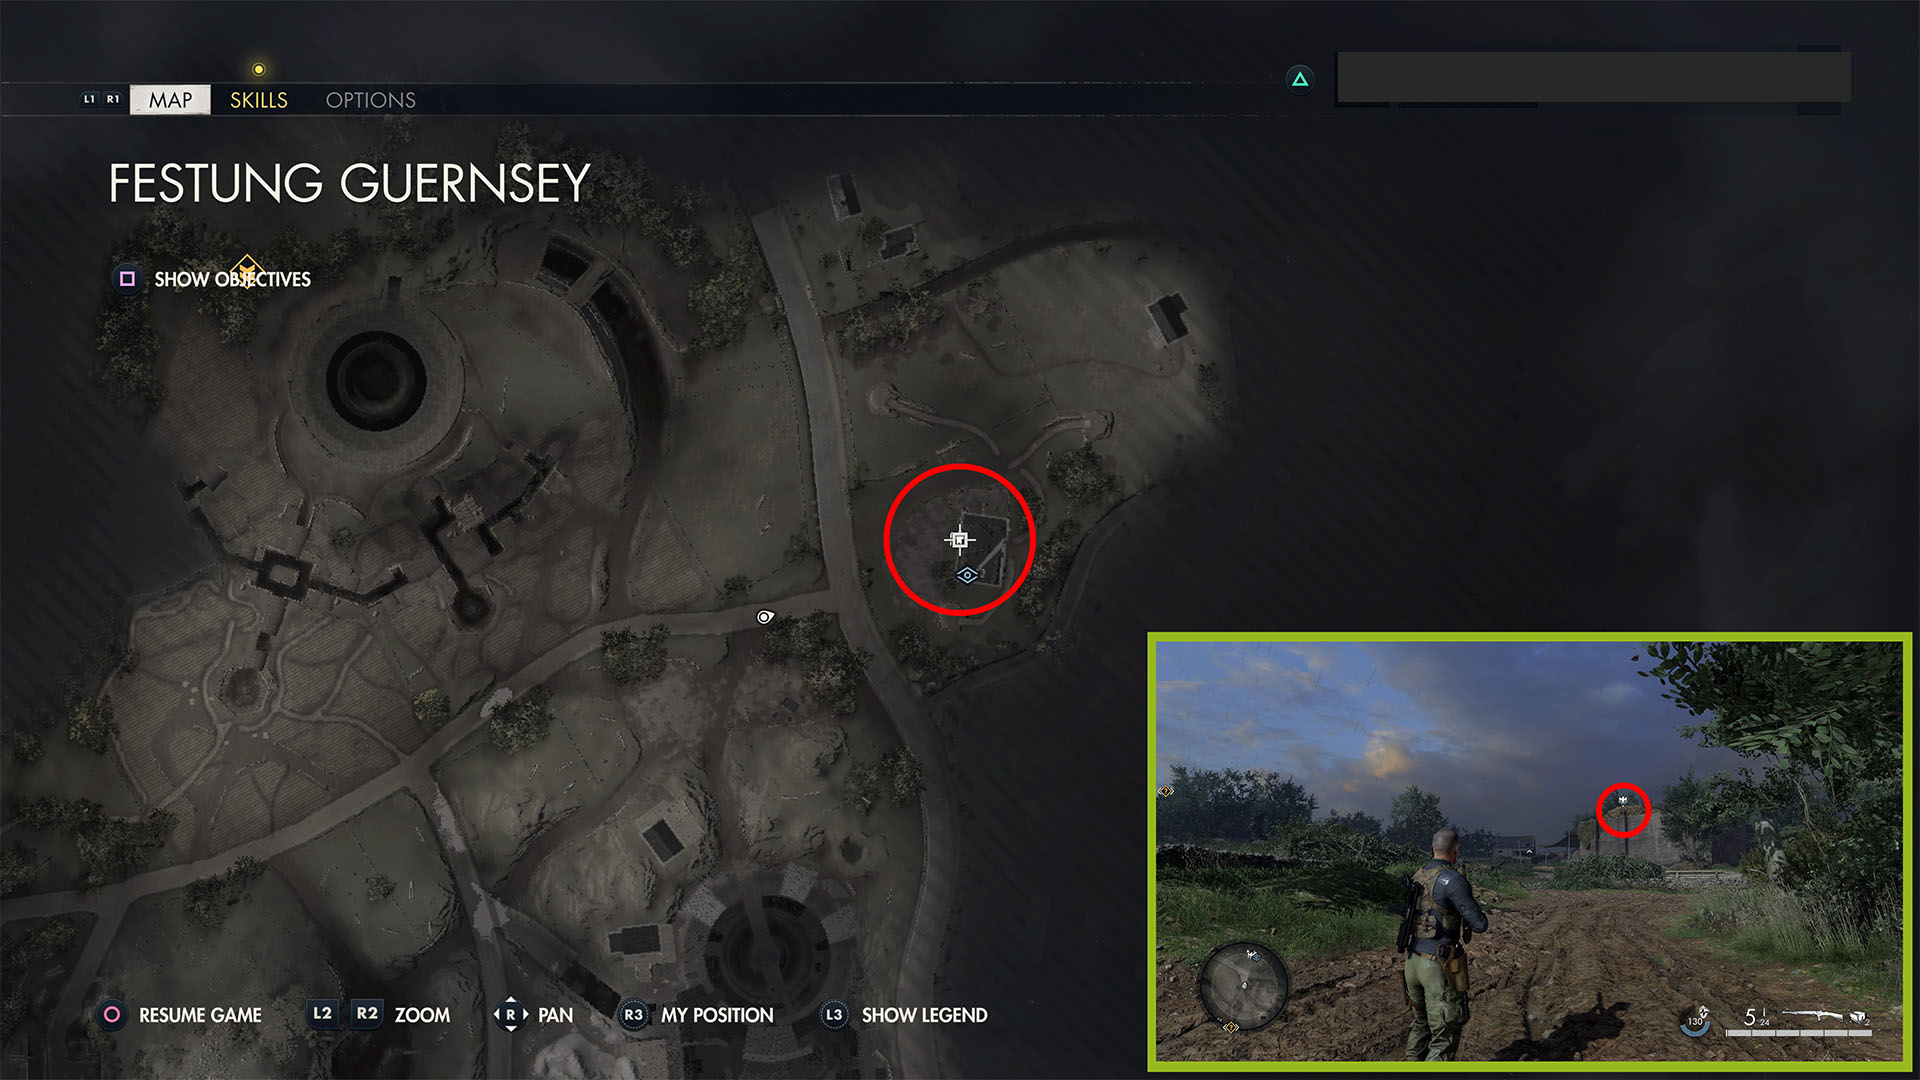
Once back outside, cross the road to the southeast to find the Roadside House starting point near the edge of the map. There is a checkpoint just west of the house. Climb the vines on the northeast side to enter and open the door from the inside.
Confiscated Goods (Personal Letter 5)
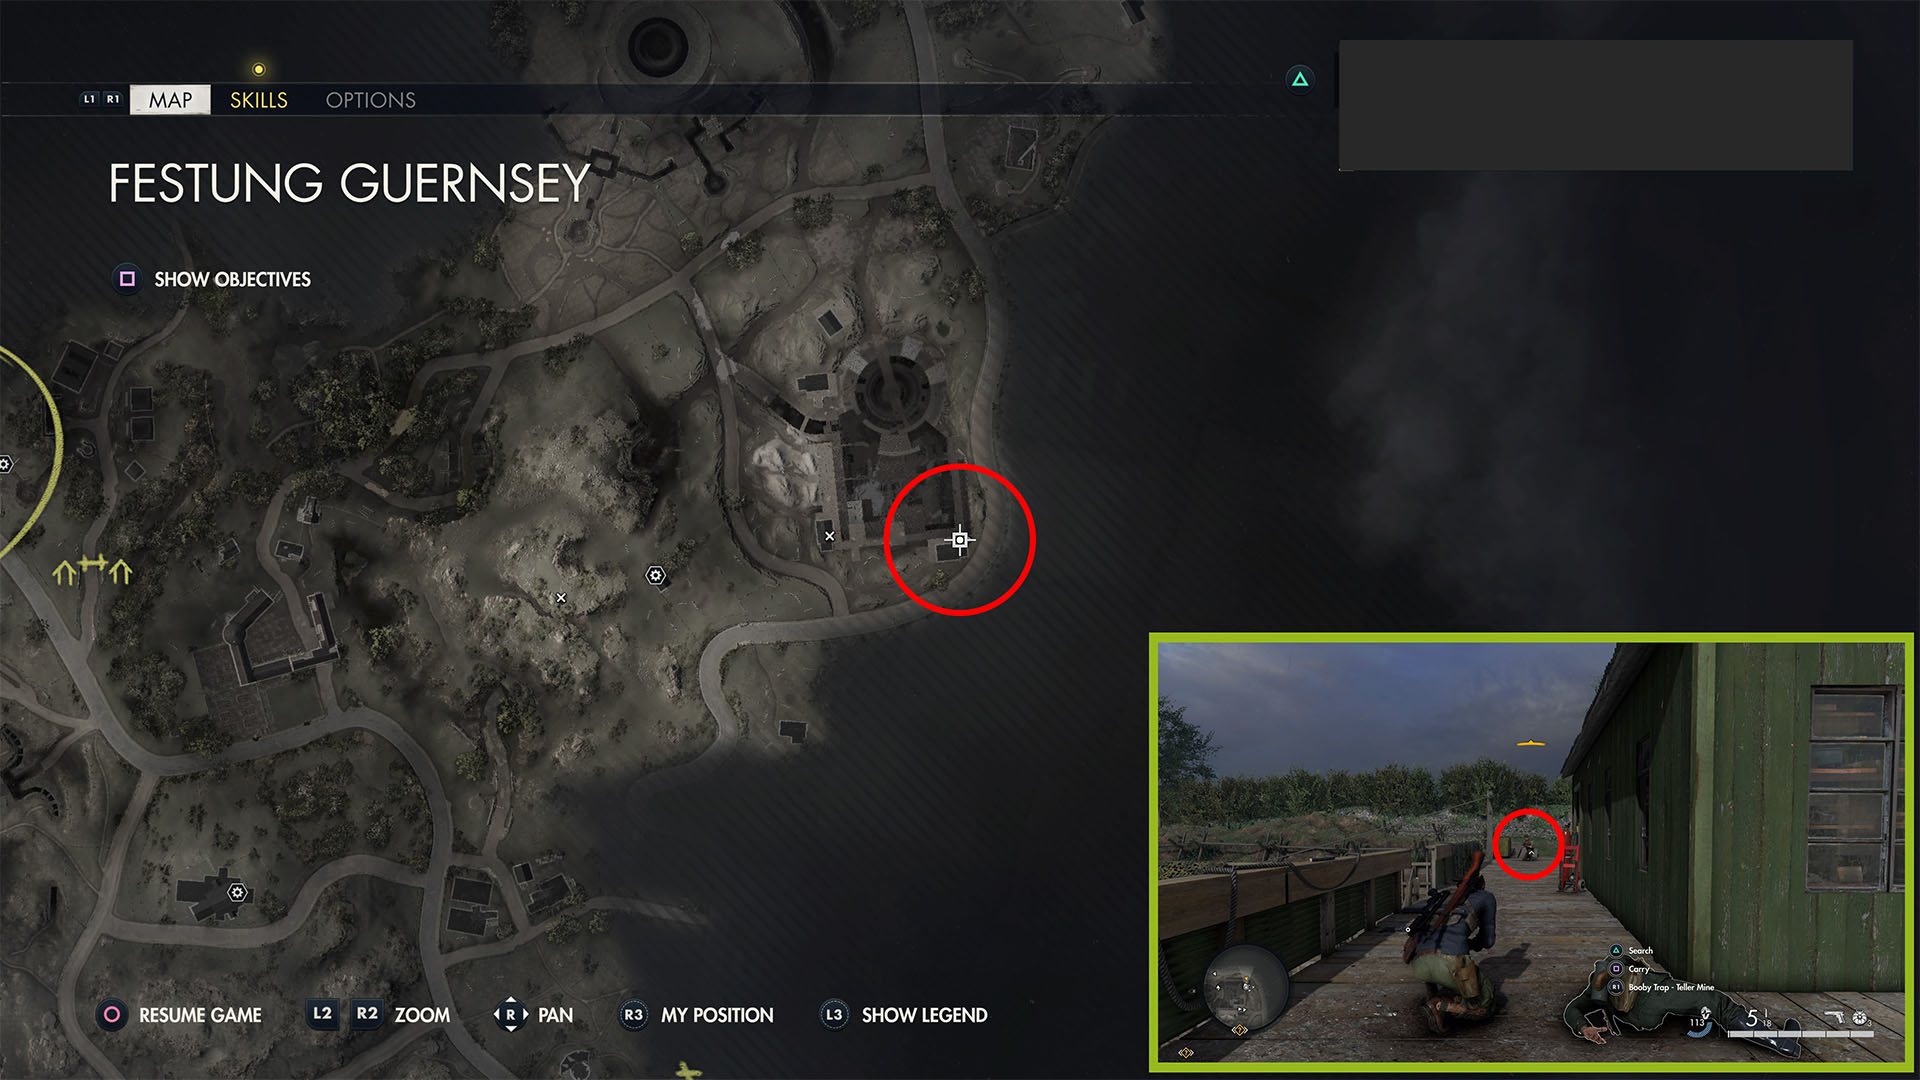
From there, go northeast to the southeastern edge of the Mirus Construction area. You’ll find a Brownshirt near the green building keeping a lookout over the construction area below
Todt Uniform Badge (Hidden Item 2)
From there, go to the northwestern side and the green shack with piles of rock in front of it and a Japanese flag flying to the right. This hidden item is on the first table on the right when you enter.
Stone Eagle 3
Take care of business at the construction site, and head to the Mirus Munitions Bunker to the northeast of the construction zone (southeast of the actual gun). It is on top of the bunker, in the middle. You’ll be able to see it from the main road from a fairly good distance.
Countryside House Starting Location
From stone eagle 3, go slightly northeast, to the edge of the map, to find the countryside house. Climb into the attic by way of the vines on the left side, then open the door to secure the staging zone.
Comfort Bag (Hidden Item 3)
Take out the Mirus Gun, then head southwest back toward the center of the map and the Parish Farmhouse. Enter the house and take the stairs to the second floor, then go right at the top and straight to the end of the hall into the bedroom on the southwestern edge of the house. This hidden item is on a set of drawers to the right of the bed.
Drastic Measures (Classified Document 4)
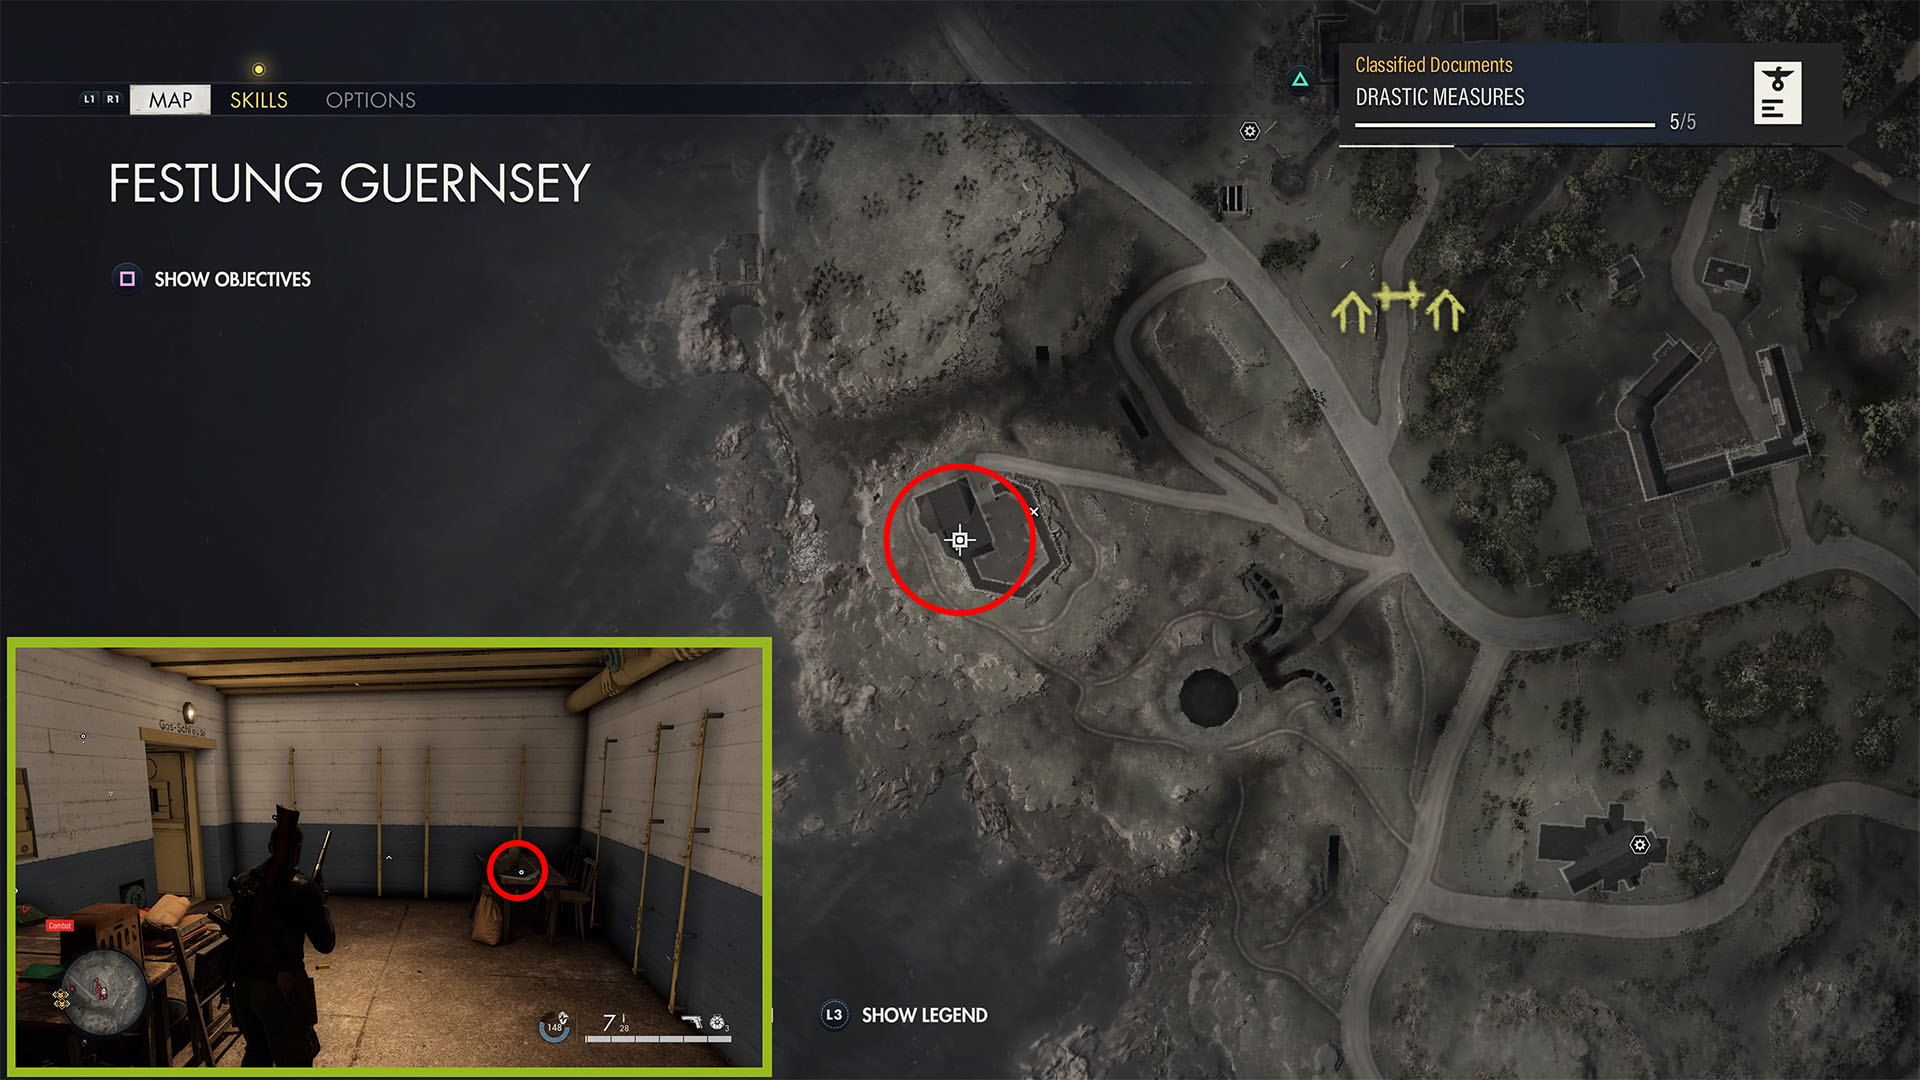
Head due west from the farm to the Dollmann Observation Tower on the western coast (where you shot stone eagle 1). Go into the bottom floor of the bunker near the firing range (the only way inside), and find this sitting on a table just inside.
Cut Costs Cost Lives (Classified Document 5)
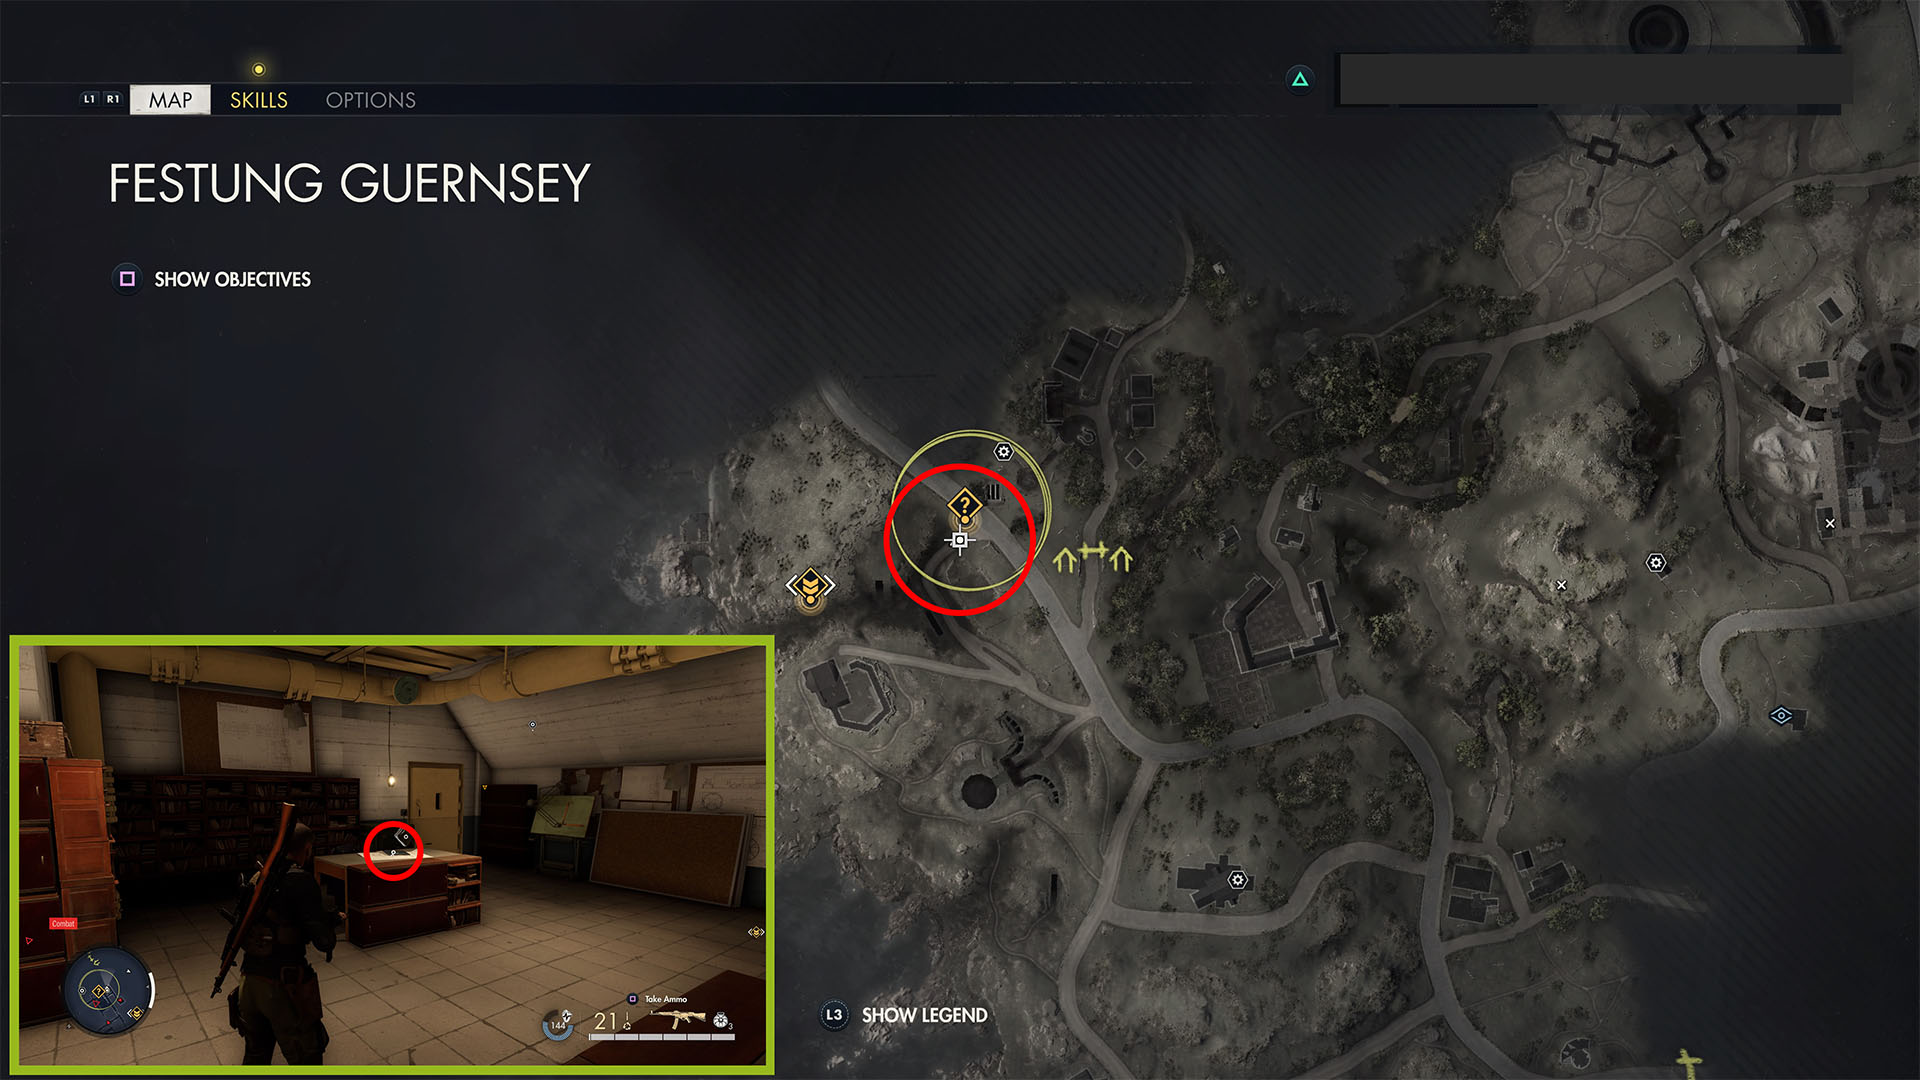
Go into the hidden facility and into the room where you need to turn the valves. Stay on the catwalk above, and go into the room on the far right. This document is on a desk on the left side (there is a safe behind the desk against the wall).
Pistol Workbench
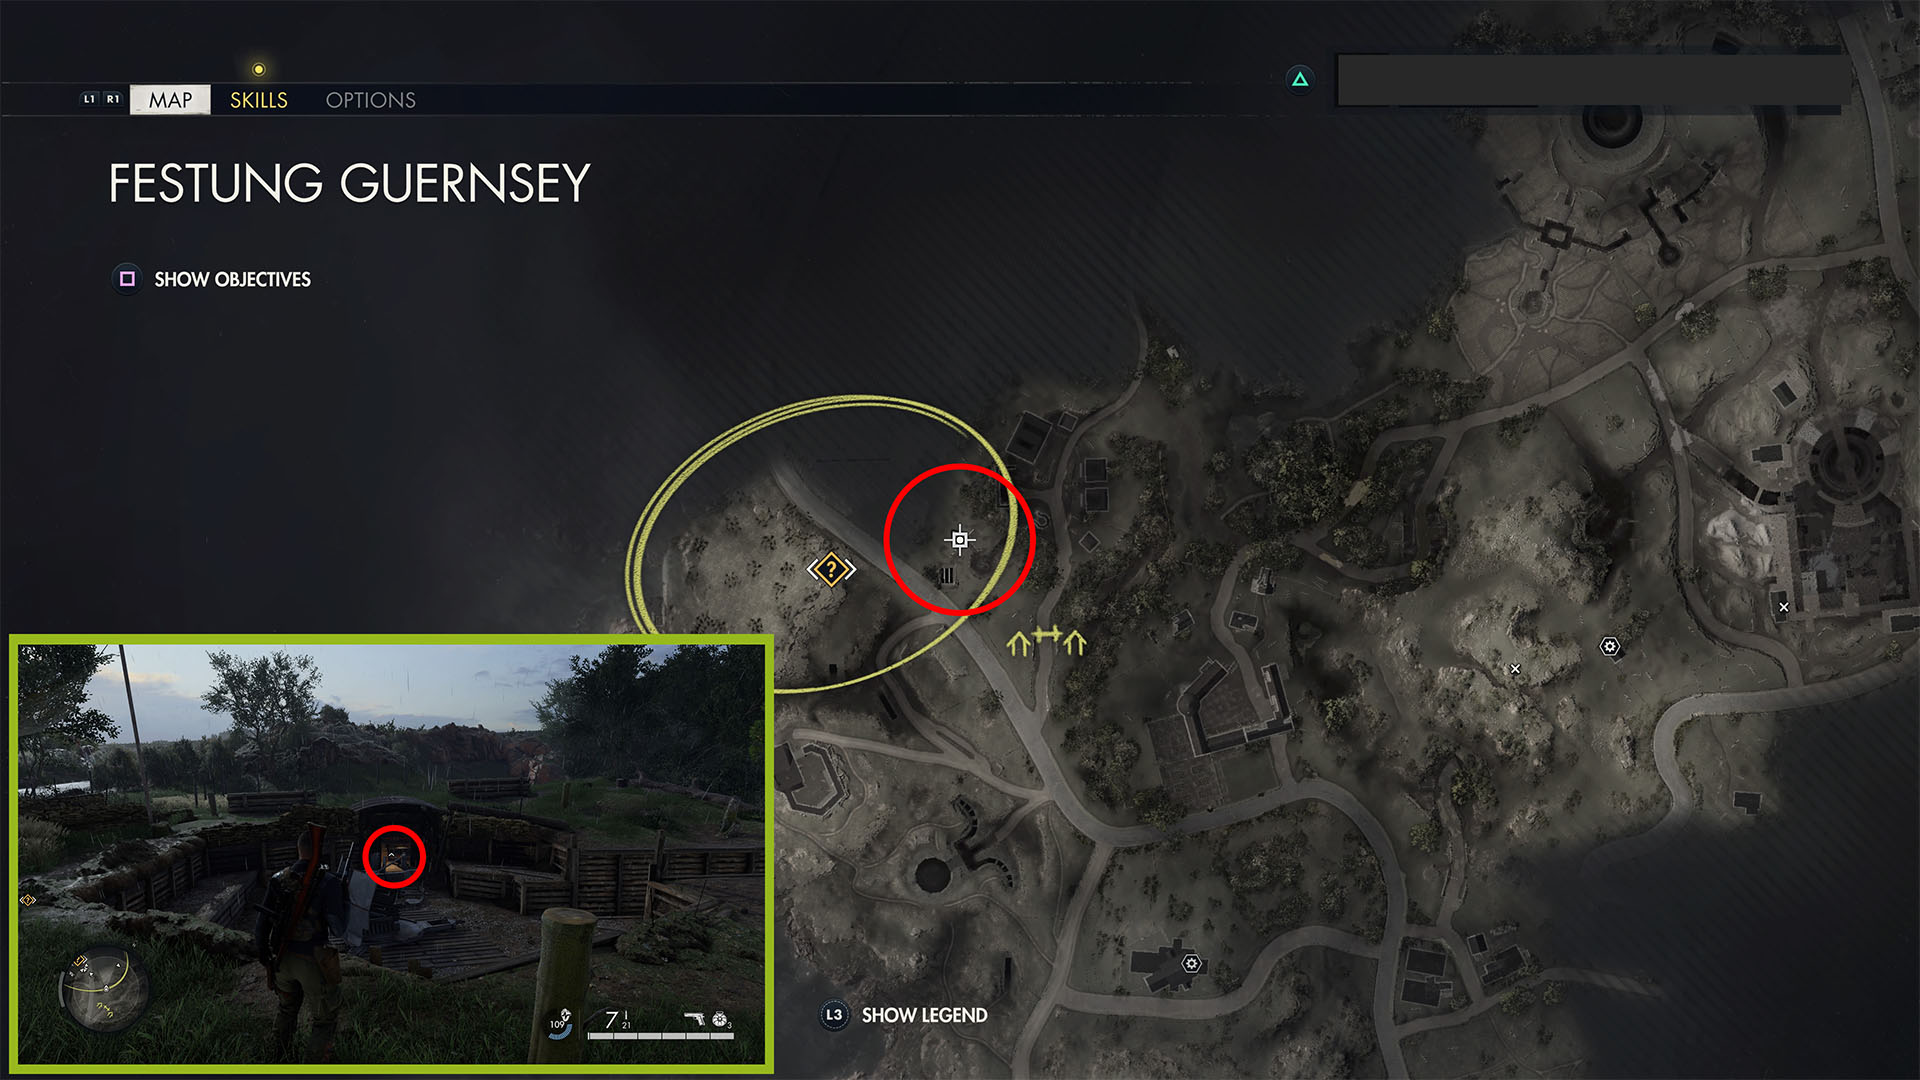
Exit the facility to the northeast toward the exfiltration area. You’ll enter a camp with a tank (if you haven’t already destroyed it). Stay right and go down the trench just before the MG42 emplacement on the left. The workbench is to the right of the AA gun.
And that’s where to find all of the workbenches, stone eagles, documents, letters, and starting locations in Sniper Elite 5’s fifth level, Festung Guernsey. For more mission guides, like those for Mission 6, Liberation, or Mission 4, War Factory, head over to our dedicated (and growing) SE5 tips page.











Published: May 25, 2022 07:42 pm