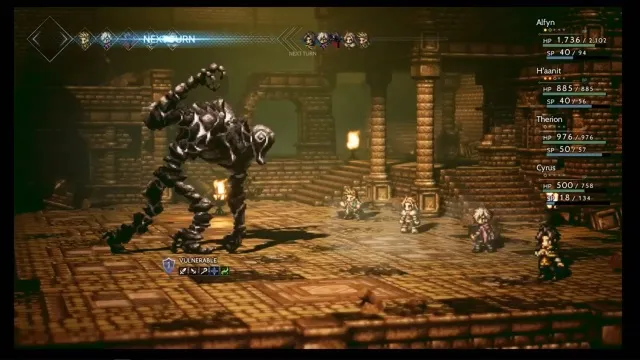
In Octopath Traveler, you’re going to may need to stray from the beaten path and focus on getting your party members levels in order to face the more difficult foes in the story. The game does not directly inform you about the best way to go about gaining experience points and this means you need to go out of your way to get the job done!
The best areas for you to grind experience points vary based on what chapter you’re in. This guide will break down the areas you should visit, depending on what chapter you’re on. We’ll also include the vulnerabilities of the foes you’re going to face, giving you the opportunity to bring along the best party to confront them.
Some areas may not be suitable to certain characters to venture into based on what attacks they have at their disposable. Keep this in mind when you visit a location.
Related Content:
Chapter 1
Untouched Sanctum
For those not ready to venture into Carrion Caverns, you can head here first! You’ll find this location in the North Cobbleston Gap, in the Coastlands. This area is a dungeon, and if you want to do the dungeon you need to first activate the side quest called Noelle, Seeker of Knowledge. The area is designated as having a danger level of 15, so if you come with a party a little bit lower than this you should be okay.
This area is a great location to use as a jumping off point. All of your characters can have a good time!
Enemy Vulnerabilities: Fire magic, light magic, ice magic, staves, and spears.

Twin Falls
This is a great area when you reach level 20. You can find Twin Falls on the South Clearbrook Traverse in the Riverlands region. Some players have reported that you can have a Cait encounter (Caits grant exponential EXP similar to Dragon Quest‘s Metal Slimes) after every 10 fights, but results may vary. Prepare to run into several of them during your fights.
At this location you find several chests and take on one of the optional dungeons. This is a great place to take the scholar, Cyrus, so you can absolutely destroy any creature you encounter here.
Enemy Vulnerabilities: Ice magic, dark magic, swords, spears, staves, and bows
Chapter 2
Carrion Caves
Hit this location up when you’re ready and get an early lead on those levels! You can find this location in South Bolderfall Pass, in the Clifflands region. The enemies in this cave hit extremely hard, even if your entire party is leveled for this area. Make sure you bring plenty of healing items with you and prepare for several difficult fights. You might find it a good strategy to roam around the sign post to ensure you’re saving often.
You can grind this area before your finish all of the chapter 1 quests, but it’s not recommended. At this location, you’ll find H’aanit is an excellent party member to grind with here as her abilities do amazing damage to enemies.
Enemy Vulnerabilities: Wind magic, Daggers, spears, bows, and axes.
The Hollow Throne
This is a pretty tough dungeon area for the Chapter 2 area, but if you succeed here you’re going to do great moving forward! To find this location you need to go to the Western Noblecourt Pass, in the Flatlands region. You’re about to find plenty of magic users, so equip your party to battle them appropriately, who can also dish it out in a magical firefight. Bring plenty of physical firepower with you, too!
Because the enemies hit really hard in this area, make sure you bring a healer with you who can keep your party alive. You’re going to be surprised by how hard these enemies can hit you. If you have trouble here, try hitting one or two encounters before returning to save or bring a lot more health potions than you need.
Enemy vulnerabilities: Wind magic, ice magic, staves, swords, and bows.

Chapter 3
Captain’s Bane
We return to the Coastlands region to embark on another quest of grinding! This time we’re heading to the Captain’s Bane, which you can find in the previously mentioned region on the West Goldshore Coast. You’ll find you will need to have a party of roughly level 35 to do well in this area.
Spend a lot of time here during your chapter 3 progress. Going the extra mile in this location will make the trek you have going forward far less difficult. Don’t be afraid to overspend on replenishing items to keep your party up.
Enemy Vulnerabilities: Lightning magic, light magic, wing magic, dagger, and axe.
Outside of Marsalim
Travel to the city of Marsalim, which you can find to the far south in the Sunlands region. This is a unique grinding spot because all you need to do is travel just a little ways outside of Marsalim. Go to the exit of Marsalim where you see a small gathering of people outside of it. Run around for a bit, and you should get a small group of enemies to spawn, three scorpions and a lizard-like monster. Defeat them, return to Marsalim, and then exit back out of the city. You can repeat this process consistently until you’re satisfied.
The game does not recommend you reach Marsalim until your party is around level 40. If you decide to grind this area, make sure you’re able to escape your foes efficiently to avoid party members getting down or using a lot of items on your way there.
Enemy Vulnerabilities: Ice magic, wind magic, swords, spears, daggers, and axes.
Chapter 4
Forest of Purgation
When you’re getting prepared for the final fights, this is where it all happens. This is the final area you’re going to need to explore for your experience points. To find this location, go to the furthest you can to the northeast of Noblecourt and you should arrive there. This is definitely a hefty area of grinding and it’s recommended you have a party in the upper-50s by this point.
Because this is the final grinding area, you’ll probably take the party you plan to use during the final boss fight. Whose characters you think will serve you best when the chips are down and focus on getting them as high of level if possible. To make it easier, take a dancer with you and hope the Bewildering Grace grants you the random experience boost you need to charge through the levels!
Grinding Accessories
Here’s a list of great items to pick up along the way to increase the output of experience points you acquire while you grind!
Captain Badge
Before you can acquire this item, you need to complete Olberic’s main story. Once you’ve done that, head to Wellspring, which is located in the Sunshade region. You’ll need to locate a specific guard who has an orange sidequest marker on them. who you can find on the west side of town inside of a home. He’ll give you a quest you need to complete, and once you do, you’ll acquire the badge.
What does the badge do? It grants you entire party, even those not in combat, +50% experience points!

Badge of Friendship
Much like the previous item, you cannot acquire it until you have completed Ophilia’s main story. After you’ve done this, you can head to Saintsbridge, which is located in the Riverlands region. Locate Emil and perform the side quest for them. When you have completed this, Emil will grant you the Badge of Friendship.
How does the badge help? This grants your entire party +50% JP experience.
—
Those are the prime locations you need to visit and grind at to provide the best experience and job points for your party while you play Octopath Traveler!
Looking for more information about Octopath Traveler? Make sure to check out more of our guides and our review here on GameSkinny.


Published: Jul 23, 2018 02:15 am