There’s a whole lot of explosive vehicular mayhem to be had in Just Cause 3, not the least of which is launching yourself at high speeds off ramps into unsuspecting motorists below.
There are a total of 30 different stunt jump locations to be found, spread across all three major island chains. So obviously you won’t be able to get them all straight from the beginning of the game. Once you hit all 30, you will find yourself the proud new owner of the Consummate Daredevil achievement. As a bonus, when you complete all the jumps for each of the three major areas, you will unlock new vehicles available through rebel drops.
Be sure to utilize those rebel drops to get cars in the right locations to go off each jump, as you are going to end up crashing quite a few of them into smithereens. Which vehicle you use is entirely up to you: sports car, school bus, dirt bike, whatever. Thankfully you don’t have to actually be any good at stunt jumps to unlock the achievement, though. So long as all your tires hit the jump and you go any distance into the air, it counts. And you don’t have to go any particular distance or land in any particular location.
Just Cause 3: Insula Fonte Jumps
Stunt Jump 1
Province: Sirocco Sud
Coordinates: N 40 38.501 E 5 42.503
Drive down the dirt path until the railway ends and just beyond two hills. You’ll find a concrete jump blocked at the end by a wood gate. Crash through at high speed to kick off your stunt jump journey.
Stunt Jump 2
Province: Sirocco Nord
Coordinates: N 40 39.053 E 5 42.869
Located north across the bay from the 1st jump, this one is just south off the main road turning onto a dirt path. Be careful when landing this one, as you are likely to end up either in a tree or all the way into the water itself if you were going too fast.
Stunt Jump 3
Province: Baia
Coordinates: N 40 40.025 E 5 43.767
At the very south tip of this province the third jump is found by pulling off the main road just as it bends and heading down the hidden dirt path. If you keep yourself going straight, you’ll land below on a road in the Lacos province. Otherwise you’re certain to land in the ocean.
Stunt Jump 4
Province: Baia
Coordinates: N 40 40.152 E 5 44.556
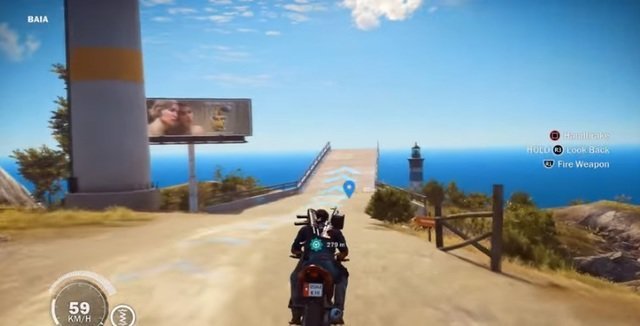
Located to the east of the previous jump, this one is a pier jutting over the water, located between a wood fence and a large billboard. You can land gently in the grass next to a lighthouse, or instead you’ll likely biff it and fly off the edge of the island.
Stunt Jump 5
Province: Baia
Coordinates: N 40 40.310 E 5 44.626
Just north of the fourth jump and just a bit north of the main road, this jump goes over a cliff and can be seen behind a billboard facing the opposite direction. Be prepared to land in traffic on the road below.
Stunt Jump 6
Province: Lacos
Coordinates: N 40 41.023 E 5 44.418
This jump is located just off the main road and to the left of a small white building. Depending on your speed you’ll either land on a road or overshoot and land in purple field.
Stunt Jump 7
Province: Lacos
Coordinates: N 40 40.872 E 5 43.740
To the southwest of this island’s large interior lake is a dirt road leading to the seventh stunt jump. This one again is with a billboard facing the opposite direction, although it won’t come into view until you turn the bend as its hidden by a tall concrete pylon. Try to stay straight to keep going down the road — otherwise you’ll crash into a white wall when you land.
Stunt Jump 8
Province: Lacos
Coordinates: N 40 40.770 E 5 43.471
Further southwest from the previous jump, stunt jump 8 is again found by veering off the concrete road onto a dirt path with a concrete pylon and a billboard. Get ready for a bumpy landing, because you’re headed towards some rolling hills that end with a concrete divider and a wall of buildings.
Stunt Jump 9
Province: Lavanda
Coordinates: N 40 41.894 E 5 42.615
In the heart of the northwest interior of this island, veer off the road as it’s curving to hit the dirt road you should be used to by now. Land below on another road heading the other direction. So long as you avoid oncoming traffic, you should be able to keep this same vehicle for the next jump.
Stunt Jump 10
Province: Feno
Coordinates: N 40 41.689 E 5 43.058
To the north of a small lake, you’ll find a narrow grass and dirt path with a sharp downward incline, followed by a steep incline. Get a good running start to follow the path all the way to the 10th jump and land in between two roads.
Stunt Jump 11
Province: Feno
Coordinates: N 40 42.134 E 5 42.466
In the northwestern quadrant of this island, another dirt path is found off the bend in the road (noticing a recurring theme in finding these?) that runs parallel to the mountain on the left. Follow the path down to launch of jump 11. It’s a long, long way down on this one to hit the road below in the Lavanda province.
Stunt Jump 12
Province: Feno
Coordinates: N 40 42.673 E 5 42.865
Near the northern point of the island, you’ll be able to see some tall buildings off the left side of this rocky dirt path. Follow it to the end to go flying onto a road below, but stay to the right — or you’ll hit a guard tower and land inside a compound you don’t want to be in.
Stunt Jump 13
Province: Plagia
Coordinates: N 40 42.542 E 5 43.299
To the southwest of the previous jump, this one again requires you to pull off the right side of the concrete road to hit a dirt path. Below you’ll find a series of rocky hills where you are guaranteed to terribly biff it. But on the plus side, you’ve now found all the Insula Fonte jumps!
Just Cause 3: Insula Dracon Jumps
Stunt Jump 14
Province: Petra
Coordinates: N 40 41.251 E 5 37.351
For the first Insula Dracon stump jump, head to the southeast corner of the area and veer off the road so you can see an oil rig in the water. Crash through the roadblocks and land in the grass below.
Stunt Jump 15
Province: Petra
Coordinates: N 40 42.012 E 5 36.758
In the northern area of this same island, drive through the gate in the large compound and head down the right hand path to hit jump 15. With enough speed, you should hit an outcropping of rock that leads to a road. But if you’re going too slow you’ll hit the side of the mountain instead.
Stunt Jump 16
Province: Petra
Coordinates: N 40 42.166 E 5 36.833
At the north end of the base, you can find this jump near a bunch of orange road blocks. Don’t hit this one too fast or you’ll overshoot the road and splash into the water.
Stunt Jump 17
Province: Trio
Coordinates: N 40 42.419 E 5 35.375
On the southern end of this island, just to the east of the bridge, is a dirt path found off the main road that curves right and goes under a rock outcropping. This is a difficult jump to land, as you’ll have to aim for a small bridge with huge open areas on either side.
Stunt Jump 18
Province: Corda Dracon
Coordinates: N 40 42.876 E 5 36.289
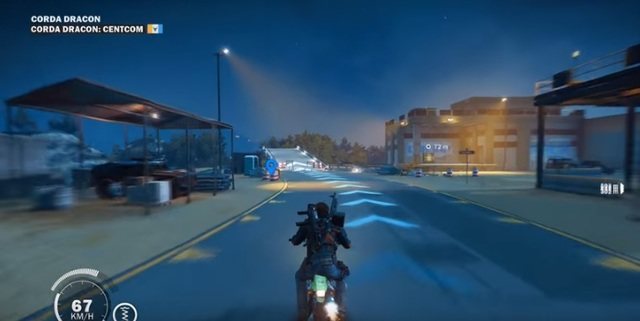
On the small island at the very center of the area, you’ll find a dirt road to the north with porta-potties on the right side. Stay to the right to avoid the large mound of rocks and hit the road instead.
Stunt Jump 19
Province: Corda Dracon
Coordinates: N 40 42.791 E 5 36.593
Found to the east of the last jump, this one is at the end of the main road running through the compound.
Stunt Jump 20
Province: Capite West
Coordinates: N 40 43.496 E 5 35.381
At the north end of a land segment that crosses into a gulf dividing the east side of the island, be on the lookout for a dirt path with a bunch of construction supplies to find the 20th jump. You should be able to hit the unfinished ramp on the opposite side unless you didn’t get enough speed.
Stunt Jump 21
Province: Capite West
Coordinates: N 40 43.513 E 5 35.601
Remember that unfinished ramp you hit on the last jump? That’s actually jump #21 – hey, that was easy!
Stunt Jump 22
Province: Capite West
Coordinates: N 40 43.803 E 5 34.930
In the northwestern section of this area is a base with an airfield. Speed down the road to the left of the hangars to launch yourself off Jump #22. Good luck with that landing, because you will definitely hit the water.
Stunt Jump 23
Province: Capite Est
Coordinates: N 40 43.786 E 5 36.157
When the road intersects to the left and right, keep going straight instead to hit the ramp and launch into the base down below. That’s two major areas down, one to go!
Just Cause 3: Insula Striate Jumps
Stunt Jump 24
Province: Libeccio
Coordinates: N 40 45.736 E 5 35.182
On the edge of this town a dirt path cuts off the main road, where you’ll see a line of trees ending with a billboard and the first stunt jump of the area. There’s no way not to terribly crash this one as you’ll fall for what feels like miles before hitting the treeline or the side of the mountain.
Stunt Jump 25
Province: Val De Mar
Coordinates: N 40 44.720 E 5 42.356
To the north of the river is a dirt path that inclines upwards and takes you straight to jump 25, where you’ll likely land in Prima province.
Stunt Jump 26
Province: Val De Mar
Coordinates: N 40 46.729 E 5 42.051
In between two small lakes is a dirt path in a wooded area. Turn off the left side of the path to find the billboard and 26th jump. There’s a small ridge you can possibly hit if you’re on a motorcycle, but more likely you are in for a long slide down.
Stunt Jump 27
Province: Litore Torto
Coordinates: N 40 49.226 E 5 45.037
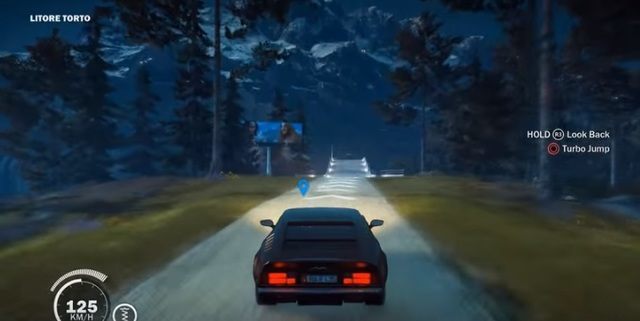
In the northeast corner of the area is a road leading up a snowy path that curves right. Rather than following it to the compound, veer to the dirt path on the left to find the jump next to a billboard. You’ll need a new car after this one, as it’s a long way down.
Stunt Jump 28
Province: Litore Torto
Coordinates: N 40 47.411 E 5 45.726
On the eastern end of the island to the east of the lake is – you guessed it – a dirt path leading to a ramp with a billboard. There will be more than a few tree casualties as you slide down the fjord towards the road.
Stunt Jump 29
Province: Costa Sud
Coordinates: N 40 46.119 E 5 44.418
The 29th jump is found on a dirt road in an area with only light snow cover. Veer just to the left near the end of the road to jump off the ramp and land on the trees below.
Stunt Jump 30
Province: Costa Sud
Coordinates: N 40 44.299 E 5 45.448
Alright here we go, the 30th and final Just Cause 3 stunt jump! On the southeast edge of the island, a dirt path veers off the left of the main road for the last jump. It will probably land you on the roof of a building. After all that hard work, you’ll unlock another vehicle and the Consummate Daredevil achievement!


Published: Nov 30, 2015 01:32 pm