Adventure quests in Honkai: Star Rail are optional, but you’ll want to take care of them for their rewards. The adventure quest titled “The Adventurous Moles” grants lots of Trailblaze EXP, rare enchantment materials, valuable items, and money. Our guide will show you how to complete The Adventurous Moles quest in Honkai: Star Rail.
The Adventurous Moles Quest Guide
Solve the Miner’s Lamp Puzzle

The Adventurous Moles quest can be initiated at the Boulder Town in The Underworld, Jarilo-VI. You need to speak to Julian, the member of The Moles group in Belobog. You can find him in the southwestern part of the town right after you complete “The Return” Trailblaze mission.
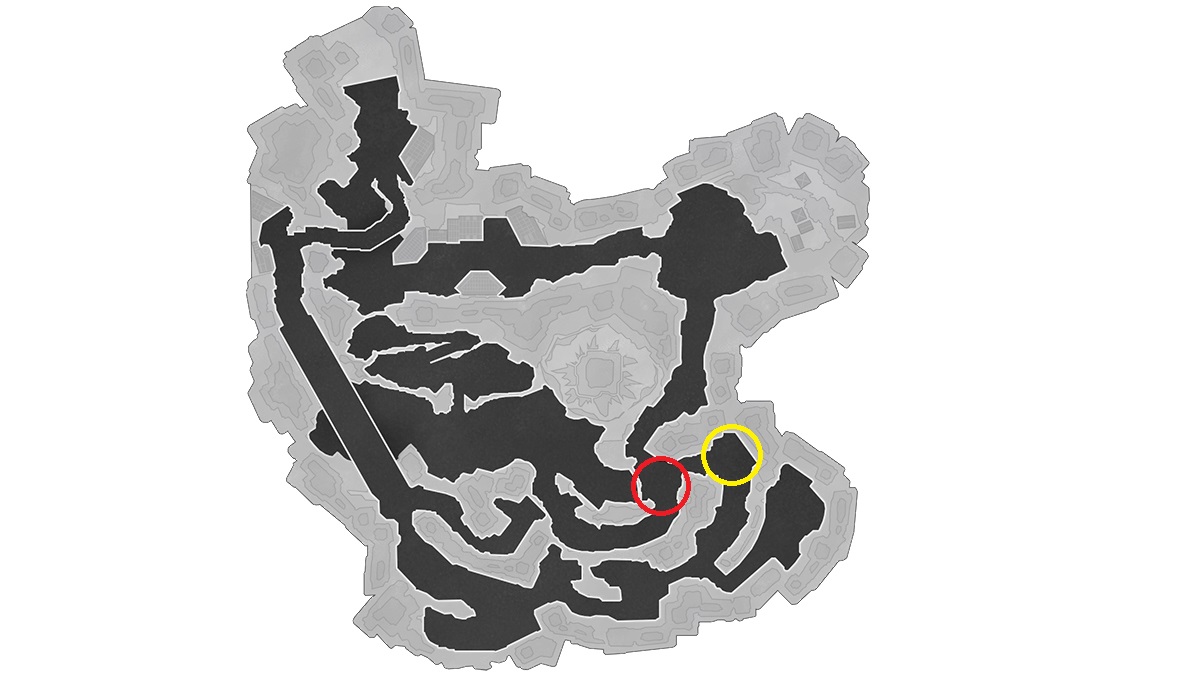
He’ll give you the copy of The Adventurous Moles book, which is missing some of the pages. The first missing page about the Miner’s Lamp can be found inside the Great Mine. You can find it on top of the barrel next to a Level 30 Patrol Machine (indicated by the red circle on the map above).
Move up ahead to the yellow circle and pick up the Miner’s Lamp from the crate. You’ll notice the fence nearby with three hanging lanterns, but one spot is clearly missing one. Place the Miner’s Lamp on that spot between the rest of the lamps on the fence.
This will solve the Miner’s Lamp puzzle, and a treasure chest will spawn at the same spot, which includes the following rewards:
- 20 Trailblaze EXP
- 20 Stellar Jade
- 2 Adventure Logs
- 1 Condensed Aether
- 1 Musketeer’s Wind-Hunting Shawl
- 60 Shield
- 3,000 Credits
Find the Rest of the Missing Pages
Once you find the first treasure, you need to return to Julian and report about your progress. He’ll be very happy, and ask you to find the rest of the missing book pages according to the table of contents that he gave you earlier. This means that you need to find three more pages that all lead to the same number of bountiful treasure chests.
The Unexpected Parchment Location

This missing page can be found in the southeastern part of Blackwater Pass in Boulder Town. You’ll see it on the bench (indicated by the red circle on the map above). Once you pick it up, you need to solve the scene in the cafe puzzle that’s located in the same area by following these steps:
- Walk around the tables at the cafe until you see a pop-up to interact with one of the chairs.
- Select “Put it upside down on the table” option.
- Select “Lay it flat on the ground” option.
This simple action will complete the puzzle and the second treasure chest will spawn with the following rewards:
- 20 Trailblaze EXP
- 20 Stellar Jade
- 1 Adventure Log
- 1 Condensed Aether
- 60 Shield
- 2,500 Credits
The Crates are the Keys Location

The next page can be found in the northwestern part of Rivet Town on the crate to your right, as soon as you enter the warehouse (indicated by the red circle on the map above). Now you need to solve the puzzle with crates on the shelves. Here’s what you need to do:
- Approach the shelf with the interactive crates to your left from where you found the missing page.
- Select “Pick up the crate in the middle” option.
- Approach the shelf located up and to your right.
- Select “Place that crate in the middle” option.
- Go back to the first shelf with crates.
- Select “Pick up the crate on top” option.
- Stay at the same shelf, don’t move.
- Select “Place the crate in the middle” option.
This will solve the puzzle, and you can open a new treasure chest, which includes:
- 20 Trailblaze EXP
- 20 Stellar Jade
- 2 Adventure Logs
- 1 Condensed Aether
- 1 Musketeer’s Coarse Leather Gloves
- 60 Shield
- 3,000 Credits
Treasure Hunt of the Battlefield Location

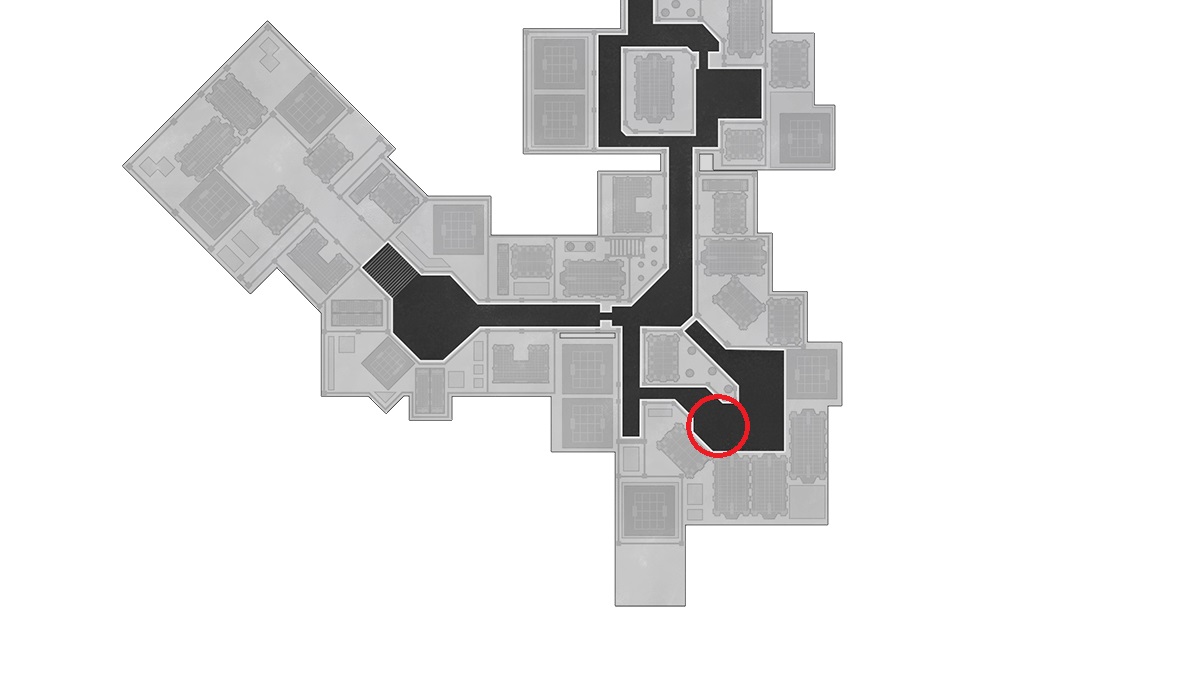
The final missing page can be located at the Silvermane Guard Restricted Zone. You can find it stuck to the corner of the wall to your right next to the western Space Anchor (indicated by the red circle on the map above). Then, you need to complete the final puzzle:
- Pick up the gun from the crate, which can be seen in the same corner.
- Put it on the gun rack in the southern corner.
- Pick up another gun from the sandbag in the southern corner.
- Put it on the gun rack in the northwestern corner.
- Pick up the third gun from the crate in the northwestern corner.
- Put it on the gun rack, where you picked the first gun.
This action will solve the final puzzle, which spawns the fourth chest with the following rewards:
- 20 Trailblaze EXP
- 20 Stellar Jade
- 3 Adventure Logs
- 2 Condensed Aether
- 1 Thief’s Myriad-Faced Mask
- Thief’s Gloves With Prints
- 60 Shield
- 3,500 Credits
In the end, go back to Julian and report about your progress. The very last thing you need to do is give all the missing pages that you’ve found to Nika, who can be found in the center of the Administrative District. That’s everything you need to know on how to complete The Adventurous Moles quest in Honkai: Star Rail. Stay tuned for more Honkai: Star Rail tips and tricks articles right here.


Published: May 4, 2023 10:59 am