Welcome to possibly the most comprehensive tips article on Fallout 4‘s Survival difficulty mode. So sit back, relax, and grab a Nuka Cola. This is going to be a long one.
Unless you’ve been living under a rock, blind-folded, with your fingers in your ears, you’ve probably heard about Survival difficulty in Fallout 4. Survival difficulty replaces the normal Fallout experience with something significantly more nightmarish. Things are generally bleaker and more unforgiving, and every enemy’s lethality is significantly higher.
What’s Different in Fallout 4‘s Survival Mode:
- More damage from opponents; death occurs after a few hits.
- Much slower healing from stimpacks, food, and water.
- Fatigue from associated health concerns reduces AP, meaning less sprinting time and VATS.
- The need to drink, eat, and sleep regularly, lest stats be diminished and fatigue set in. Eventually, you suffer periodic damage which will cause death.
- Diseases can be contracted that have different effects. One such complication requires more sleep; another is an infection that causes periodic damage.
- Beneficial drugs (stimpacks, rad X, radaway) can be dehydrating, induce hunger, and leave you vulnerable to sicknesses.
- Limbs are not cured automatically; they require a stimpack or a bed.
- There are no saves, auto-saves, or quick-saves available. You can only save at a bed.
- Ammunition has a weight now. Larger ammo, missiles, nukes, etc. are significantly heavy. Fusion cores will also weigh you down.
- Carrying capacity is significantly reduced.
- Companions have reduced carry weight.
- Companions will head home if not healed with a stimpack to recover.
- There is no fast travel — now you must travel the old-fashioned way.
Fortunately, having delved into survival difficulty long enough to properly understand its harshness and idiosyncrasies, here are 111 tips to reduce the likelihood of your fairly immediate demise.
Best Fallout 4 Character Build:
-
S.trength is very important
When it comes to creating and customizing your post-apocalypse character, strength is rather vital. In survival mode, it’s especially vital because the starting carrying capacity is reduced to around half of the normal amount. Every strength point equals 10 extra pounds of carrying capacity, and having 6 points within this attribute means the ability to unlock the coveted strong back perk (more on this later). An ideal starting figure is 4 – 6.
-
P.erception isn’t that important
Perception certainly isn’t remotely as important as it was before Survival difficulty reared its head. Unfortunately, because red compass markers indicating enemies have now completely disappeared when in “caution and danger,” that element is no longer useful. In terms of perks, there aren’t many worth having in the higher numbers. An ideal starting figure is 4, which will allow the “locksmith” perk to be unlocked. It’s unlikely more is necessary.
-
E.ndurance isn’t that important
You would imagine having tons of health would be a boon in survi val difficulty, but realistically, an average or high amount would probably not be much more helpful than a smaller health total. Add that to the fact that there aren’t many helpful perks available in endurance, and you’ll realize it’s best to stick to a relatively small figure. Purely for an average HP amount, 3 is a reasonable starting stat, and it’s unlikely any more is necessary for your playthrough.
-
C.harisma is very important
Charisma, since it essentially allows superior buying and selling prices, is definitely useful. It is also the factor that allows for more peaceful, conversational approaches to situations that could potentially lead to conflict. Because there are various types of clothing available which increase your charisma amount, it’s best to take that into consideration before increasing the attribute; a good set of clothing, hat, and glasses will increase charisma by 4.
An acceptable starting amount is 3 – 5, which encompasses the “lone wanderer, cap collector, and the black widow/lady killer” perks. After these, there aren’t many perks you will useful.
-
I.ntelligence is very important

Higher intelligence equates to higher experience gain from defeated enemies and completed quests. It’s also useful for several perks important to staying alive in survival mode. Gun Nut, Hacker, Scrapper, and Chemist perks are the ones you want. This means a good starting figure is around 4 – 6.
-
A.gility is very important
Since there is a genuine reason to be afraid of almost every adversary in Survival difficulty, agility is huge. This is because the higher the amount, the better the chances of remaining completely undetected. Add to this the fact that there are several perks available which are important for Survival difficulty, and players will realize this is the best starting stat. The perks that are particularly useful are Sneak, Mister Sandman, Moving Target, and Ninja. Starting at 7 is recommended to take Ninja ASAP.
-
L.uck isn’t that important

Luck really isn’t important, simply because it doesn’t have any meaningful bearing on anything practical within the game. Add to this the perks available, which are essentially V.A.T.S- or critical gauge-oriented, and it’s best to keep a minimal figure. 1 – 3 is an ideal start.
Which Perks to Choose in Fallout 4:
-
Take the Gun Nut perk as early as possible
The “Gun Nut” perk is definitely useful early in the game. Hav ing each rank available means immediate access to the best mods for your level. Things like scopes, upgraded magazines, and recoil compensators make you more effective in ranged and close combat for longer periods.
-
Take the Armorer perk as early as possible

Like “Gun Nut”, the “Armorer” perk is best taken early. With this, your defensive capacity is increased more regularly, making the difference when attacked. Add this to the ability to add beneficial effects to your armor, and it’s a clear choice.
-
Take the Sneak perk as early as possible
Because this difficulty setting is extremely unforgiving, it’s recommended to avoid detection whenever possible. This perk is essential for your survival. Again, taking this as quickly as possible is important to give you an advantage over all low level adversaries. Also, because mines and other explosive traps are deadly in this difficulty, it is very useful for a later rank’s ability to avoid traps entirely.
-
Take the Ninja perk as early as possible

Enemies are devastating in this difficulty setting, and that means you need to be too. This perk is definitely recommended from the start. With it you’ll do up to 3.5x extra ranged damage to any enemy hit by one of your sneak attacks. It also pays to keep a melee weapon available, as the damage multiplier for melee sneak attacks goes up to a maximum of 10x.
-
Take the Locksmith
 perk as soon as possible
This one is mandatory one. If you haven’t taken this perk, many locked containers will remain inaccessible to you. Having quick access to this perk means more money, ammunition, and general stuff worth selling.
-
Take the Hacking perk as soon as possible

Like lock-picking, hacking is another way of attaining useful items. Sometimes, when lock-picking isn’t available, such as like with magnetically locked doors, this perk will allow you access.
-
Take the Strong Back perk as soon as possible
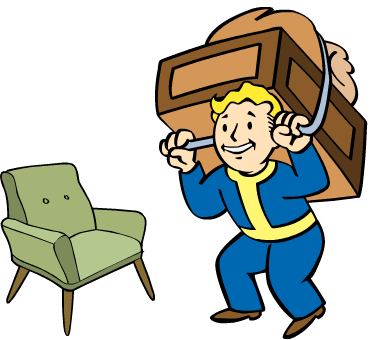
This perk can never be overlooked. As mentioned earlier in the strength section, carrying capacity is significantly reduced here, so having up to 50 pounds of extra carrying capacity makes a massive difference. Remember, ammunition and stimpacks are now given a weight, so this is even more important.
-
Take a specialist weapon perk as soon as possib
 le
le
As mentioned earlier, having increased lethality is very important, as adversaries can be very dangerous. That’s why perks that increase damage are vitally important. Frankly, it’s up to you which weapon-related perk you specialize, but since damage and range are important, the “Rifleman” perk is particularly useful. The weapons which have increased damage include the hunting rifle, combat rifle, laser rifle, and the combat shotgun. This means your ability to kill is increased for sniping, mid-range combat, and close combat, making you more combat efficient in all scenarios.
-
Take the Chemist perk as soon as possible
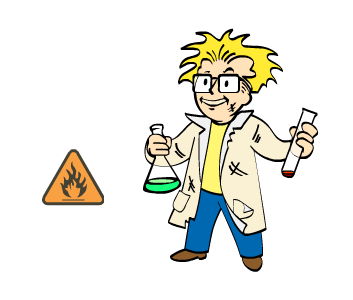
Stimpacks can no longer be made immediately. That makes this perk particularly important. Couple that with diseases you will contract fairly regularly and the capability to manufacture antibiotics to counteract them, and the Chemist perk is a lifesaver. Furthermore, the refreshing beverage consumable can be crafted and is something you won’t want to miss out on since the healing effects are exceptional. Obviously, another bonus is the fact you’re saving plenty of caps.
-
Take the Mister Sandman perk once suppressors are available
The importance of this perk cannot be overstated, as it increases damage wit h all silenced weapons, including weapons with a silencer, or suppressor fitted. Since being stealthy is the priority in survival, having that extra damage whenever that approach is taken is important. Finally, this stacks with sneak attack damage, making the highest ranks of both combined increase damage to absurd amounts. You’ll never want or need a missile launcher again.
-
Take the Moving Target perk as soon as possible
This one is perhaps not the priority among the perk options  mentioned within this guide. However, since it actually reduces damage while sprinting, it can make a massive difference when running from a mine or similar explosive, or when you’re fleeing from multiple opponents. The 2nd rank is roughly the equivalent of a full set of light combat armor, which makes a difference in damage resistance.
-
Take the Lone Wanderer perk immediately

The Lone Wanderer perk is absolutely crucial, and it makes a significant difference for several notable reasons. It increases damage resistance by up to 30% and increases carrying capacity by up to 100. The 30% damage resistance speaks for itself since enemies do significantly more damage. Since carrying capacity is reduced in survival difficulty and companions cannot carry nearly as much, the extra weight limit is very important. At the maximum rank, you gain 25% extra damage from all attacks.
-
Take the Cap Collector perk as soon as possible
This perk improves pricing for buying and selling at vendor s, and eventually you will be able to invest 500 caps into your favorite stores. As noted in the aforementioned perk, carrying capacity is reduced, which means carrying all those items of value isn’t feasible. Coupled with no fast travel, it becomes fairly obvious the amount of caps collected is going to be less than a normal playthrough regardless of how frugal or resourceful you are.
-
Take the Scrapper perk as soon as possible
Less carrying capacity and no fast travel means less upgrade materials for weapon and armor improvements. With this perk, weapons an d armor can be broken down at the appropriate benches or settlements with workshops. Each rank allows the attainment of materials considered reasonably rare, such as screws, springs, nuclear material, and aluminium. With this, there’s no need to carry a weapon to sell, especially if its value is low.
-
Take the Black Widow / Lady Killer perk as soon as possible
Many NPCs in this mode are quite overpowered despite the fa ct enemies are supposed to be as easy to kill as you are. This is why having the ability to persuade powerful characters of the opposite gender can be a boon. This is on top of the extra experience points earned from each successful persuasion and a damage increase.
Resource Gathering Tips in Fallout 4:
-
Collect as many road leathers, harnesses, and raider leathers as possible
Leather is extremely important for armor upgrades, especially in the beginning, when your upgrading abilities aren’t very developed and materials are somewhat fleeting. Each one of these outfits has roughly a 1 in 4 chance of being worn by Raiders and similar enemies, and they only weigh a pound. Carry them to a workshop and dismantle them for leather. Then, utilize the parts for much-needed armor upgrades.
-
Collect all available ammunition whenever possible
Ammunition is one of greatest money makers in the entir e game and — even though it weighs something in this difficulty — it’s not an overpowering amount. Really, you can easily carry hundreds of rounds of the lightest ammunition and sell it to cover the cost of recent purchases. Always aim to collect as much as possible, but attempt to avoid the heavy varieties.
-
Collect all available food and water whenever possible
Obviously, since dehydration and starvation are very real thr eats in this difficulty, collecting every piece of food and water is important. Always attempt to prioritize collecting lighter pieces of food, like corn, mutfruit, Fancy Lads snack cakes, and Blamco mac and cheese, over heavier varieties. While it’s nice to have plenty of food regardless of the weight, having several pieces which exceed half a pound can weigh you down quickly.
Whenever you discover corn, regular mutfruit, and tato, save some, as they can be combined into something extremely useful when mixed with purified water. More on that in the adhesive section.
Always collect every bottle of purified water there is, and don’t be stingy about collecting and using dirty water, especially as the latter can be used to create noodles — when combined with razorgrain — which are helpful for fending off both hunger and thirst.
-
Collect every pre-war dollar possible
Every pre-war pile of cash is worth up to 8 caps, depending on your current charisma attribute and associated charisma perks. Even better, they weigh absolutely nothing, and you can carry literally thousands of them. This means they’re a wonderful way of earning plenty of caps and can even be used to create beds, as they require the cloth attained from the money. Make sure to check as many cash registers as possible.
-
Find and use apparel which increases the charisma attribute
Higher charisma means better buying and selling prices an d a higher chance of persuading NPCs to be friendly, or even give you larger quest rewards. That’s why it’s essential to have an alternative outfit when visiting towns or smaller settlements. Fortunately, such articles of clothing are relatively easily attainable and can be found in stores and containers like suitcases and drawers. It’s best to have a hat, glasses, and an outfit at once to maximize the amount of charisma gained.
Available glasses include black-rimmed glasses and fashionable glasses; available clothing includes dirty and clean suits, tuxedos, and dresses; and available head apparel includes the formal hat, militia hat, trilby, hat and pompadour wig.
-
Collect as many bottles as possible
Like a few previously mentioned tips, this one cannot be overs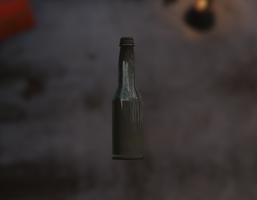 tated. Bottles might seem like mundane and relatively meaningless junk, but that’s actually incorrect, as they can be filled with water. Yes, practically any lake or river will allow you to fill bottles with dirty water. Purified water can even be obtained from water pumps at various settlements and water fountains that contain purified water. So collect as many empty Nuka Cola bottles, beer bottles, and milk bottles as possible.
-
Collect as many hubflowers as possible
Hubflowers are purple and blue flowers and grow practically everywhere in the game. These are particularly useful for creating grape mentats, a super useful variety of mentats which increase your charisma by 5 and also your buying and selling prices by 10%. Hubflowers are also a food alternative and restore some HP — it is only very lightly irradiated. Sometimes, they don’t respawn for whatever reason.
-
Collect as much wild mutfruit as possible
Starvation is a very real possibility if you aren’t keeping on t op of your character’s basic needs, so the fact that so many mutfruit grow in the wild is very useful. Whenever you notice a yellow bush, that should be a wild mutfruit. Collect one from each, and keep returning to the same ones later for a respawn (although sometimes they don’t respawn for whatever reason).
-
Collect as much junk as you can carry
This is perhaps the most important aspect of the entire game an d really cannot be exaggerated in the slightest. Concentrate on anything typically useful for upgrading weapons and armor and building water pumps, if you can. If you’re interested in standard weaponry, collect anything with screws and springs and metallic elements; for more advanced weaponry, concentrate on plastic and precious metals like gold and silver.
For armor upgrades, leather, plastic, cork, fiberglass, and ballistic fiber are particularly useful, so concentrate on collecting junk with anything that features those things.
-
Collect and save as many Nuka Cola drinks as possible
Certainly for healing purposes, Nuka drinks are definitely useful, an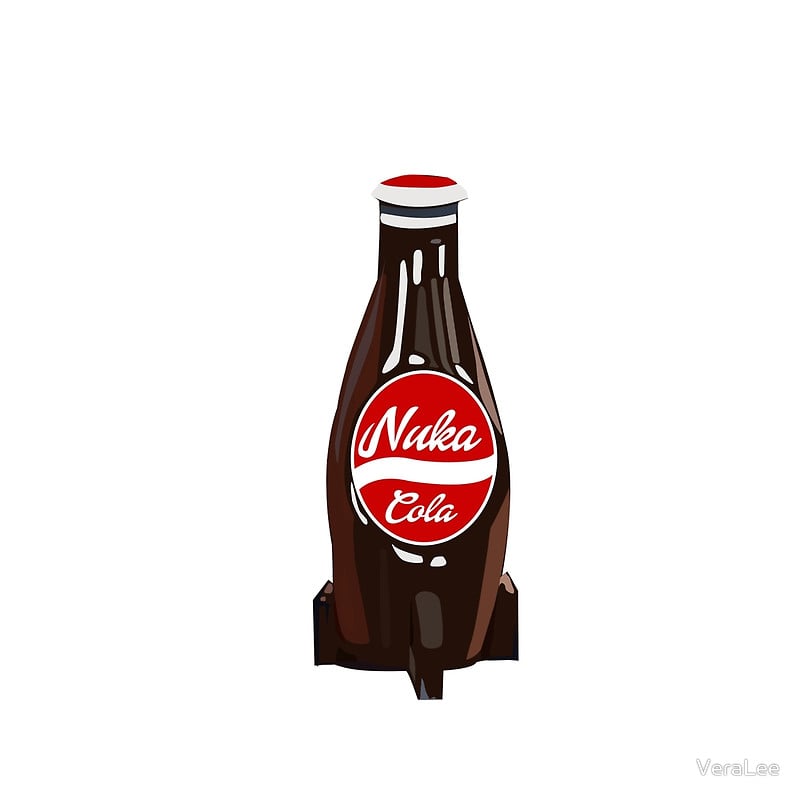 d Nuka Cherry and Nuka Quantum are particularly good healers. Also, they’re useful for staving off sleep, although the effect is brief at best. This one is perhaps a secret and relates to the next tip coming up — whenever you find Nuka Cola, Nuka Cherry, and Nuka Quantum, don’t always drink them all immediately; save some. Why? You’re about to find out.
-
Find the “Drinkin’ Buddy” robot
The Drinkin’ Buddy robot is a peculiar Protrectron model that is a  walking, talking vending machine. Once discovered — look for a guy in green overalls in a hotel in Goodneighbour as a starting point — he’ll offer to dispense various varieties of ice cold beers. While that isn’t particularly useful, the robot will also take all the Nuka Cola varieties available in the game, increasing their healing properties once they’re also ice cold.
Make sure you keep the robot once discovered, and tell it to go back to your main settlement. But beware, it can be destroyed by enemies, so make sure you’re alert to danger in your chosen settlement.
-
Adhesive is a priority; buy it and collect it all
Adhesive is needed for everything weapon and armor related. It’s imperative to continually collect as much as possible whenever it’s available. Collect it in the field, and don’t be stingy spending money on it in stores. You’ll need lots of it simply to upgrade a single weapon or piece of armor completely, and the more weapons you want completely upgraded, the more you’ll need.
If you’ve collected plenty of purified water, corn, mutfruit, and tatos, they can be combined at a cooking stove to create vegetable starch. Vegetable starch is an item worth 5 adhesive, and it’s considerably useful. It takes 3 tatos, 3 corn, 3 mutfruit, and a bottle of purified water to make a single can of vegetable starch.
-
Fill every empty bottle you have when a water pump is found
Water pumps are relatively common in various settlements, an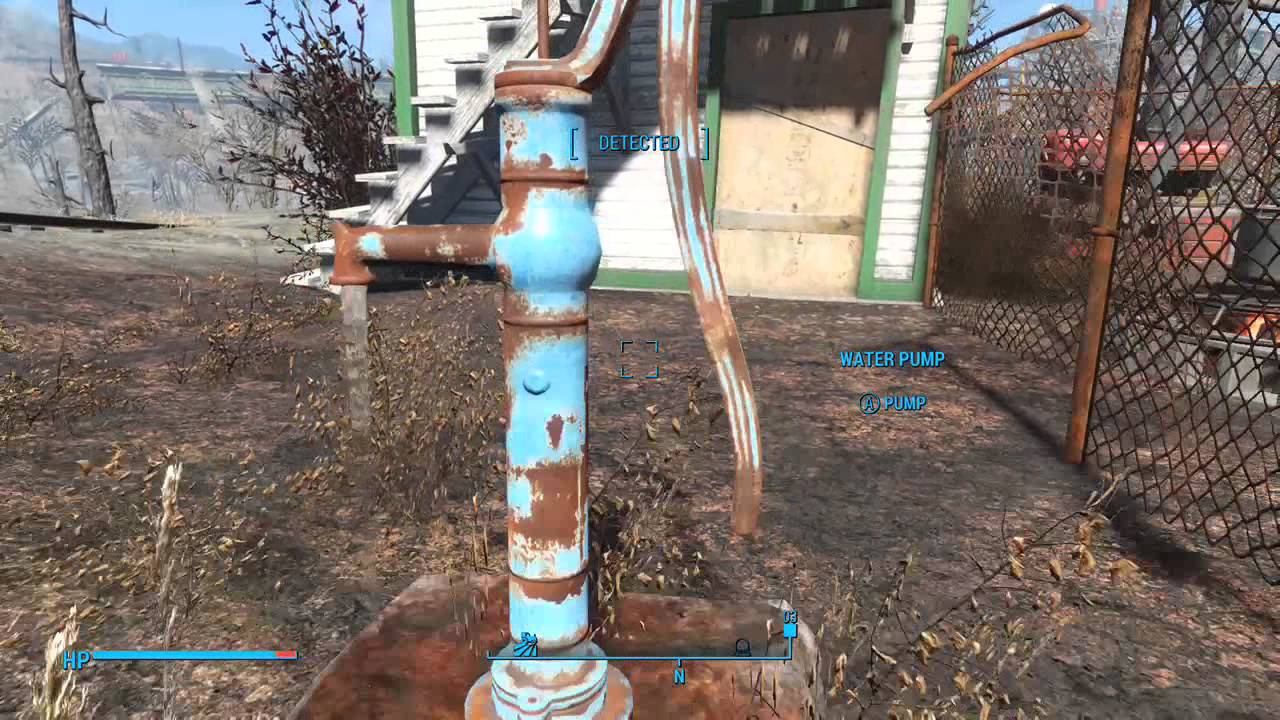 d finding one is a really great moment. So fill every milk bottle, empty Nuka Cola bottle, and beer bottle up to create purified water. Also, while you’re there, make sure to drink using the pump to remove any thirst your character might have.
-
Collect practically everything with aluminium in it
Aluminium is one of the game’s most important resources for u pgrading weapons. Any upgrade increasing damage or featuring a larger barrel, stock, etc. will almost definitely feature an amount of aluminium. Aluminium can be found in aluminium cans, hub caps, aluminium canisters, cake pans, and surgical trays. There are even more pieces of junk, too, which contain the metallic element.
Magazines have various unique effects, which are great when combined with similar perks. While they’re practically scattered around everywhere, all that can be said is keep an eye out for them all. Some increase critical hit damage with various weapons; others increase various things, like meat attained and AP.
-
Keep an eye out for bobbleheads

Bobbleheads are even more useful than the magazines mentioned above. These are available for every S.P.E.C.I.A.L. attribute and also for every skill-orientated aspect, like small guns and medicine. Look out for these in practically every large, important location; you’ll particularly have luck finding them during any of the main quests.
-
Hunt all available Mirelurks and similar creatures
This is perhaps something I’m morally against in reality, but in the game, it’s perhaps not so big a deal. Whenever you notice a Radstag, Molerat, Mirelurk, etc., open fire and collect whatever meat and skin they possess. The meat can be cooked at a cooking stove into something more effective at healing, and the skin can be turned into leather. While Mirelurks don’t have skin, most of the rest most certainly do. Then, it’s up to you whether you have your character eat the meat or sell it. I personally sell it, even if it makes me feel like an evil poacher.
Fallout 4 Combat Tips & General Strategy
-
Take your time
This could be associated with many different situations within the game, but the general rule of thumb is don’t move too quickly. Since opponents are more dangerous, moving quickly creates more noise and attracts their attention. Whenever moving through the wasteland towards your next destination, run for a bit, then stop and sneak to analyze your surroundings. Keep moving if it’s clear. Doing this regularly gives you the chance to utilize the game’s stealth meter. If it moves inwards or says “caution,” be careful.
Whenever you are sneaking, the slower you move, the greater the chance of completely avoiding detection. It’s imperative you move as slowly as possible. Whenever approaching an opponent in stealth, move even slower, as they’re programmed to more easily detect you the closer you are. Be aware of their patrol routine before engaging. Wait for a situation where you can maximize your combat effectiveness while keeping collateral damage to a minimum.
-
Ditch your companions
The companions aren’t very helpful in this game in all ho nesty, as they frequently give away your location, attack enemies unprovoked, and get defeated. Besides, without them, you get the beneficial effects from possibly the best perk in the game, Lone Wwanderer. You cannot have both, so it’s best to leave them behind.
-
Specialize in a weapon type and have two or three backups max
Specializing in a weapon type should have already been something you’ve considered, but because upgrade materials seem harder to come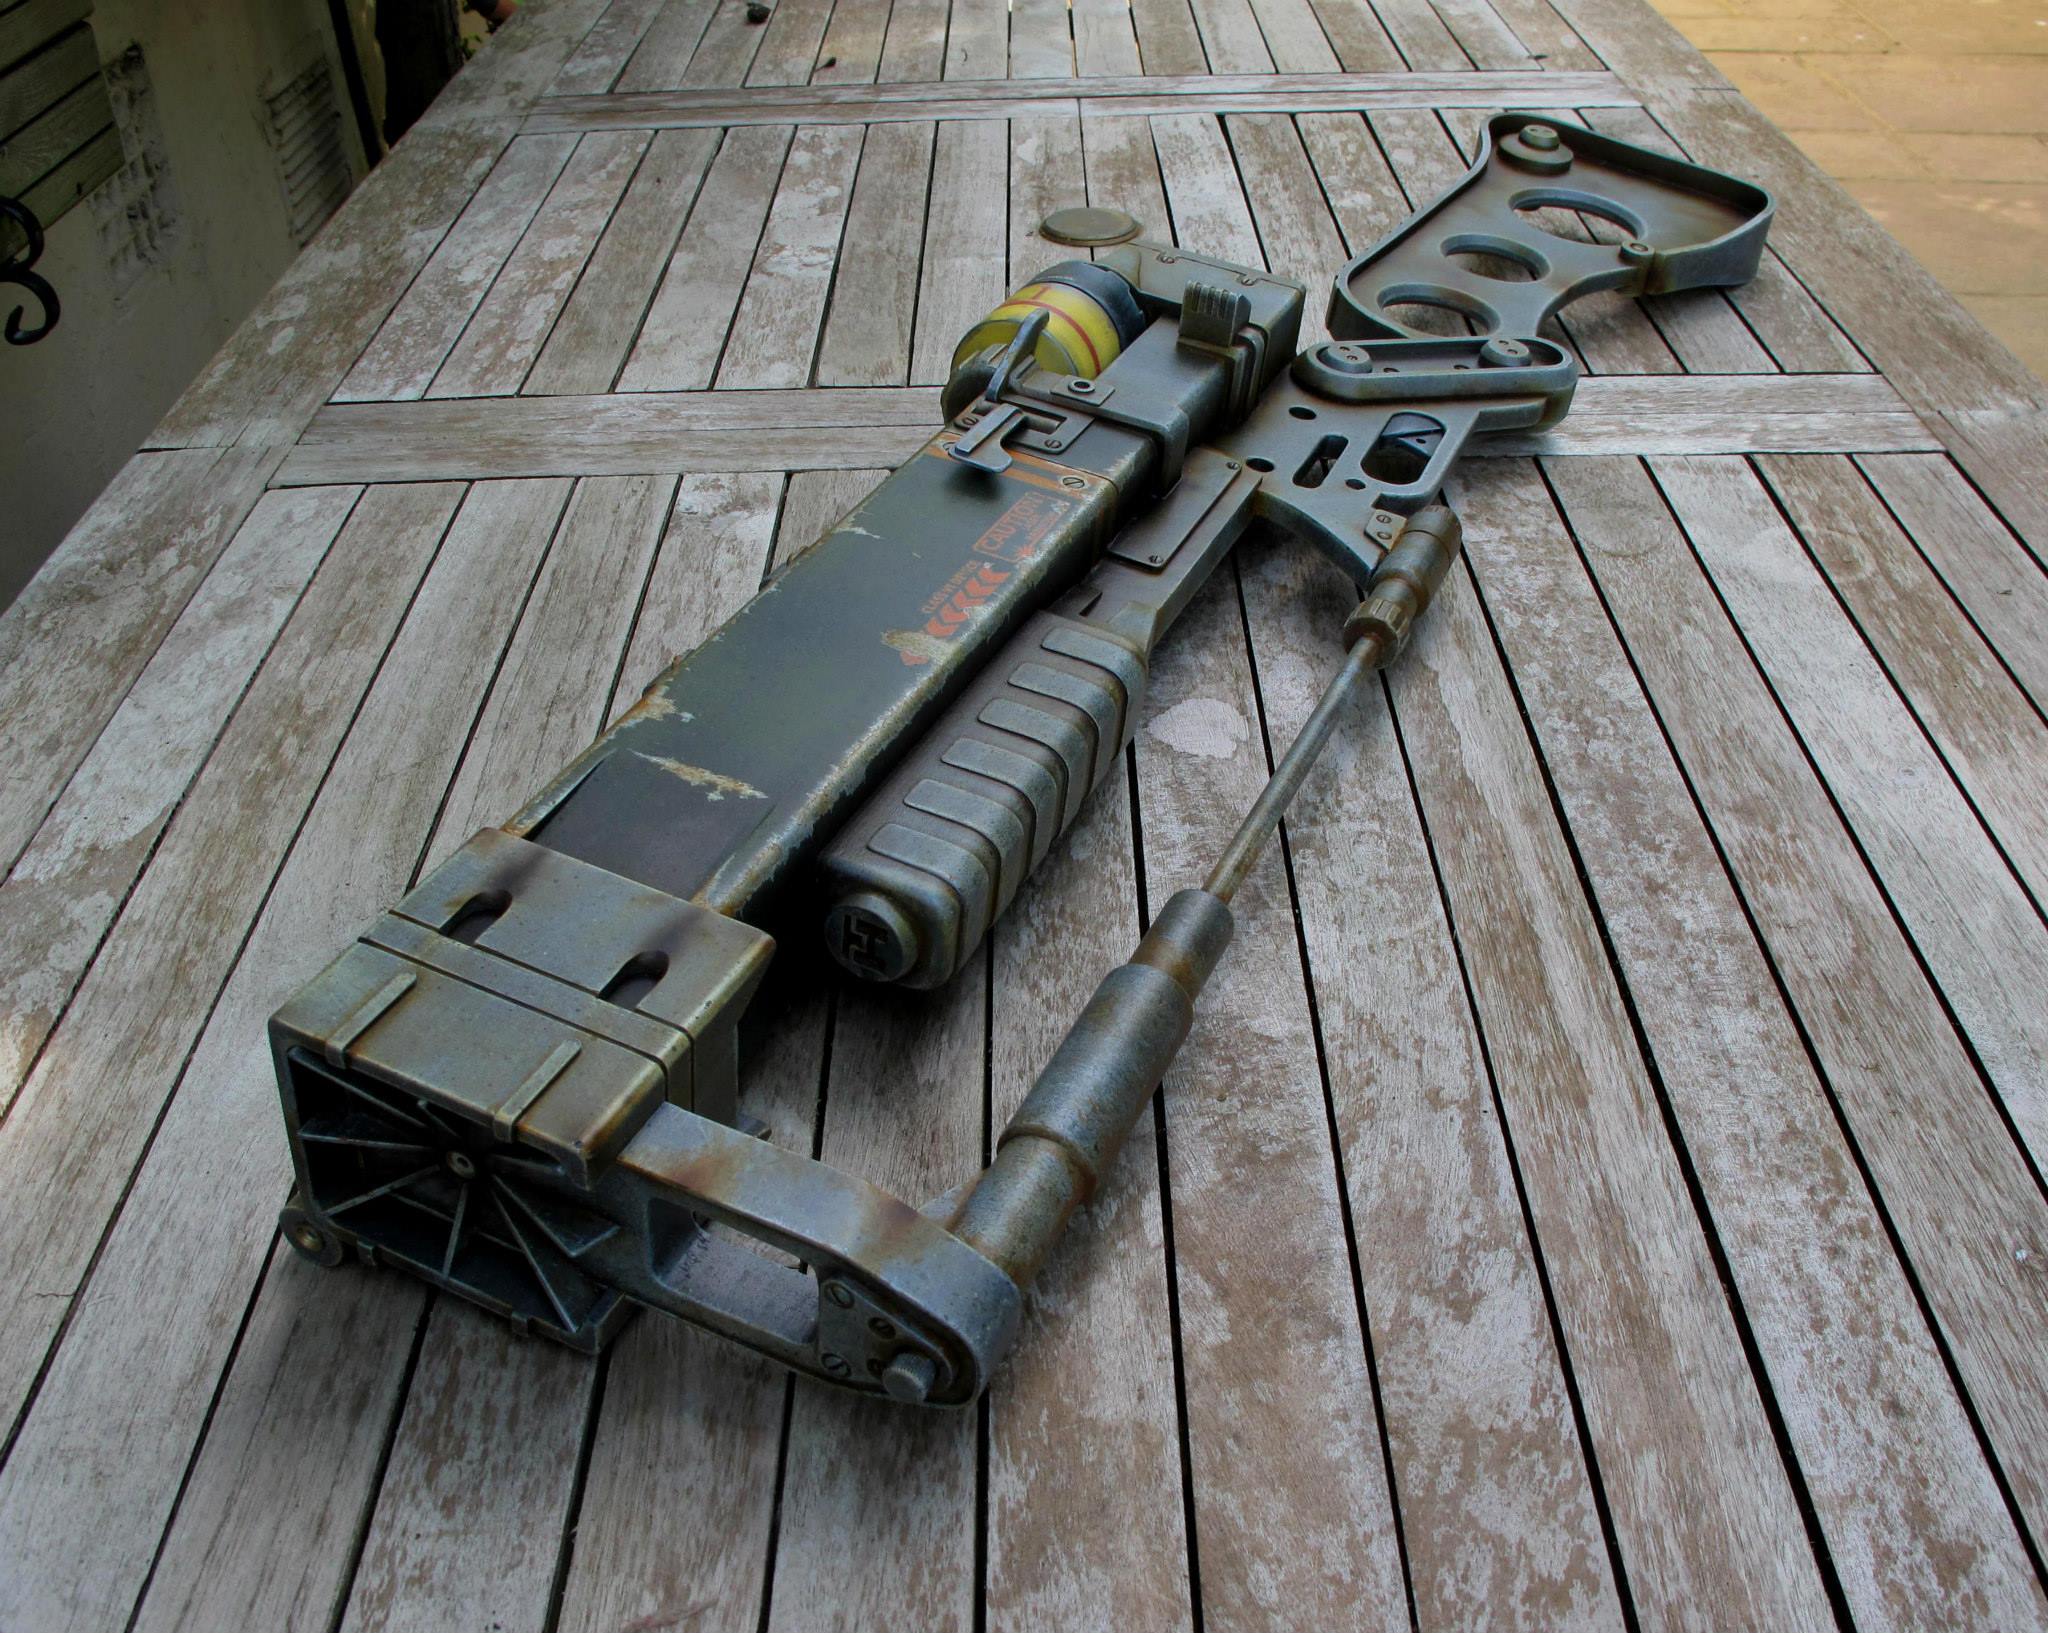 by, it’s best not to go for too many weapons. Having a sniper rifle for long-range targets and a shotgun available for close targets is a good idea. Then, anything with a slightly better fire rate is your best bet for anything in-between those distances, since it allows you to quickly dispatch multiple targets. It’s up to you whether that should be another rifle or a handgun. Either should be equipped with a short scope or iron sights for quicker target acquisition.
-
Engage all opponents in stealth mode
Stealth is essential in most situations in this Survival difficulty, and it is a tremendous advantage catching adversaries off guard. While it could be 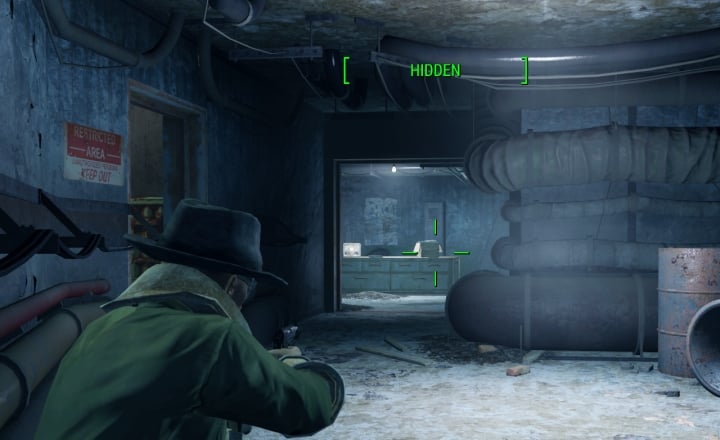 considered dishonorable, that’s irrelevant in war. Shoot all enemies when they aren’t aware, or back stab them. Whenever shooting an opponent is the only option, wait until he/she is far away from other opponents to prevent an alarm being raised.
If enemies are closer together, engage the first with a head shot from your mid-range weapon, then move onto the next quickly; empty the rest of your magazine if it’s necessary. If your cover is blown, change to your close combat weapon and remain in cover behind the wall the enemy is logically going to advance through. Drop a mine in the doorway and back off behind cover, aiming your shotgun at the door. If the enemy survives the explosion, keep shooting. This tactic is generally effective throughout the game, and it’s effective for avoiding standing fights.
-
Utilize explosives in tight spaces, staircases, and corridors
Whenever enemies are in corridors, or generally against any walls, explosives will be very effective. Use them in logical situations 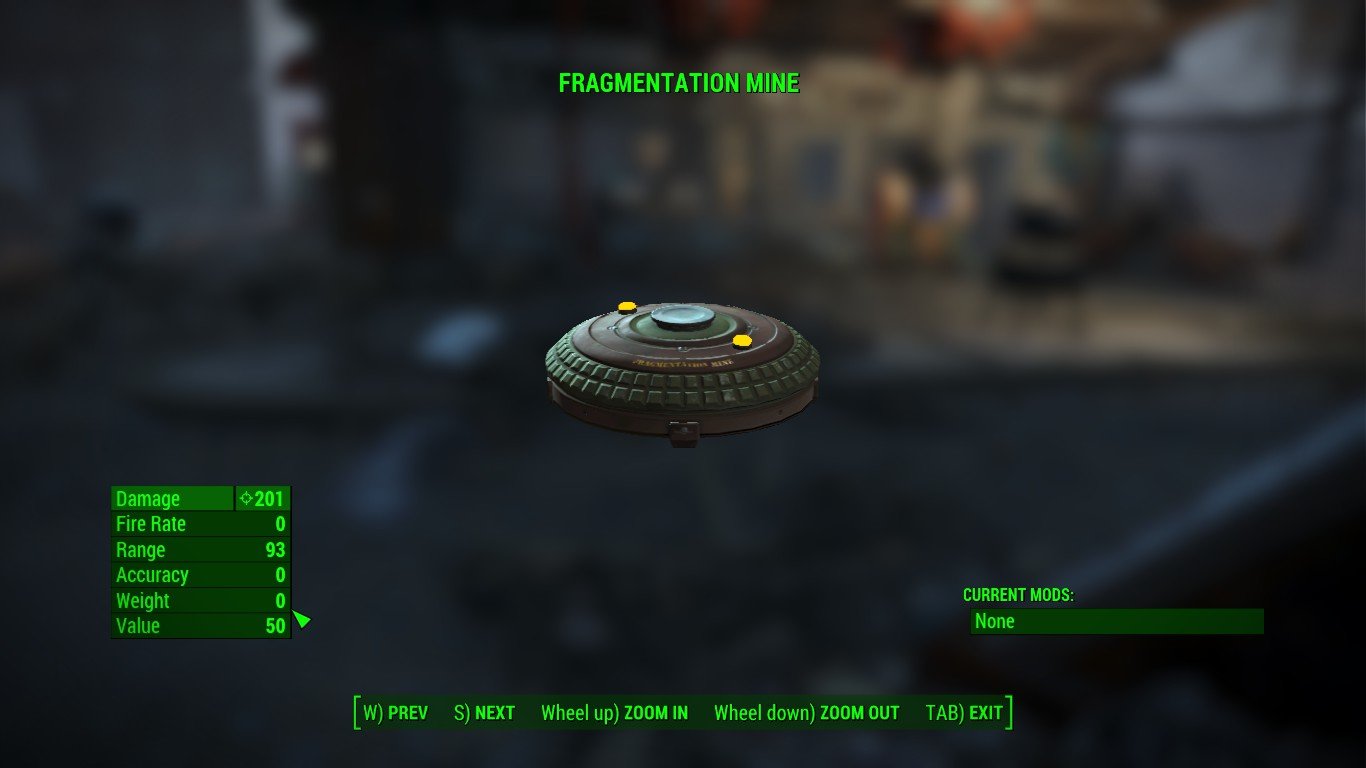 where you would typically utilize a combat weapon. In terms of modern warfare, it’s typically called a bottle neck. Treat every narrow space as one, and use explosives wisely. Whenever you’re relatively certain enemies are attempting to discover your location, utilize those corridors as inevitable one-way entrances to you. Use their curiosity against them by dropping a mine and picking off any survivors with silenced weapons.
-
When enemies are searching, hide
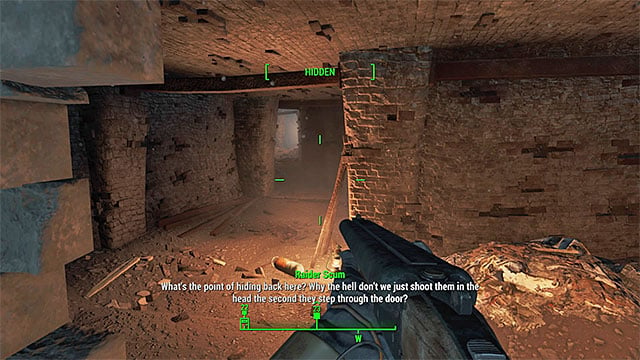
Never give your enemies an opportunity to detect and engage you. Whenever they’re searching for you, hide behind an object and wait for them to turn their back before engaging. If you’re more patient, you can also wait until the gauge says “hidden” again. Once the latter is accomplished, enemies will relax, making a potential ambush much easier.
-
Throw grenades at multiple opponents
The general rule with grenades is to use them when multiple  opponents are together in one place. This means you maximize the effect and will likely not have to expend any ammunition. Peek around doorways and then throw them through when you’re certain enemies are as close together as they could possibly be. This is extremely effective on unaware opponents.
-
Flank enemies taking cover
Enemies in this game like to take cover frequently. When this occurs, attempt to find an alternate route, and hit them on their blind side. This is especially useful if the enemy is busy engaging something else and allows you to take advantage of their lack of perception.
-
Throw grenades at enemies taking cover
Whenever enemies are in cover and are either not exiting cover frequently enough or reloading, just throw a grenade. Make sure to throw the grenade right alongside or slightly behind the enemy. Avoid throwing it near the cover, as it will not be as effective.
-
Engage far away adversaries with a sniper rifle
Take advantage of your weapon’s range, power, and accuracy and snipe whenever possible. Regardless of whether other opponents are going to hear the shot or see their ally go down, just shoot first. Then, quickly move onto the next target, or hide and wait until the enemy stops searching for you.
-
Always aim for the head as a first attack
Regardless of the attack distance or combat situation, always aim for the enemy’s head first. It does more damage and saves you ammunition, which reduces the likelihood you’ll be caught reloading.
-
Aim for the torsos of moving enemies with faster weapons
After your initial attack, proceed to aim for the enemy’s torso. This is the largest part of the opponent and the easiest part to hit while they are moving. It is preferable to use fast weaponry if possible. Combine this with the associated scope or iron sights for maximum efficiency. Always try to anticipate your opponent’s movements to stay on target.
-
Utilize doorways to prevent large enemies from following
Larger, more dangerous enemies have a difficult time getting through doorways. Take advantage of this as much as possible. Stand near doorways whenever a large enemy (Deathclaw, Sentry Bot, Yao Guai, etc.) is interested in causing some woe. That way, whenever the enemy comes close, you can easily dodge through the door and into relative safety. Proceed to run through the door to attract the enemy’s attention, and then fire a few shots while retreating back through. Rinse and repeat to survive, or just run away.
-
Place mines near doorways and get the enemy’s attention
This is an old trick you’ll become good at eventually. If an enemy, or enemies, are dwelling within a room attached to a well-lit corridor, stealth is difficult. The alternative is to place a mine or two in the doorway and get their attention. It’s possible to get their attention multiple ways. One would be to make noise slightly away from the doorway. When the opponents investigate the gunfire, they will set off the mine, leaving you completely unscathed. Another way would be to attract their attention by revealing yourself, then running. They will typically give chase.
-
Always sneak up behind enemies
When you are behind an enemy, the current light in the room is irrelevant; they will be unaware of your presence until you decide to make yourself known with a well-placed blow.
-
When adversaries turn to face you while sneaking, be cautious
When in a situation where stealth is viable and enemies are searching for you, always be cautious. If they look your way and it’s dark, stay still. If they’re reasonably far away and it’s light, move into cover. If they’re close and it’s light, just engage them quickly.
-
Utilize fallback points efficiently
A fallback point is any place you can take cover when under duress. If enemies are searching for you or are potentially ambushing/flanking, having a fallback point is essential. You can use these to set up ambush points yourself, or make use of any connected corridors as bottle necks to guarantee enemies will walk on your mines, or be easy to hit with gunfire.
-
Use vantage points whenever possible
A vantage point is anywhere above the ground floor where enemies patrol. Whenever possible, use vantage points effectively by hiding behind any available corners and walls before engaging any opponents. If you use these points, make certain to cover any weaknesses where enemies could flank you with tactically placed mines. Appropriate positions are on stairs and any doorways leading up to your position.
-
Switch to a weapon like a shotgun for close encounters
This one is a simple one and mandatory. Weapons like shotguns are very effective whenever opponents are close because of their sp read. If any melee opponents get close, switch to a shotgun. Since enemies move very quickly when close, using other weapons can be risky. Enemies like ghouls are particularly quick, and all animals will be melee opponents.
-
Use cover when approaching enemies in sneak mode
Always watch enemies carefully when moving up on them in stealth. It’s important when approaching them that you move as slowly as possible and attempt to use doorways and various items, like fridges, water coolers, etc., as temporary hiding spots. If the enemy sees you, that cover is perfect for absorbing gunfire, protecting you if need be.
-
Run away if engaged by more than one gun-wielding enemy
To be honest, this is only if they’re relatively powerful opponents; if they’re the opposite, feel free to engage them fairly aggressively. If that isn’t the case, always be aware that retreating is a viable option. If you find yourself caught in the middle of two flanking enemies, retreat to a safer position. Ideally, you need a more tactical position on the battlefield, where your enemies are directly in front of you. Always remember that running into unexplored territory or a dungeon could alert patrolling enemies.
-
Use a semi-automatic weapon for quickly despatching mid-range opponents
Think of mid-range as the area where accuracy and fire rate need to be averaged out, meaning it’s appropriate to be more accurate than in close range, yet less than long. For fire rate, it’s appropriate to be more aggressive than long range, yet less than close range.
The most useful weapons for mid-range engagements are pistols, such as the 10mm or laser pistol, and semi-automatic rifles, such as the combat rifle and laser rifle. Always attempt to attack in stealth, and make your first shot count by striking their weak points. Follow up reasonably aggressively with torso shots.
-
Use single-shot weapons, not rapid fire
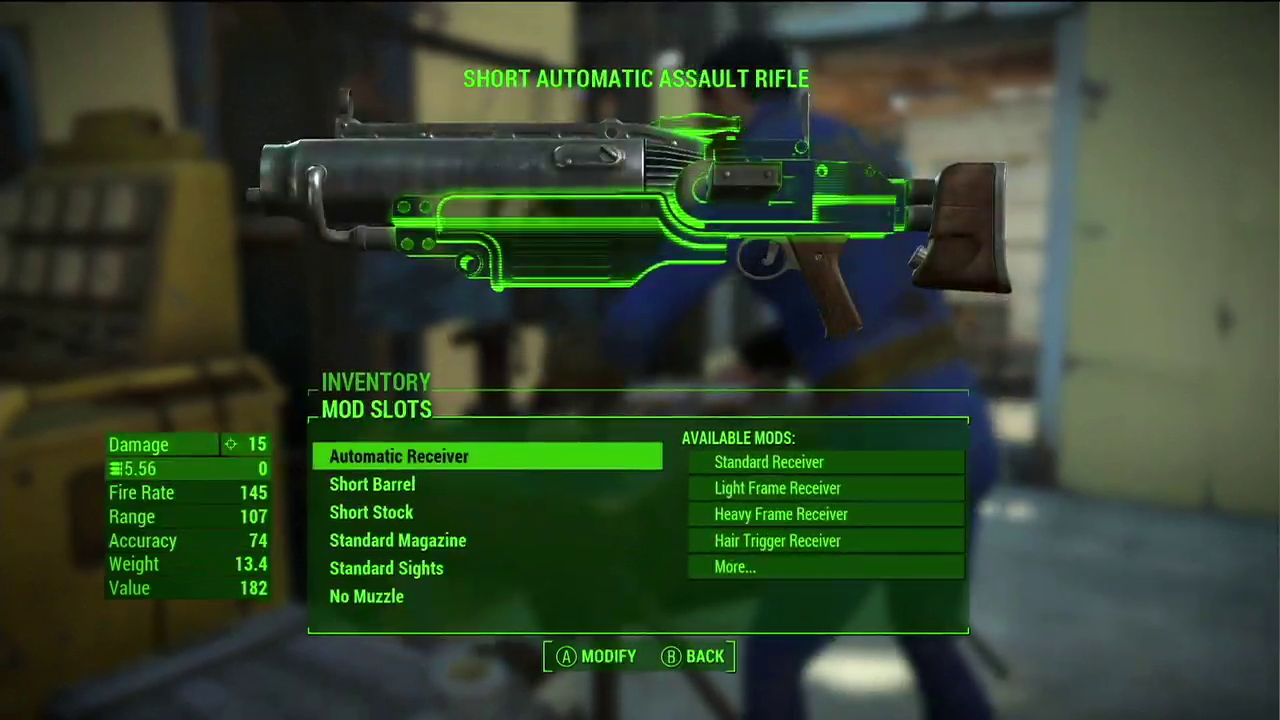
This is a little pearl of wisdom for multiple reasons. The first is naturally because single-shot weapons do more damage. The se cond is because single-shot weaponry is significantly more controllable, meaning more efficient accuracy and target acquisition. The third is because you’ll not be burning through as much ammunition, which means you won’t be buying and carrying as much.
Although the minigun looks and sounds badass, it’s next-to-useless against reasonably powerful opponents. In fact, because many opponents seem to have the same health amounts before the survival difficulty addition, you should realistically avoid anything fully automatic.
-
Ditch the power armor
Enemies hit like metaphorical trucks in Survival difficulty, which means power armor isn’t as protective as you would think. Unfortunately, power armor is a dampener on that stealthy/skirmishing approach encouraged throughout this guide. You’ll be worse at sneaking, noisier when walking and running, and remarkably good at getting shot due to your larger size and slower movement speed. Then there are fusion cores, of which you would need to carry several. They are 4 pounds each, weighing you down like a brahmin.
Regardless of these negatives, you’ll want to utilize any available power armor when you explore the highly irradiated area to the southwest. That solution is definitely preferable than going in with a hazmat suit, which reduces your protection to zero. That extra defense does help a bit against some seriously dangerous enemies, including deathclaws, radscorpions, redwidow bloodbugs, and “glowing ones” (feral ghouls).
-
Avoid larger weapons like the Fat Man and missile launcher
The Fat Man and missile launcher are notoriously heavy weapons. A fully modified missile launcher weighs about 45 pounds, and the Fat Man, although it only features one upgrade, weighs slightly less than that. The weapon weight alone is bad, however as pointed out previously in this article, mini nukes and missiles weigh a ton. Mini nukes weigh in at a hefty 12 pounds each, and missiles weigh 7. What makes this worse is the fact you’ll obviously require quite a few missiles or mini nukes to be combat ready. Typically around 10 missiles is acceptable. With the mini nukes, you’d need at least 3 to take down any real threat. That’s 70 pounds and 36 pounds respectively just for ammo.
-
Use cover until enemy’s reload
This is a standard ranged combat technique taught to every soldier in modern warfare. If you’re involved in a skirmish with an opponent who is opening fire while out or in cover, just wait behind something and peek out regularly without exposing your whole frame. Wait for a break in fire before leaning out and taking a shot or two. On Survival difficulty, this is something you should be attempting regularly.
-
Break line-of-sight when sneaking
Think of opponents as having mounted lights on their heads. When they turn to face you while in stealth, that reveals your position. This will help you understand how you need to hide from their line-of-sight. Fortunately, almost anything can be effectively utilized to hide from your opponent’s gaze. Whenever they face you and the gauge goes from hidden to caution, use walls, close doors, and even hide behind fridges and Nuka Cola vending machines. Almost anything will do. If the enemy loses interest, go for the ambush or sneak away.
-
Use Bottlecap Mines Effectively
Bottlecap mines pack a serious punch, and that’s infinitely usef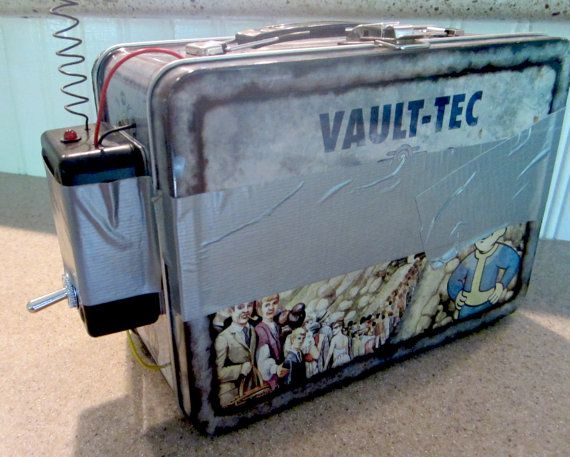 ul for this game. The important thing to realize with bottlecap mines is they’re quite rare and very powerful, so it’s best to be frugal in their usage. Always utilize these mines whenever you’re faced with extremely powerful enemies for your current level. Enemies like sentry bots, powerful feral ghouls, and mirelurks are useful targets. Be careful when placing one down that you have enough of a gap between you and the enemy, so make sure to place it before the enemy begins to charge. Also, make sure you line yourself up to the enemy after placing the mine; this way, the enemy will definitely walk over it since it will be walking directly toward you.
-
Get a silencer for all weapons as soon as possible
Guns are loud. It’s as simple as that. That’s why it pays to reduce your decibels by attaching as many silencers as possible. Make sure to go for the Gun Nut perk, and at rank 1, it’s already possible to place a silencer on a pipe weapon. At 2, it’s possible to attach a silencer to a 10mm pistol. At 3, you can outfit hunting rifle, and at 4, the combat rifle and assault rifle all receive silencers. Don’t forget that you might find a weapon with a silencer in loot or in a store, too. Typically, weapons appear with different tier upgrades a couple of levels before that Gun Nut perk rank is available.
-
Keep a combat knife, or similar weapon, for stealth kills
Melee weapons are extremely important, and with stealth involved, they’re ludicrously effective. Remember when the Ninja perk was discussed? With rank 3 of the Ninja perk, sneak attacks with melee weapons do 10x the normal amount of damage. With or without that perk, the general idea with melee stealth is to creep up behind opponents really slowly and click the attack button. If the attack is powerful enough, it should trigger a finishing animation, instantly killing the victim.
You should utilize stealth melee attacks whenever enemies are far apart, since they won’t hear the other getting hit like they would with gunshots, even silenced ones. Make sure, however, not to go for an attack on enemies close together since the other enemy will usually react to the attack. As a general rule, an enemy by themself can be removed this way, as can two enemies reasonably far apart. If they’re too close, avoid it.
This is also a good way to conserve ammo.
-
Use V.A.T.S. regularly
V.A.T.S. is quite literally a life saver, as you likely already know. It’s the ability to nearly stop time and attack a single enemy area multiple times. This is often extremely accurate and lethal and can save you against many opponents. It’s recommended to use this mode whenever you go toe-to-toe with a melee enemy giving you trouble, or a showdown with an enemy with a firearm. It’s highly recommended that you use it constantly on powerful enemies.
-
Sleep regularly in any available beds
This is something which you might learn the hard way like so many players. Game over in Survival difficulty happens so frequently, regardless of your skill level and cautiousness. The simplest solution is to attempt to use every bed you come across since these are your only available save point. Whenever you’re in your settlement, complete everything you need to do: store and withdraw ammunition, brew drugs, mod weapons, then sleep. If you sleep after you’ve completed your preparations, you won’t have to do it again if you’re defeated.
Always look out for bedrolls and mattresses once you’ve cleared out any remaining adversaries in an area and choose to sleep. You will regret it if you’re sent hours back.
-
Refreshing Beverages are your best friend
In case you haven’t realized, there’s an amazing healing item which  easily beats all others — the refreshing beverage. This wondrous refreshment not only heals a character with massive HP close to full health, but it also completely removes all radiation and dehydration. It even cures drug addictions. It can heal your character remarkably quickly as well, making a massive difference in difficult scenarios. You’ll need the Chemist perk to create one of these, as well as several other beneficial items, such as stimpacks, blood packs, and purified water. Considering the absurd number of benefits, you’d have to be mad not to create some.
-
When retreating, drop some mines
This tip is important in a number of ways. Not only does it allow you breathing room and time to heal and reload, but allows cover to be gained. It’s particularly useful when in confined spaces because you can guarantee a following opponent will trigger the mine, potentially killing it. It may seem obvious, but if the enemy is particularly powerful, drop several mines or a couple of more powerful ones. Remember, bottlecap mines are recommended against exceedingly powerful opposition, but plasma mines are also particularly powerful explosives.
-
Join any and all factions
Joining factions means more resources and allies. It also means having more places to sleep and access to some unique equipment. It’s highly recommended you join the Railroad since after a side mission or two, you’ll gain access to applying armor to regular clothing. The useful aspect of this is full body protection, with the added possibility, depending on the particular type of clothing, of adding multiple armor items on top. You could have an armored set of fatigues with a full set of combat armor on top easily. It’s recommended you seek them out. They also grant possibly the best stealth weapon in the game.
There’s also the Brotherhood of Steel and the mysterious Institute. They both have their individual perks, but it’s generally better to find the Railroad.
-
Throw grenades over low cover
If you’re under enemy fire and are behind a relatively low object, try lobbing a grenade. This is perfect because you remain completely unexposed and are capable of attacking. This takes some practice, but if you’re reasonably confident of your adversary’s current position, just aim and throw. First be aware of what your opponent is actually doing, though. Are they taking cover behind a post box? Are they approaching down the center of a street? In the former case, try to aim for their cover; in the latter, throw the grenade in the street, slightly ahead of the enemy. Take the Demolition Expert perk, rank 2, to gain a HUD trajectory for assistance.
-
Don’t engage powerful enemies
This one is up to you if you feel confident enough, but generally, powerful adversaries should be avoided. This is especially true early on, when equipment and perks are underdeveloped. If you absolutely must, make sure the enemy is completely isolated by removing all of its allies, then use stealth and explosives as much as possible. Always go for head shots if possible.
-
Scan enemy’s health by using V.A.T.S
This could be the most important element of any reconnaissance-related approach, and doing this is a useful way of de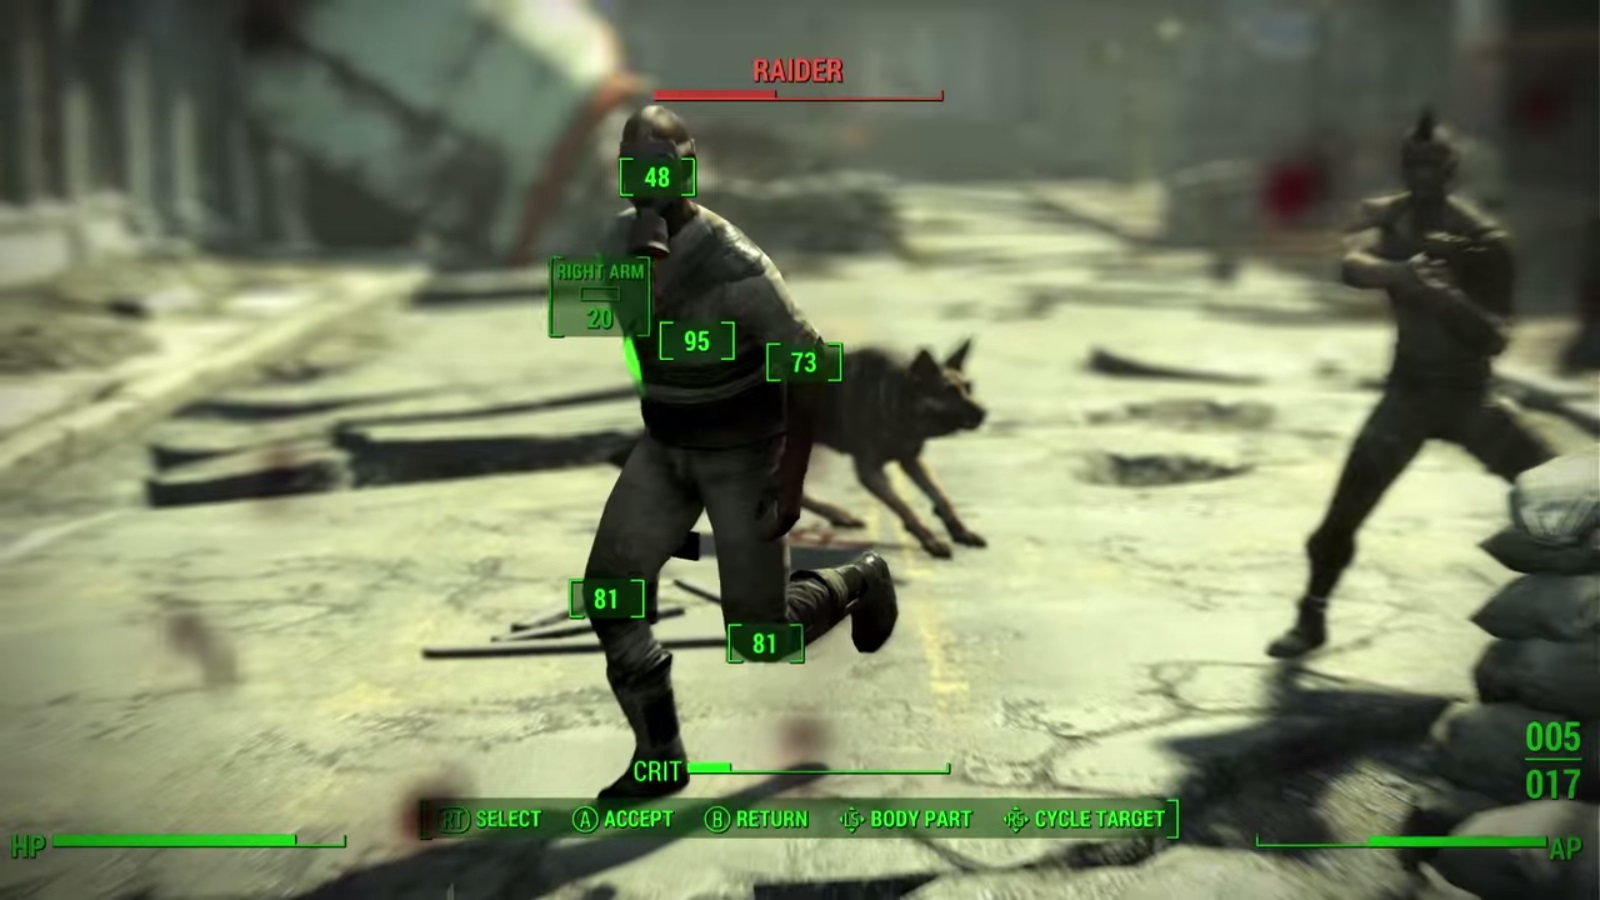 ciphering whether victory is even feasible, or how aggressive you may need to be. It’s also useful for figuring out if there are any other enemies hiding nearby. This prepares you ahead of time for potential ambushes and flanking opposition, allowing you to formalize a more tactical approach. Couple this with the perk which reveals more about enemies, and you’ll know their health, armor, and resistances.
-
Stay back from Super Mutant Suiciders
If there’s one enemy you don’t want to get too close to, it’s these guys, especially on Survival difficulty setting. If they get too close, they will detonate their mini nuke and will kill you instantly. The simple rule with these guys is employ the aforementioned method of using mines effectively to attract the enemy’s attention. Alternatively, just throw a grenade directly in front of them. With either method, stay as far away as possible.
A final, slightly trickier method is to shoot their mini nuke out of their hand, As their health is reasonably high when compared to early-level super mutants, the explosive option might be better than general gunfire, especially considering they typically travel in packs with regular mutants. You can use this explosion to defeat multiple mutants.
Resource Management
-
Break down all unwanted weapons, armor, and junk at settlements
It’s efficient when breaking down materials to drop them on the ground near workshops. Once you enter build mode and highlight the object, it’s possible to break them down into smaller components. This is not only faster, but it allows you more carrying space for anything important. It’s useful for traveling to a settlement that possesses a weapon or armor bench as well.
-
Store excess food and water at settlements
Think of this storage space as your rainy day fund. Generally before going on an adventure into the unknown, it pays to free up inventory space. Obviously, the benefit is you’ll be able to collect and bring more back, and returning to a cupboard full of food is a great feeling. Water can be rather heavy if you’re carrying a lot, so again, store some of it.
-
Always sell unwanted ammunition
Selling ammo is a big money maker in this game, and often it’s great for balancing transactions where a couple of caps may be owed either way. The most useful thing about this is that every bullet is always worth at least 1 cap, so even the worst ammunition is pretty profitable. If you’ve increased your charisma, found magazines, and attained some of the perks which improve bartering, you’ll start getting multiple caps for reasonably powerful ammunition. It’s always preferable to sell ammunition you aren’t going to use.
-
Spend your caps; don’t constantly save them
Like people say, money is just money, and therefore it’s pretty meaningless. While you may think differently, th e general rule is caps are needed to purchase stuff, so buy whatever’s required to make your journey easier. Every shop usually features a unique piece of useful equipment. For example, there’s a woman in Covenant that sells two useful, but pricey, pieces of combat armor. These pieces have unique benefits that you cannot attain elsewhere. Whenever possible, always check stores and purchase that rare equipment.
You should look out for useful junk and purchase anything with rare components you can carry. Always make sure to buy any adhesive.
-
Carry just enough ammo for your journey
If you’ve read the previous section regarding having the right amount of weapons, you’ll remember that having too many is not sensible for carrying capacity. Couple this with the added weight of ammunition, and you’ll be glad you minimized the number of weapons you carry. The idea is to have the appropriate amount of ammunition so you won’t run out too quickly on a fairly lengthy journey.
A solid way of deciphering how much ammo to carry is to identify the weight of each round and how quickly the weapon fires. A pistol has a reasonable fire rate, and the ammo is fairly light, so around 100 seems fine. A hunting rifle fires heavy ammo and has a slow fire rate, so 50 seems fine. A combat shotgun’s fire rate is between the two, but has heavier ammo, so around 30-50 is reasonable. Fully-automatic weapons will naturally require much more due to their high fire rate, so around 200-300 is fine. These are simply estimates. It’s ultimately up to you and your play style.
-
Carry water
Always carry water when traveling around the wasteland since it’s not called a wasteland for nothing. Water is heavy, weighing in at around half a pound a bottle. Carry more than ten of these and they start to become burdensome, but water is important, so it’s appropriate to balance the encumbrance with the necessity. 5-10 bottles is a good amount, and it’s always possible to find more in the field, especially with so many empty bottles available.
-
Carry food
Food is necessary. We all know this from real life. Eventually, your attributes will be negatively affected if you go too long without consuming something, so always carry food to eat in the field. Food is generally not as heavy as water, and that means you can carry more for less weight. Always attempt to carry several items that are of relatively high value, as this is an indicator of how filling they are. Realistically, it’s best to carry items with 0.1 weight values, like wild mutfruit and corn. A few pounds is enough.
-
Collect and carry all basic drugs
Collecting all the basics includes: buffout, psycho, jet, and mentats. The reason to collect them all is for crafting purposes. You can combine two, in various combinations, to create new versions. Examples include psychojet and bufftats. Always carry around all basic and crafted versions for in-the-field crafting and selling, respectively. Make sure to keep mentats for creating grape mentats.
-
Keep a couple of buffout handy
This one can be crucial because buffout increases carrying cap acity by around 30. Since there’s no fast travel, the likelihood of being stuck somewhere over-encumbered increases in Survival mode. When that happens, take some buffout. The effect should last around 8 minutes; with rank 1 of the Chemist perk, it should be 12 minutes. This gives you plenty of time to sprint to a settlement or store. If it runs out and the dreaded “over-encumbrance” message reappears, take your second batch.
-
Sell almost every drug you create
Drugs like psychojet and bufftats are extremely addictive and not recommended to consume. They’re better to sell and are worth a decent amount (around 60 – 70 each). Make sure to sell almost everything you create to stores, with the exception of antibiotics, grape mentats, and refreshing beverages. Avoid selling those three because they’re useful for curing diseases, increasing charisma, and healing incredibly quickly.
-
Carry just enough stimpacks for a reasonable journey
Stimpacks have weight now, so be aware of that when organizing your inventory at settlements. The exact weight is minimal, only 0.1 pounds per stimpack, but because they aren’t too effective at healing quickly now and are also dehydrating, it’s likely best not to carry that many. If you’re reasonably careful, 10 – 20 is a decent amount to carry around, and you could probably get away with less if you’re combat efficient.
-
Sell cooked meats
After collecting all that meat from the mutated horrors of the wasteland, the next appropriate step is to cook it. It’s up to you whether to use it as food, but it’s recommended you sell it at vendors whenever it’s possible. Meats from yao guai, deathclaw, radstag, and softshell mirelurk are particularly good for selling since they generate the most funds. It’s worth mentioning there’s a magazine that allows you to harvest two pieces of meat from defeated enemies, so keep an eye out for it.
-
Store useful ammunition in your main settlement
Your main settlement is a place you’ll be returning to frequently, so make certain to store any ammunition there whenever you don’t need to carry as much. Try to avoid selling any ammunition you use, though, since you might need it if your funds begin drying up. The amount you carry around is entirely up to you, but realistically, you shouldn’t have more than 10 or 20 pounds of ammo at once. Besides, returning to a cabinet or other suitable container full of ammunition is a good feeling. It will ultimately save you time and caps.
-
Collect and sell packs and cartons of cigarettes
Make certain to collect and sell every single pac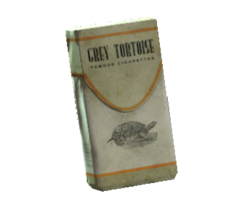 ket and carton of cigarettes possible. At 10 caps for a packet of cigarettes, along with the fact they only weigh 0.1 pounds each, selling them can be quite lucrative. The cartons are worth a maximum of 50 caps each and only weigh 1 pound. Never pass up the opportunity to carry as many as possible and, if possible, collect these over less critical types of junk.
Crafting in Fallout 4
-
Craft the best damage improvements available for your level
The reason the gun nut perk was recommended as soon as possible was because it allows you to utilize upgrade materials as early as possible depending on the rank. Levels 1, 13, 25 and 40 are when these perk ranks are unlockable, and that is exactly when you need to be crafting these weapon upgrades. Attempt to concentrate on increasing the damage amount by improving the receivers on your chosen guns. If upgrade materials are particularly fleeting, concentrate on damage improvements. As you level up, more challenging adversaries will start spawning, and you’ll need every advantage necessary.
-
Craft the best armor improvements available for your level
This is identical to the above tip, involving the armorer perk instead. At exactly the same levels, concentrate on upgrading damage resistance. Like before, concentrate on defense over anything else if materials are particularly scarce.
-
Craft scopes appropriate to the weapon
Crafting the appropriate scope is important depending on the tactical situation. Think about the different combat scenarios you could get into involving weapons suited for different ranges. Hunting rifles are suitable for engaging opponents at longer ranges than others, while pistols and smaller rifles don’t have the firing range of the rifles. Shotguns have the shortest range of the three, only being effective at a dozen meters.
The ideal scope for a hunting rifle is the longest one available, so you can zoom in as close as possible. With weapons like pistols, laser rifles and combat rifles, a short scope is ideal. This allows for quick target acquisition coupled with higher firing rates. Another aspect of shorter scopes is that target tracking is easier, since camera panning is quicker. Finally, anything for close combat purposes, such as shotguns and assault rifles, should ideally have reflex sights for snap aiming.
-
Craft the “pocketed and deep pocketed” upgrades to every available piece of armor
You’ve read that inventory capacity has been reduced in survival difficulty several times now, and that’s good, since it’s genuinely a big deal it has been reduced. That’s why it’s important to find alternatives to bolster your carrying capacity. Hopefully, you’ve already considered taking the lone wanderer and strong back perks, as well as increasing your strength attribute whenever possible. All of that is helpful, but you can also increase your carrying capacity by crafting upgrades to your armor pieces. It’s possible to increase your carry weight by 5 for each “pocketed” armor upgrade, as well as “deep pocketed” which goes up by 10.
Since it can be applied to all arms, legs, and chest armor pieces, craft it to all for maximum effect.
-
Craft as many grape mentats as possible
Grape mentats improve buying and selling prices by 10%, as well as increase your character’s charisma by 5. The combination of t hese effects make both bartering and coercing people significantly easier. It’s best to craft them whenever possible. Remember the recommendation to collect as many hub flowers as you can? They’re used in combination with a bottle of whiskey and some mentats. Go nuts once those ingredients are gathered, you won’t regret it.
-
Craft as many antibiotics as possible
Diseases are an annoyingly regular occurrence, and it always pays to have a few antibiotics to counteract those nasty bacterial infections. Having these in the wasteland is important, as diseases can spring up without so much as a warning. Since they only weigh 0.1 pounds each, carrying several won’t weigh you down. It takes 2 glowing fungus, some purified water, stimpacks and blood packs to craft one; so make and carry a few.
-
Craft shorter barrels and stocks for your combat weapons
In close combat, a shorter barrel is better for reducing aim drift. Which is when your guns move gradually upwards with prolonged firing. The weapon will be more controllable for close combat engagements. A shorter stock (the back of the gun) also makes the firearm more suitable for fast movement and firing from the hip. Always remember, short is better for close combat engagements.
-
Craft longer barrels and stocks for your ranged weapons
In longer-ranged combat, long barrels are preferred for improving shot distance and superior shot accuracy. When it comes to stocks, longer stocks are preferred for ranged combat since it reduces per-shot recoil and steadies the weapon considerably over shorter stocks. For longer range weapons, always use longer barrels and stocks. It’s not recommended using this setup for short range engagements.
-
Craft as many drugs as possible
This was briefly touched on earlier. Crafting and selling drugs is lucrative. Many can be collected and crafted into stronger, combined versions. Make certain to utilize all those you’ve collected and combine them at a chemistry work bench. Two highly recommended to combine are jet and psycho, which make psychjet. Other options are buffout and mentats (making bufftats) and buffout and jet (making buffjet). Finally, there is also psychobuff, by combination of psycho and buffout. Remember to save mentats for grape mentats and also some buffout in case of over-encumbrance.
We don’t condone drug dealing, but this is a game, so just go with it.
Settlements Strategy in Fallout 4 Survival Mode
-
Establish settlements at Red Rocket Truck Stop or Sanctuary quickly
When you start your adventure into the wasteland, you’ll emerge from vault 111 as far to the northwest as possible. The first objective will be to travel to your character’s previously lived-in home slightly to the southeast. There you’ll find Sanctuary. This settlement is perhaps one of the best in the entire game since it has all necessary workbenches, room to grow food, and even a nearby river to build a water purifier.
Once you leave to investigate the nearby town of Concord, you’ll come across a fuel station known as Red Rocket Truck Stop. This is personally my favorite for many reasons. First off, it is fairly isolated, small, and unassuming. Secondly, it’s small, meaning it’s minimalist and easy to take care of. Few, if any, settlers will stay there. The best reason is that all workbenches are clustered together in one location, meaning immediate access without traveling between houses.
-
Have a main settlement to regularly return to
The choice of a main settlement is up to you, but remember, the first two you unlock are useful for all the reasons mentioned above. Ideally, a main settlement should possess all of the stuff you need, including weapons, armor, power armor, a chemistry station, and a workshop.
-
Establish as many settlements as possible
Since fast travel is disabled, you’ll be travelling miles at a time. By unlocking as many settlements as possible, this allows you the ability to store anything considered important at workshops. More importantly, it allows you to break down any available weapons, armor, and junk into individual components, which are then significantly lighter to carry around.
-
Create at least one bed at every settlement
Beds are typically available in most settlements, so this normally won’t be a problem. If there isn’t one, always craft a bed with availa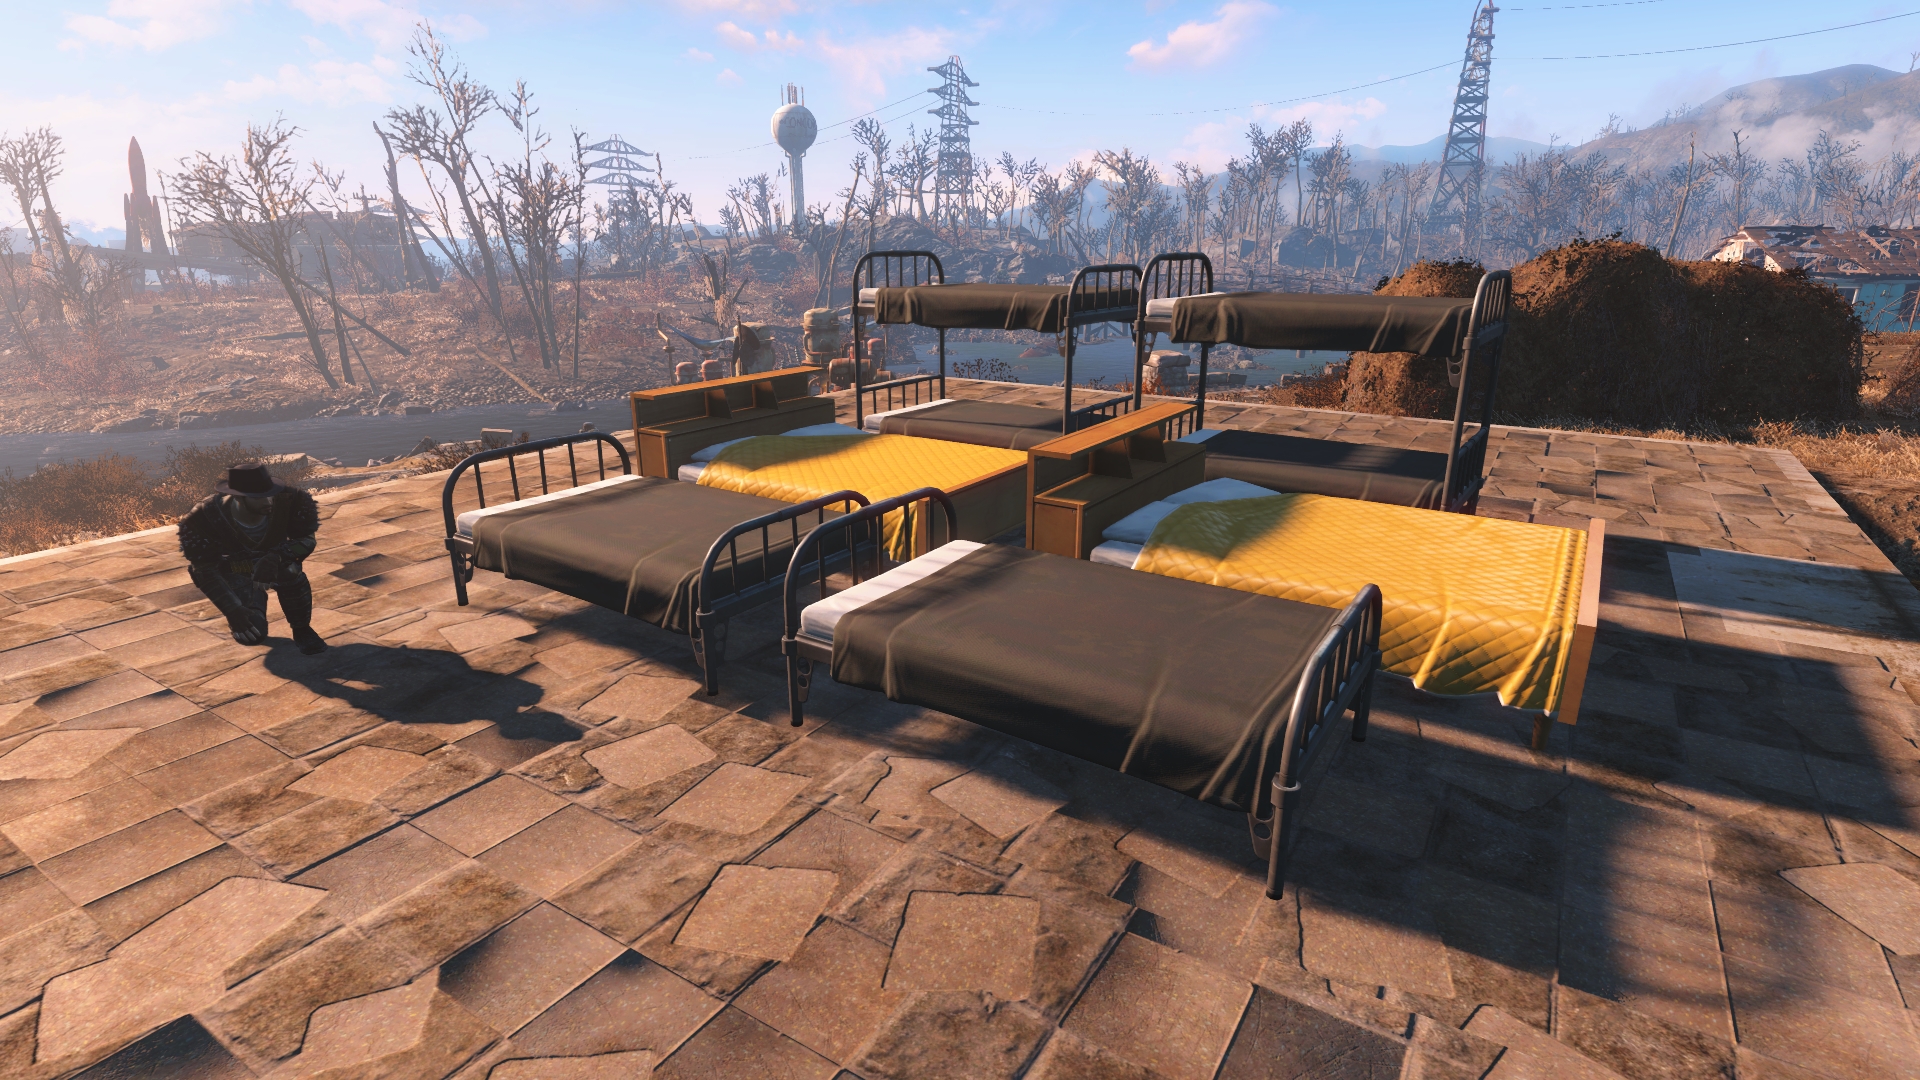 ble components. Typically, the materials required will be steel and cloth, so start dismantling cars, signs, and other metallic items to combine with cloth items, like pre-war money and dish cloths. Naturally, creating a bed is important for saving purposes. Think of it as adding extra nodes to a checkpoint system. The more nodes you have, the more checkpoints to keep you safe, and the less time you’ll spend back-tracking.
-
Don’t go to the rescue of settlements
This one probably sounds mean, but it really isn’t, as settlers cannot be killed by monsters. Unfortunately, you can, and as there are often many that spawn that scale with your character’s level, you will almost instantly be killed. It’s so risky that it isn’t worth being a hero.
-
Always build at least one water pump, or a larger purifier if possible
It really is helpful to have a water pump in every settlement. Sometimes they will already have one, but if you come across a settlement that doesn’t, try to build one immediately. This is similar to the creation of beds above since it’s like a network of water pipes, and each one leads to a different source or settlement. Obviously, water means no dehydration, a boon in itself, but you can also create a water purifier. These take more components to create and a pool of water or river, but they also create more bottles of purified water than pumps.
-
Visit established settlements regularly
Large settlements have dedicated store owners whose inventories regularly refresh and also have hotels available. They have crops you can repeatedly harvest and water pumps you can continually utilize. They’re the perfect inventory refreshers and save points.
-
Collect all available fruit and vegetables
Whenever you’re in your settlements or ones that are already owned, harvest as many fruit and vegetables as possible. No matter the type (melon, tato, mutfruit, corn), grab them all. Even if it isn’t your settlement, settlers won’t complain about you harvesting every single crop, so help yourself.
-
Plant some vegetables, but keep some stored
Always plant vegetables whenever possible because you’ll get more once they’ve grown. However, it’s also important to keep as many as needed. You still need to eat, and there’s also wonderful vegetable starch to create.
-
Keep a minimal number of settlers
This could sound slightly greedy, but the more settlers you have, the more food and water they’ll require. That means you need to have more water pumps, purifiers, and more food planted. It also means you’ll need more beds and shelter to keep them happy. If you want to avoid all of this and have more resources available for yourself, minimize the number of settlers. Having less will also make the place more straightforward to defend, if that’s your intention.
—
There you have it. These were 111 tips to survive in Survival difficulty in Fallout 4. If this guide has helped you, don’t forget to share it with your friends.
If you think there are even more tips than 111, we’d love to know. Leave your replies in the comments below.





Published: Jul 4, 2016 05:16 pm