Move over mosquito vampires — its time for abominations from beyond the stars to invade Darkest Dungeon with The Color Of Madness DLC! Taking heavy cues from the Lovecraft classic The Colour Out Of Space, a new area near the Hamlet has been overrun by evil shards of cosmic evil flung down from the heavens.
Of course new DLC means new bosses, and as with any of the big bads in Darkest Dungeon, you need a strategy ahead of time if you want any chance of coming out alive.
When building your boss-killing party, keep in mind that several major gameplay tweaks have arrived along with the DLC. Notably, stuns have been nerfed so they can’t be abused as heavily. The enemy recovery buff is now much more effective, so you can’t stun an enemy repeatedly. Abominations can also now join a group with religious characters, so there’s no more need for mods to do this for you and your party lineup options have expanded.
With those major changes in mind, lets jump into how to defeat the new Color Of Madness bosses!
The Color Of Madness Boss: The Miller
Your party automatically camps at the curio in the room before the fight with the Miller, so make sure to check what camping skills you have assigned before taking this quest! The Millers’ stats are as follows:
- HP: 143
- Stun Resist: 95%
- Blight Resist: 60%
- Bleed Resist: 220%
- Debuff Resist: 60%
- Move Resist: 70%
The Miller gets two actions per turn, so your typical debuffs won’t be as helpful since they will tick down faster. Bleed would be a great way to go, but at 220% resist you aren’t likely to ever get a bleed effect to take hold. Unless you’ve got a really high chance to hit with a blight effect, straight damage is probably the best way to go.
His primary attack is The Reaping, which hits the whole party, so a group heal effect is useful in your lineup. The Harvest does a small amount of damage to a single character, but heals the Miller, so be on the lookout for a sudden health surge.
He summons 17 HP Farmhands who go in the front positions, along with 8 HP Sleeper’s Heralds, moving the Miller to the back, so make sure you can hit the back positions.
While they have less health, the Sleeper’s Heralds have higher protection and much higher resistances to all effects. Their Reality Bend skill can increase your stress and cause debuffs very quickly.
If you kill the Farmhands, the boss will use The Master Beckons to turn their corpses into undead Scarecrows (if you don’t destroy the corpse in the same turn). Scarecrows that are destroyed can likewise be turned into new Sleeper’s Heralds, so if you are taking out the underlings first, make sure to destroy the corpses.
You might be thinking that just leaving the Farmhands alive is the best course of action… except that he will use Winter’s Breath to turn them into 25 HP Frozen Farmhands with better stats.
To beat this boss fight, you have to juggle destroying the minions against getting in enough attacks on The Miller that he doesn’t heal himself back up to full with The Harvest.
If you don’t have a ton of healing abilities, focusing on the Miller over his minions is the way to go. When he goes down, so do his minions, so you don’t need to worry about dying after taking out the boss. Having a character to focus solely on the Miller who is crit-heavy with critical chance attacks and crit-boosting trinkets can make this an easier battle.
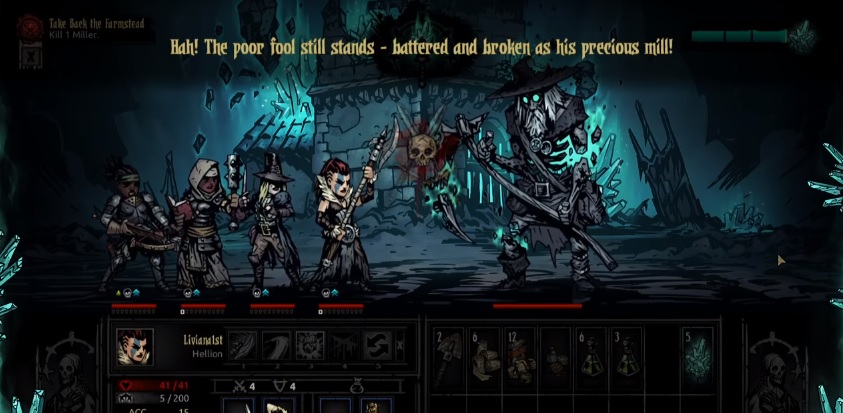 Fighting The Miller (thanks to BaerTaffy for the screenshot)
The Color Of Madness Boss: The Thing From The Stars
This boss wanders the Farmlands and can be encountered randomly. The Thing From The Stars’ stats are as follows:
- HP: 128
- Stun Resist: 85%
- Blight Resist: 40%
- Bleed Resist: 33%
- Debuff Resist: 40%
- Move Resist: 25%
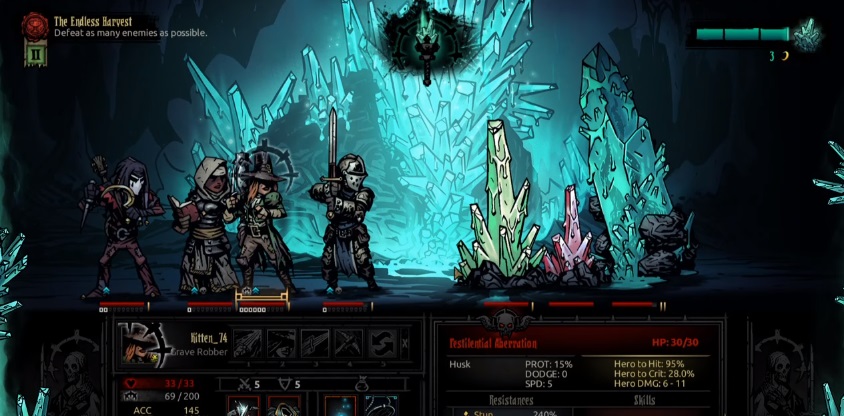
During the battle the Thing will summon 6 HP Crystalline Aberrations, which have huge resistance against stun, bleed, and debuff and will move the boss back a position. You want to take these out quickly. Their suicidal Unstable Resonance attack destroys themselves, but deal high damage and stress.
The Thing can also cause blight, so have some antivenom on hand. His Paralyzing Shard attack does a small amount of damage, but increases stress and can stun, so be prepared to have one character unable to act frequently throughout the fight.
There’s less strategy to this fight than in many other bosses, and nearly any party combo can work out here. With two actions per turn and low resistances, Bleed and Blight can be your best friends in this battle. A debuff like Weakening Curse from the Occultist or Bellow from the Man-At-Arms can also make this battle more manageable.
A combination of all three abilities consistently being used take this from an incredibly difficult battle to something akin to the Darkest Dungeon version of a cakewalk – still difficult, but at least possible.
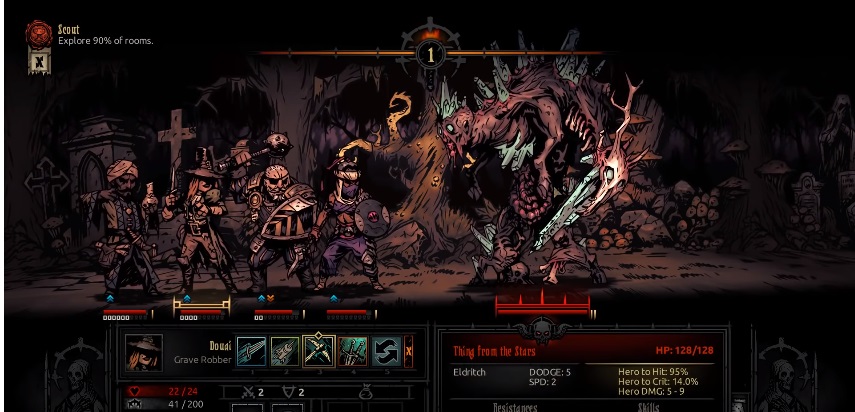 Fighting The Thing From The Stars (thanks to Game-Wisdom for the screenshot)
The Color Of Madness Boss: The Fracture / The Sleeper
This is a very strange fight, as the boss doesn’t deal direct damage to you, but instead spawns other creatures that grow over time and then eventually damage you in a suicide move. The Fracture’s stats are as follows:
- HP: 115
- Stun Resist: 140%
- Blight Resist: 120%
- Bleed Resist: 240%
- Debuff Resist: 90%
- Move Resist: 140%
First up, the Fracture will drop Seeds Of Fury to create three Focus Points of 25 HP each in front, shifting him to the far back position.
The boss will then use Befouling Tint to upgrade them to red or green versions with even more health. They can be upgraded multiple times, and each upgrade heals them completely. Oddly, the third form has less health than the second, so if you like risk/reward, you can take them out a bit easier at the third upgrade with a lucky crit.
When they hit the third upgrade, their next action will be to break and deal damage to the whole party in addition to a stun or blight effect, so taking out the Focus Points before they become overwhelming is critical. Balance fighting the shards with dealing damage to the Fracture when possible to eventually finish the battle.
When the Fracture goes down, it morphs into the Sleeper (the comet that landed), which has 225 HP. It only gets one action per turn, but the attack deals large amounts of damage to whole the party. The best way to take this out is to go for multiple crits in a row. Small amounts of damage over time will just lead to disaster, as the Sleeper needs to go down in a handful of turns or you are guaranteed to die.
Do you have any other boss fight strategies for The Color Of Madness? Let us know your best Darkest Dungeon boss tactics in the comments below! And check out our other Darkest Dungeon guides here on GameSkinny.





Published: Jun 19, 2018 04:05 pm