DLC is finally starting to land for CoD: WWII, offering even more 1940’s firefights in Germany and beyond! The free Resistance event is running concurrently with the full, paid Resistance DLC, offering up fun new options like the prop hunt and the Darkest Shore zombie map.
A new zombie level of course means a whole new Easter egg hunt is ready to explore. Now standard in all CoD titles, these Easter eggs keep getting longer and more ludicrous as time goes on. Darkest Shore’s EE may not be the worst one, but it does take a lot of work to get to the end.
If you aren’t that devoted to all the tiny details, it is possible to complete a shorter, more casual side of the Easter egg and unlock the Black Winds to Darker Lands trophy. Fully completing the Easter egg and escaping the island before the bombing starts instead unlocks the Making History trophy. For that version, get ready to devote quite a few hours of your life to CoD WW2 zombie mode.
If you missed the complex Easter egg for Call Of Duty WW2‘s first zombie map, check out the full guide over here.
The Darkest Shore Full Easter Egg Hunt
Unlike other maps, this one starts immediately with zombies on the beach before you actually start the wave, so be prepared to rush down and take out all the enemies near the dead whale.
If you just use your axes and pistols (ignoring the machine gun turrets), you can unlock the I Got This achievement.
From there, it’s time to start the actual Easter egg hunt! Be sure to check the notebook to see what parts you currently have and see if you are missing anything on the casual or hardcore sides.
Turn on Power / Activate Pack-A-Punch
This is always the first course of action in any given CoD zombie map. To turn on power, flip the switches on the walls inside the U-boat pens and the artillery bunker.

Turning on the first power switch
With the power on, take the mine cart (watch out for the bomber zombies!) to one of three locations and grab the Elektroschnalle fuse on the floor, then repeat the process with the next two locations:
- Submarine Pen to Bunker 1 (Graben)
- Beach (Strand) to Submarine Pen (U-Boat Hohle)
- Bunker 1 (Graben) to Beach (Strand)
After collecting the three Elektroschnalle, use them on the machine found by Bunker 3 to fix the elevator, which will bring you the Pack-A-Punch for upgrading weapons.
Construct Ripsaw Weapon
Head down to the Artillery Bunker to grab the Ripsaw wonder weapon’s handle near the armor station, then grab the blade component on a dead body in Bunker 3 by the wall gun.
With both parts in hand, find the weapon-crafting bench in the tunnel by the U-Boat Pens to construct the weapon. After constructing the saw, use your overpowered execution kill on random zombies until a spine with an attached fuse drops.
Take the fuse back to the saw-crafting bench and insert it at the start of a wave. Kill zombies near the bench to collect souls until the upgraded Ripsaw is ready to go.
Unlock The Door
Head down the mine cart track to locate an area on the map marked as an “ancient door.” Lure a bomber zombie over to the giant ammunition shell by the door’s location, and shoot it there to open the door and immediately access the new area. It’s easy to miss since you’ll be on the track, so prepare to do this more than once.
Once inside, a new object will automatically appear in your notebook to mark your Easter egg progress. In addition to that Notebook entry, search the room for a monk’s head on the floor, then take the head to the freezer in the U-Boat Pens.

Shoot a bomber zombie here to open the door.
Use The Cannon
In the U-Boat Pens, activate the machine and then lure bomber zombies up by the cannon. Keep killing zombies in this area to charge the cannon, then take a look at the map on the wall.
Here things get a little tricky, as there isn’t one specific answer to follow. You need to figure out how to configure the cannon to fire on the ship based on its position, using the table on the map to calculate the proper distance.
Activate the devices on the sides of the cannon to set your calibration and then fire. If you mess up the positioning, just kill more zombies to charge the gun and redo your math to fire again.
Son Of Nerthus
With the German ship destroyed, check outside the entrances to all the bunkers until you find a radio component (the exact bunker is randomized on each playthrough).
The second piece of the radio can be found by firing the Ripsaw at the arm of a corpse dangling from the edge of a cliff face. Take both pieces to the table near the Bunker 2 entrance to construct the radio.
Next, head to the cliff edge by the 750-point flak cannon, and activate it to fire on the rocks nearby. Run down to the area where the debris lands and pick up the first Son Of Nerthus tablet, then take it to the hidden room behind the ancient door to place it on the hole in the wall.
There are two more holes to fill with tablets still, though. One can be found by using charged melee attacks on enemies until a red spine drops. Place that spine in the big skull bowl in the U-Boat Pens area and wait for a zombie to appear, but don’t kill him! Instead, follow him as he runs into the water and then comes back out with the second tablet.
Place that tablet in the secret room, then head to the cliffside area with the Ripsaw and fire it at the red rocks. The exact rock to contain the third tablet is randomized, so keep shooting at them until you find the right one, then take that tablet back to the secret room behind the ancient door.
Sacrifice Zombies
For this next part of the Easter egg, you need to sacrifice three different types of zombies — pest, wustling, and meuchler.
For all three, use the Ripsaw’s charged melee attacks to kill zombies until the appropriate type of spine randomly drops. As before, place the spine in the skull bowl in the U-Boat Pens area.
Pest Zombie
When the pest zombie spawns, use the Ripsaw to fire at the colored fuse boxes to send a fuse flying towards him of the correct color. The zombie will then change colors and run to a new area, where you have to repeat the process of firing on a colored fuse box to again change his color.
You will have do this five separate times, sometimes aiming your shots to ricochet off other fuse boxes first to get the right color in the zombie’s path.
Once that’s all done, return to the secret room and kill the pest zombie to grab the Anointed Pest Head and set it on the sacrificial hook.
Wustling Zombie
When the wustling zombie spawns, lead him around the map to the following perk machines in this exact order: Kugelblitz, Faustblitz (Artillery Bunker), Laufenblitz, and Lebenblitz.
If he tries to go to a different area out of that order, fire at him to herd him in the right direction. After checking out the final perk machine, he will disappear.
At this point, head back to the secret room, and again kill the zombie and place his head on the sacrificial hook.

Following the zombie to a perk machine
Meuchler Zombie
When this zombie spawns, it’s time to play a game of hide and seek! He will rush off into the fog, and it’s your job to find him by following the screams.
When you find the zombie, hit him once with a melee attack, and then repeat the process two more times when he hides again. Just as before, go to the secret room, kill the zombie, and set the head on the sacrificial hook.
Darkest Shore Easter Egg Boss Fight
We’re almost at the end for the inevitable big bad boss fight! Head back to the freezer and grab the monk’s head and hang it on the final sacrificial hook to unlock a door.
After fighting the zombie wave, you can now grab the Barbarossa’s Pommel item inside the room. Go back to the radio you built before and throw the Pommel at the radio, then have the full team interact with the radio to activate the boss fight.
As with all the CoD zombie mode boss fights, there are multiple phases. Fight off the zombies and meuchlers until the mine cart is activated and can be used, which starts the next phase. Repeat this process four times to finish the fight and complete the hardcore version of the Darkest Shore Easter egg!

The zombie shenanigans aren’t done yet — there’s still another map coming later this year!
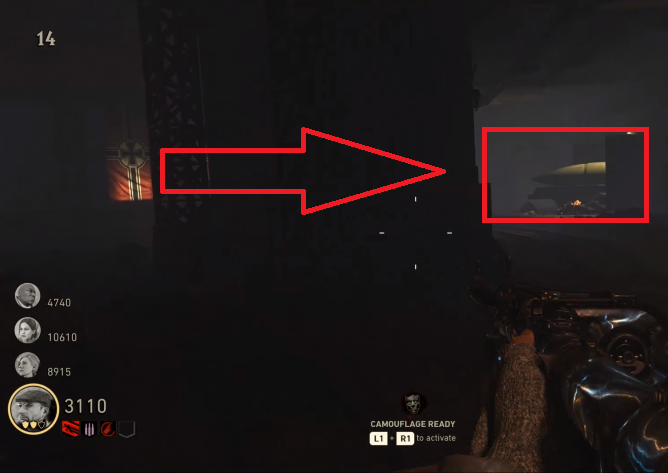
Special thanks to YouTuber MrDalekJD for the screenshots above. Did you find any other aspects to the Easter egg hunt that we missed? Let us know in the comments below!


Published: Jan 31, 2018 01:23 pm