I’m playing Black Ops 4 in preparation for my review, there are a few things that stand out in the multiplayer portion, and one of them isn’t new, but because of the changes made in this new iteration, there’s still no doubt the Specialists change up game flow.
That being said, this time around many of the Specialist abilities take a supporting role to the gunplay, and the only ones who can have a lasting impact are the actual support abilities, like Crash’s heal or Torque’s barricade and razor wire.
I’ve divided the Specialists into three categories, based on the Team Fortress 2 system for simplicity. The categories, therefore, are Attack, Defense, and Support.
Before we get started, please remember: all of these strategies assume a basic familiarity with the maps. You’ll be hard pressed to get the most out of the Specialists without one.
Now, first up is Attack, made up of Ruin, Firebreak, Battery, and Seraph.
Attack Specialists
The primary goal of these Specialists is to be on the battlefield at all times, laying down fire and explosives and dealing as much damage as possible in the shortest amount of time. Mobility is key, as is pure output.
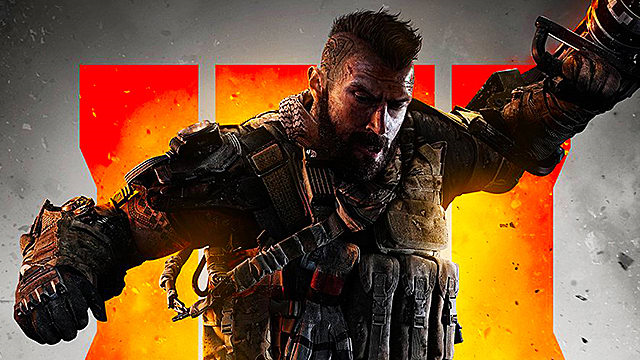
Ruin: First to the Fight
Getting the most out of Ruin is fairly simple, as he’s probably the most straightforward Specialist on offer.
The strategy for most matches is as follows: get to the first major firefight first with the grappling hook, take the first fight and win it, then reposition either to the flank or toward the enemy’s blind side with a second use of the grapple.
The nuance comes in the most valuable pair of traits a good shooter player can have: bravery and unpredictability.
Ruin excels at both.
He can get most places on the map before anyone else, faster than anyone else, more consistently than anyone else, so make good use of the increased mobility the grapple offers.
If you know there’s a small squad of enemies coming, grapple over their heads, make a quick turn while they’re disoriented, and take one or two out.
Alternately, you can grapple to safety exactly when your opponent doesn’t need you to: right after they’ve wasted all their ammo, lost some health, and now find themselves alone and out of position.
The key with Ruin is to never be in the same place for more than a single gunfight because at that point you might as well be playing anyone else.
Using his Specialist Weapon, the Grav Slam, is as cut and dry as any other one-shot ability. Find enemy team, press buttons, get kills.
You will do well combining a grapple into a slam because there’s no easier way to secure at least two or three kills. Be aware also that the slam has some ability to go through terrain, but not solid walls.
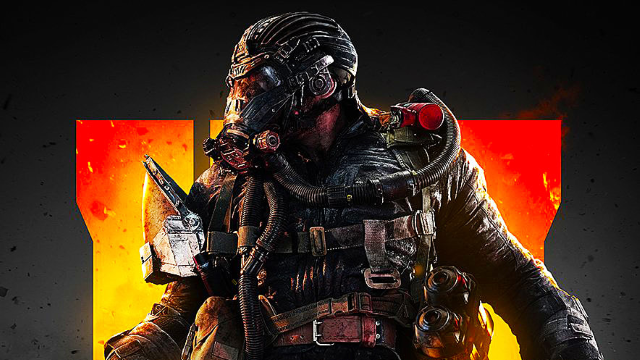
Firebreak: Fire. Lots of it.
If you remember Firebreak from Black Ops 3, you might be a little disappointed in this variation. His flamethrower doesn’t have the range or the instant killing power it did in the previous title, but it’s still quite deadly in the right hands.
His Reactor Core ability is, however, quite handy so long as you spare a little time to learn where and when to use it.
In short, go to common chokepoints when you know there’s at least one enemy there and fire it up. You’ll deny them both access to the power position and a good portion of their health as well.
Reactor Core also provides Firebreak with a good amount of armor, reducing incoming damage by at least half.
If you can outmaneuver your opponent, activate the ability and listen to them burn, screaming in frustration, not at the flames but their own failure.
The Purifier still functions as a good area-clearing weapon, and because there’s no way to super jump in Black Ops 4, it provides a fair bit of visual cover as well.
The increase player health dulls its edge a fair bit, but in close quarters there are few better options than quickly swiping back and forth across a spawn, incinerating everything you can see.
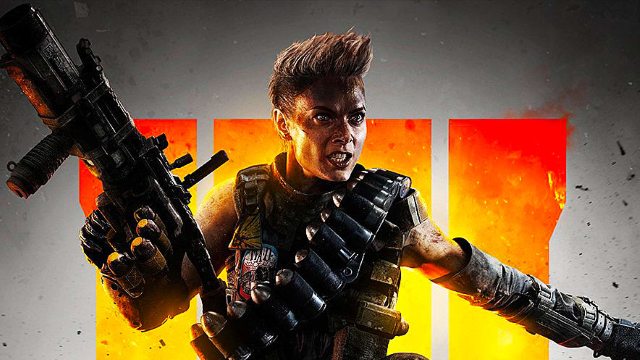
Battery: Splash
“Throw grenades, watch explosions” might sound like an easy ask when it comes to strategy, but like all of the Specialists in Black Ops 4, there’s a little subtlety to consider when playing as Battery.
First are her Cluster Grenades. Their cooldown isn’t too long, but it isn’t short, either so you have to choose carefully when and where you use it. Take care about its short throw distance as well, it can be deceiving.
There are two primary strategies when it comes to making the best use of the Battery’s grenade, and the first one is as old as CoD itself. Pick a known hot spot, wait until you know someone’s there, and take them out.
The second might seem like a waste of a perfectly good lethal ability, but momentary area denial is a valuable use of any grenade.
Make your enemy think twice about moving through that doorway, or toward you and your friends, with a well-placed set of explosions.
You can also lock someone down in a corner for an easy kill if you put the blast even somewhat close to them.
As for her Warmachine grenade launcher, your aggression will pay dividends. You can get kills either with direct impact grenade hits or by bouncing them up and around your enemy.
If nothing else, holding that much explosive power should give you the confidence to take on all comers. There’s not really a bad way to use the Warmachine, so don’t be afraid to experiment.
If I had to narrow it down, the most satisfying way to play Battery is to go for direct impact grenade launcher kills that lock down an objective or sightline.
My second favorite way is to use it the same way grenade launchers have been used since the early days of Quake: blind spam. Yes, it’s annoying. Yes, it’s effective. Yes, you will laugh and your enemies will hate you.
That’s kind of the point, though.
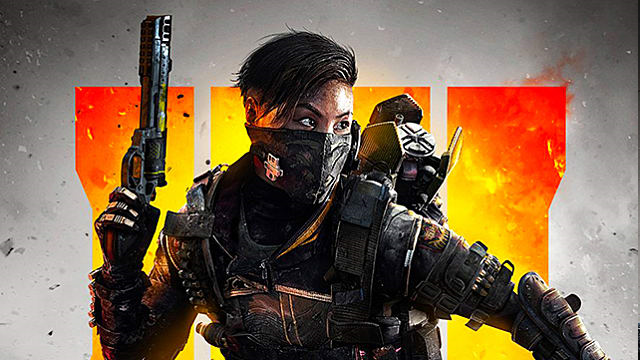
Seraph: Staying in the Fight
Seraph is something of a mixed bag, blurring the line between attack and support heroes as a hybrid, though she sits more in the first than the second.
Her Specialist Weapon, the Annihilator, is a one-hit kill from any range to any part of the body, but the Tac-Deploy is a more passive tool, can’t withstand even the smallest amount of enemy fire, and can’t deal damage of any kind for any reason.
In fact, unlike Ruin’s grapple, it’s actually more beneficial to the team than it is to her. Every aggro player’s nightmare.
The difference is all about timing. If you can place a Tac-Deploy beacon in just the right spot at just the right time, you can make more of a difference than all six Annihilator shots.
Especially in objective modes — but not limited to them — having ready access to a power position or to the primary objective can turn the tide of battle.
Aggressive beacon use is not necessarily encouraged, as it will be destroyed quickly, but getting a high-skill player in the right place at the right time is valuable for its own reasons.
Don’t let these facts dissuade you from making liberal use of the Annihilator. Indeed, combining a well-laid beacon with six one-shot kills is a potent means of obliterating all opposition.
Like the Warmachine, I prefer a heads up approach to using Seraph’s Specialist Weapon, if only because being close range makes actually getting the kills easier by virtue of bigger targets.
Defense Specialists
Whether you want to cut off entire pathways on a map or just make a single objective or power position incredibly unappetizing, Defense Specialists are your go-to. They are: Torque, Ajax, Nomad, and Prophet.

Torque: (Non-)Traditional Fortifications
Out of all the Specialists on offer, Torque’s strategies could very well have the most in the way of options. You can deploy his abilities anywhere and they’ll do wonders to dissuade your enemies from getting anywhere near them.
Though popular spots will eventually come to dominate the meta, it is the player who uses them unconventionally that will always win.
Razor wire is fairly self-explanatory, but even poor placement can have its uses. An ill-timed jump, slide, or panicked getaway can go very badly if you suddenly find yourself caught up in sharp steel.
For best results, of course, you want to cover doorways and entrances of all kinds. Blind corners, when you can find them are also great ways to make someone’s day that much worse.
Bear in mind that you won’t be killing many people with razor wire. That’s not its purpose. It’ll happen, just don’t count on it.
You can, however, funnel people into Torque’s Barricade, where they’ll cook alive.
Barricades are, oddly, easier to take out than the razor wire, but that’s mostly because they’re such a large target and you’ll be deploying them in much hotter zones.
In game types with points to capture, a single Barricade can halt an entire push until the thing’s been dealt with.
Again, with blind corners and smart use of razor wire, you can even get three or four kills with it before the enemy team wises up and just shoots it to pieces.
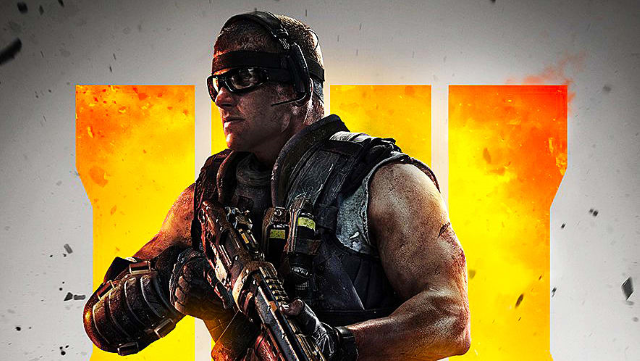
Ajax: Single-Man Lockdown
Ajax brings the underused 9-Bang grenade and overused riot shield into the modern age, both with a twist. Simple but effective, the implementation here makes for one of the most annoying-but-hilarious class setups in Call of Duty history.
Strategies here are primarily harassment-based. The 9-Bang is throwable like any other ‘nade or cookable for a prolonged, powerful effect.
Your enemies won’t be able to heal with their other hand trying to block the light, and the full flash pushes ten seconds if you’re caught in the middle of it.
Options are as numerous as there are ways to throw a grenade, but again, aggression is your friend. Pre-flashing a room is all well and good, but taking on a whole team after a full-charge flash is one of those feelings you don’t find in many places.
That said, the most effective use is the tried and true preparatory flash, so don’t be afraid to fall back on the classics.
The riot shield, while a series staple, now comes with handy gun port, and completely covers the feet. Crouch and approach your enemies at an angle and watch as they fire uselessly at three inches of future-steel.
Remember that unless you can track them properly, a player who tries to jump shot you is your worst enemy. And your back is completely exposed, so unless you know you’ve got backup, try to keep the enemy in front of you.
Do that, and you can solo cap an objective, get at least three to five kills with the 100 rounds in your fully automatic pistol, and become one of the biggest pains in the neck this side of Modern Warfare 2.
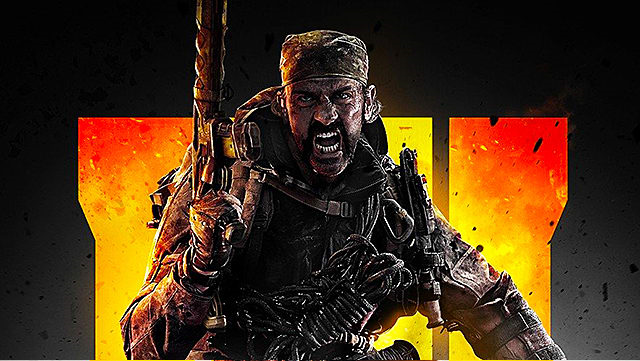
Nomad: A Dog of Mine
I’ll admit, I don’t find Nomad particularly effective. The dog’s AI feels like it needs adjusting and the mesh mine, even though it’s an almost guaranteed kill if it goes off, is pretty easy to see, a first for Treyarch plantable explosives.
Still, in the right hands, Nomad can be.. well, if not a menace then at least a nuisance.
Mesh mines follow the same basic logic as razor wire. Plant them on common traffic routes, near doorways at people’s feet, hidden if possible. A blind corner will all but guarantee a kill, so don’t hesitate to make use of them.
You can also use them to deter or eliminate a pursuer if you’re fast enough on the placement. People are always liable to chase if they sense they can get an easy kill, so turn the tables and make them into giblets.
Sadly, there’s no real nuance to the dog that I can find. He follows you around, trying mightily to kill something. A distraction at best, and only for a little while, he takes too long to summon and has a poor killing radius.
If I had to put something on paper, I’d tell you to always summon the dog when you near a major conflict area, let him go in first to draw fire, then mop up when he inevitably bites it. He might get a few kills, but that’s gravy.
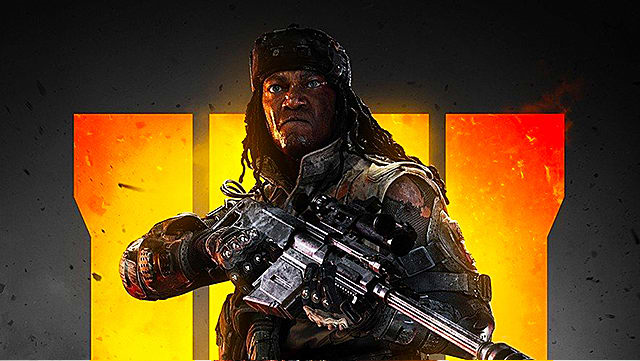
Prophet: Zap Zap
From where I’m standing, Prophet is just a better Nomad. His mobile deployable is faster, harder to hit, comes up more often, and is a more consistent kill than the dog ever is.
Using the Seeker Mine is similar to the dog in some respects. You want to lead with it, set it down in a safe area, and letting it track enemies so you can follow it for a quick clean up.
If you must be aggressive, throwing a Seeker Mine directly onto a point won’t buy you too much time, but objectives have been captured with less.
Remember that people hit with the mine have the opportunity to escape it if they’re fast, and they can still shoot it if they can get their aim down enough.
The ultimate Seeker Usage boils down to timing. If you have it available and you know and where and when your enemy will be en route to an objective, you can set the mine, let your team clean up, and get behind the enemy team while they’re dealing with everyone else.
Spawns being what they are, you won’t have long, but seconds are priceless in Black Ops 4, so use them as you have them.
Support Specialists
Everyone loves the support until they stop doing their job correctly. Poor ability use is perhaps one of the gravest sins a support player can commit, not just because they’ve wasted their ability, but that diminishes the effectiveness of the entire team.
Learn a few ways to make the best use of Recon and Crash’s abilities below.
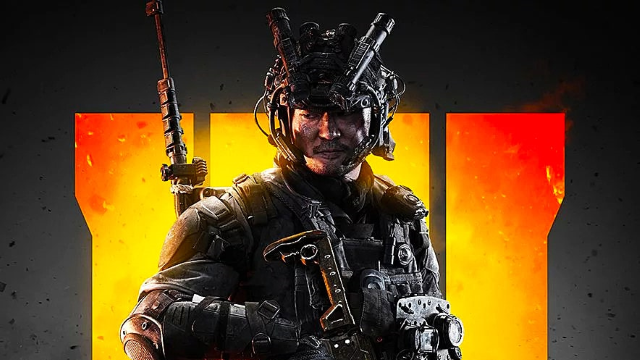
Recon: I See You
Recon’s statement, “Intel wins wars,” is certainly true, and the Sensor Dart and Vision Pulse are two of the most powerful abilities in all of Black Ops 4.
When your team can see where they need to be shooting, the “teammate problem” usually gets a little better. Sometimes. Maybe. If you’re lucky.
In any event, using the Sensor Dart is easy and difficult at the same time. Easy because it’s a simple button press and suddenly everyone on your team knows where people inside the dart’s radius are.
It’s hard because there are plenty of places on each map where you’ll get absolutely nothing by placing your dart in that location.
Also, darts are easy to spot and easier to destroy, so you want to be smart about how you place them.
The key thing to remember about a Sensor Dart is it’s not burdened by height or obstacles like walls, so if you want to canvas a particular part of the map, place your dart above, below, or to the side of that location.
Everyone still gets the effects on their minimap and you get the satisfaction that the dart’s probably not going anywhere.
Vision Pulse is a boon to everyone on your team and a big caution flag for the enemy, and there are two schools of thought when it comes to deploying it.
First, the passive. Like Firebreak’s Reactor Core, you can use Vision Pulse from a known high-traffic area, find a nice spot to stand, and let the pulse do its work.
You’ll get plenty of points toward your streak and your team will have a good twenty seconds of knowing exactly where they’ll need to be shooting.
For the aggressive player, Vision Pulse can be a gift from the FPS gods. Be prepared for every fight. Predict where your enemy will come from after you kill them, the options are endless.
I would stress that aggressive Vision Pulse use is still slower than most other aggressive styles, as you need to take a moment to internalize all incoming threats, let the pulse reset, and actually take time to prepare for each engagement.
If you so choose, win one gunfight then activate the pulse so you can continue fighting in one seamless motion, moving from foe to foe with speed and efficiency.
Each engagement should lead into the next, and do your level best to keep fights one-on-one. Even if you know they’re coming, low health and low ammo are the perfect ingredients for a death sandwich.
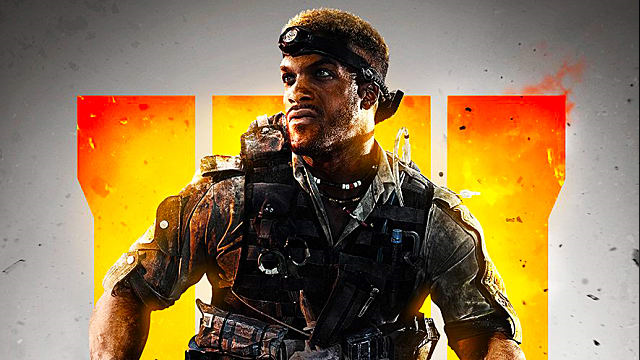
Crash: Traditional Support
The support’s job is to make sure you don’t die and are also better at your job. Crash is, therefore, a consummate support. More bullets to keep your friends in the fight longer.
More points to get their streaks faster. More health to fight longer. There’s really nothing wrong with ever playing Crash, and I believe every team should have one.
Using the Assault Pack should happen pretty much as soon as you have it available, and never aggressively. The extra points are too valuable and the ammo important enough that there’s no reason to ever have it in the line of fire.
Ideally, you want to use the pack at your team’s current spawn, about twenty feet or so in front of where most of them will come back into the fight.
In other words, you want to make it as clear as possible to your team that, hey, they should pick this up. It’s a win for everyone involved.
Don’t forget to pick up ammo from your own assault pack if you die and respawn near it. You get the full benefit of those points on a kill too, so put them to use. You won’t regret it.
You also won’t regret the Tak-5, heal-the-entire-team ability. The only ability I’d call purely aggressive (note that the Tak-5 has no means of dealing damage), giving everyone on the team including yourself an extra 50 health is nothing to sneeze at.
More importantly, if you use the Tak-5 when a teammate is in the middle of a fight, they’ll go from almost nothing to full instantly, all but securing the engagement unless they’re are a poor shot.
I would caution against using this ability when you yourself are in the middle of a firefight, as you’re more liable to die before the buff goes off.
The one tried and true strategy I’ve found is to do everything you can to get the ability ready before a new round in round-based modes, or by the middle of a match in everything else.
Use it straight off spawn. Your enemies now have a full team of buffed players to contend with, and unless they’ve got a Crash on their side, that’s one advantage no one player can overcome.
I hope you’ve gotten something out of this Black Ops 4 Specialist guide. There’s plenty of little bits and bolts of strategy to tease out in the hundreds of hours to come, and it will be interesting to see where the meta goes in this game.
I can guarantee a Crash on every team, and probably a Ruin and Seraph. The other two are flex, though I’d still put money on a Recon and Battery as the primary takers here.
Stay tuned to GameSkinny for more Call of Duty: Black Ops 4 guides.



Published: Oct 15, 2018 11:07 pm