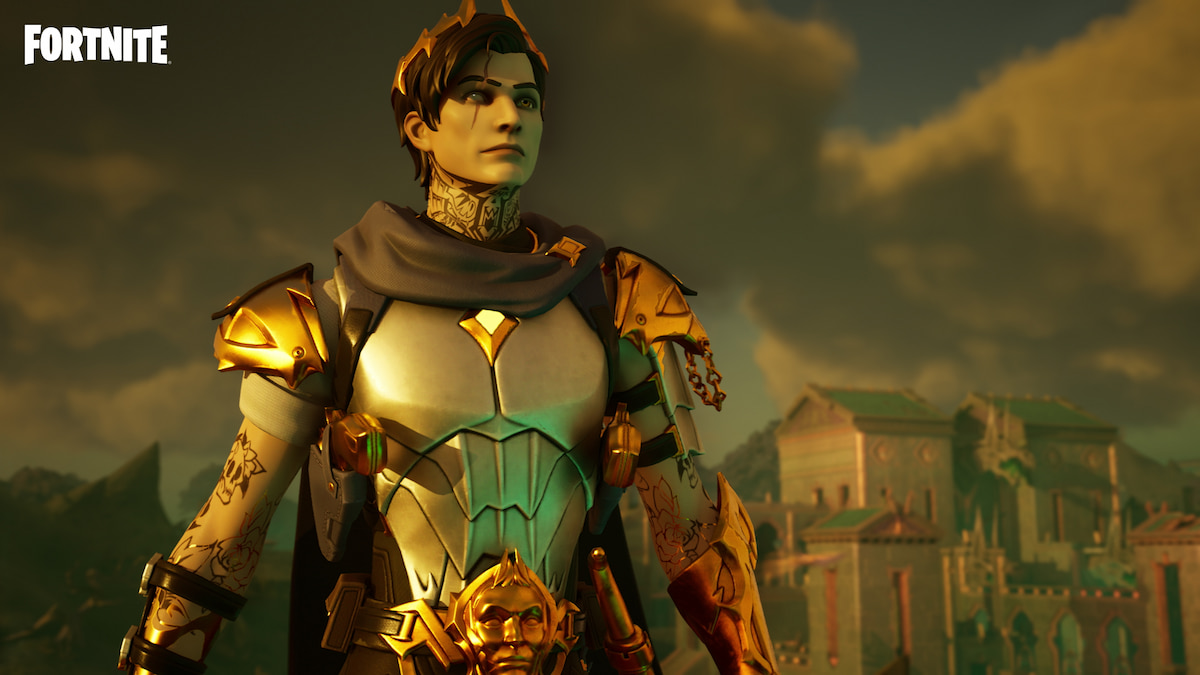
King Midas is making his epic return to Fortnite in Myths & Mortals, and with him comes the Rise of Midas quests. Hop in and collect some special Midas-themed rewards. Here’s how to complete all Rise of Midas quests before they’re gone!
Fortnite Rise of Midas Quests Guide
The Rise of Midas quests are active until April 2, 2024, and during this time, you can work toward completing some tasks in-game to collect rewards. These quests roll out over the next few weeks until the end date. You will only be able to collect your rewards during the event, so here’s how to get started!
How to Complete All Midas Rises Quests
- (Stage 1) Collect Bars – 200
- (Stage 2) Investigate Midas’ Jail Cell
- (Stage 3) Corroborate with Marigold on Midas’ Escape
- Hit an Olympian Boss with the Chains of Hades
- Damage Players with the Chains of Hades or Harbinger SMG – 750
How to Collect Gold Bars in Fortnite
The first step of the Midas Rises quest is to collect Gold Bars. To complete the task, you must collect 200 gold bars. This can be done fairly simply since Gold Bars can be found in plenty of different ways.

You can get Gold Bars by defeating players and collecting them from their loot, in chests, cash registers in stores or gas stations, and primarily within vaults. You can also earn some bars by completing bounties or Shadow Briefings.
Where to Investigate Midas’ Jail Cell in Fortnite
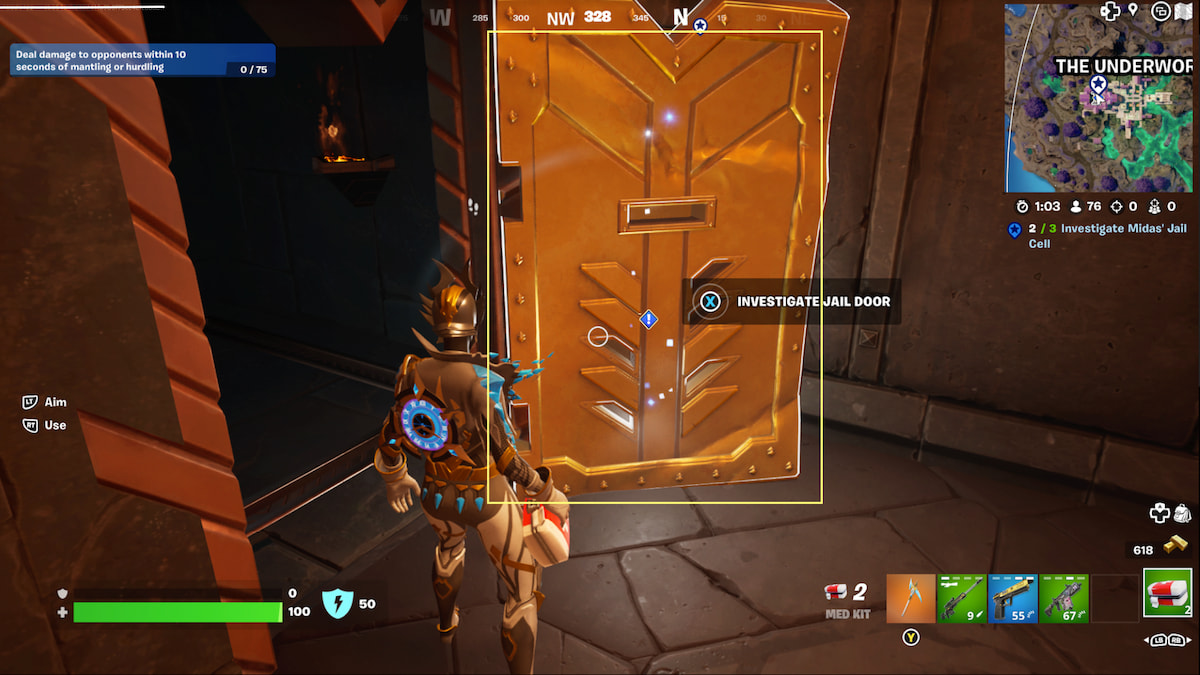
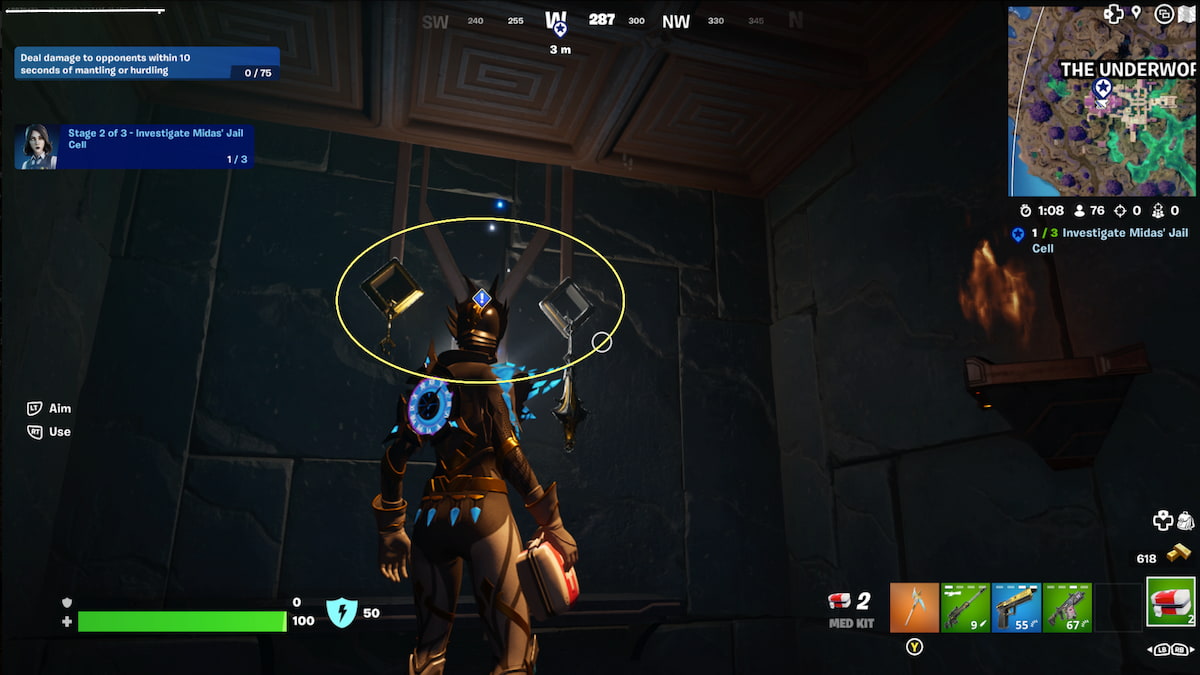
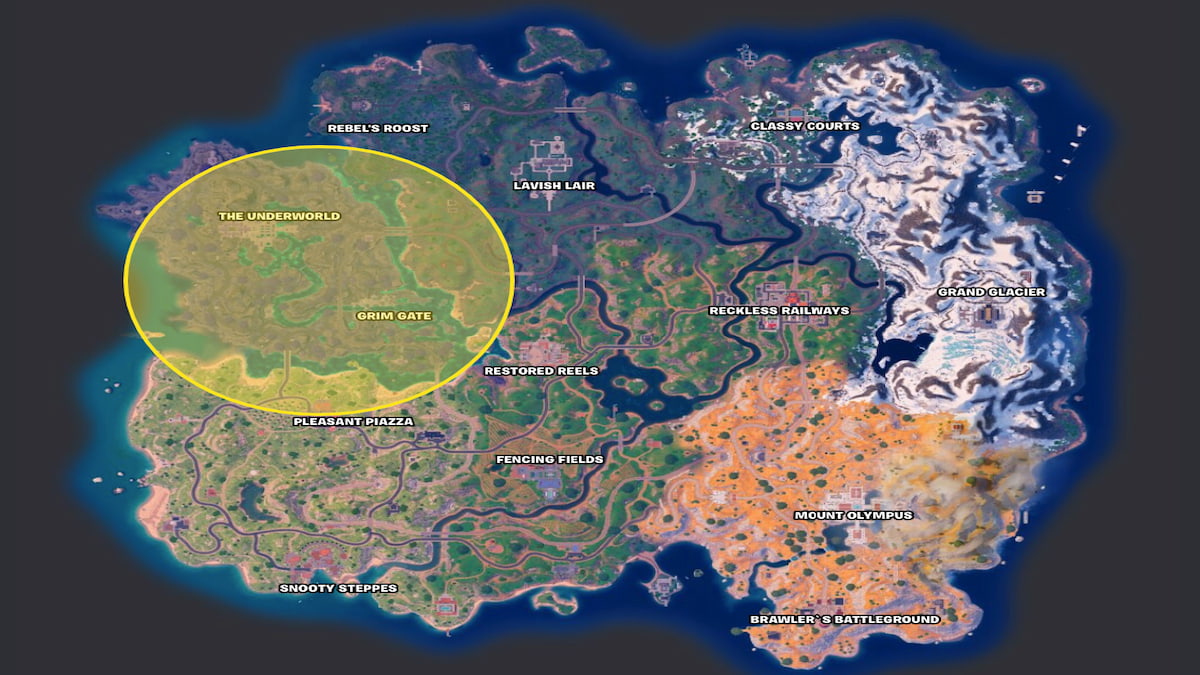
After collecting Gold Bars, you can proceed to the second stage of the task, which is to Investigate Midas’ Jail Cell. Midas was captured and imprisoned by Hades, so to find his jail cell, head to the Underworld POI, located at the top northwest side of the map.
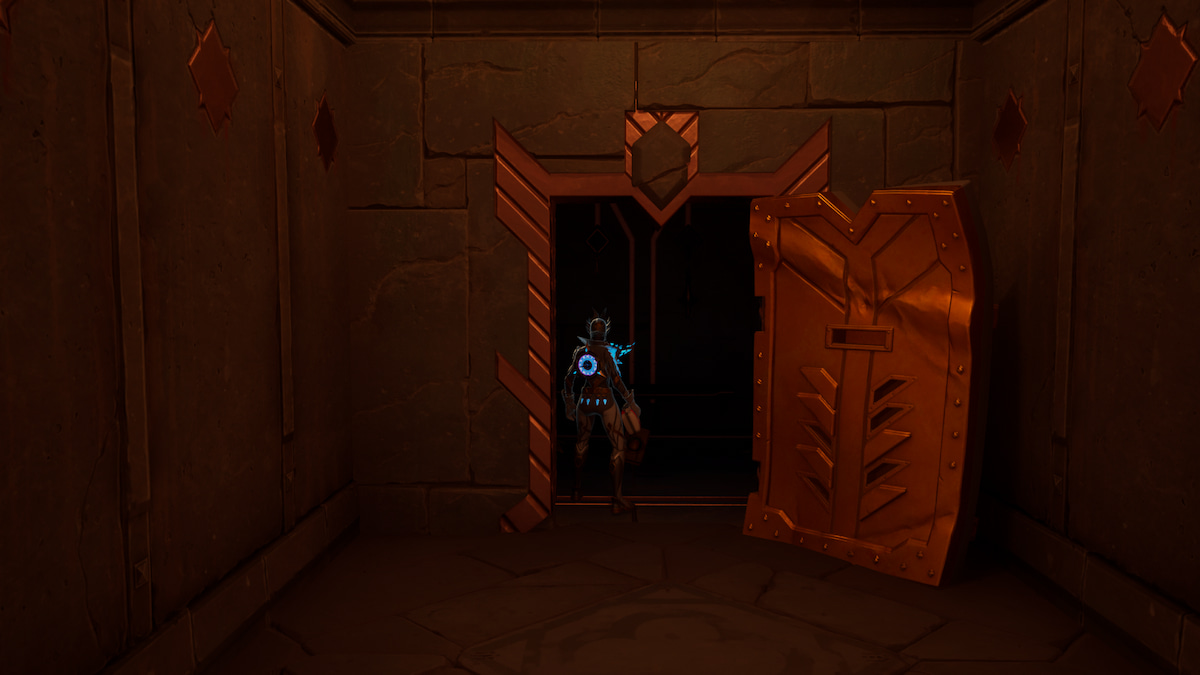
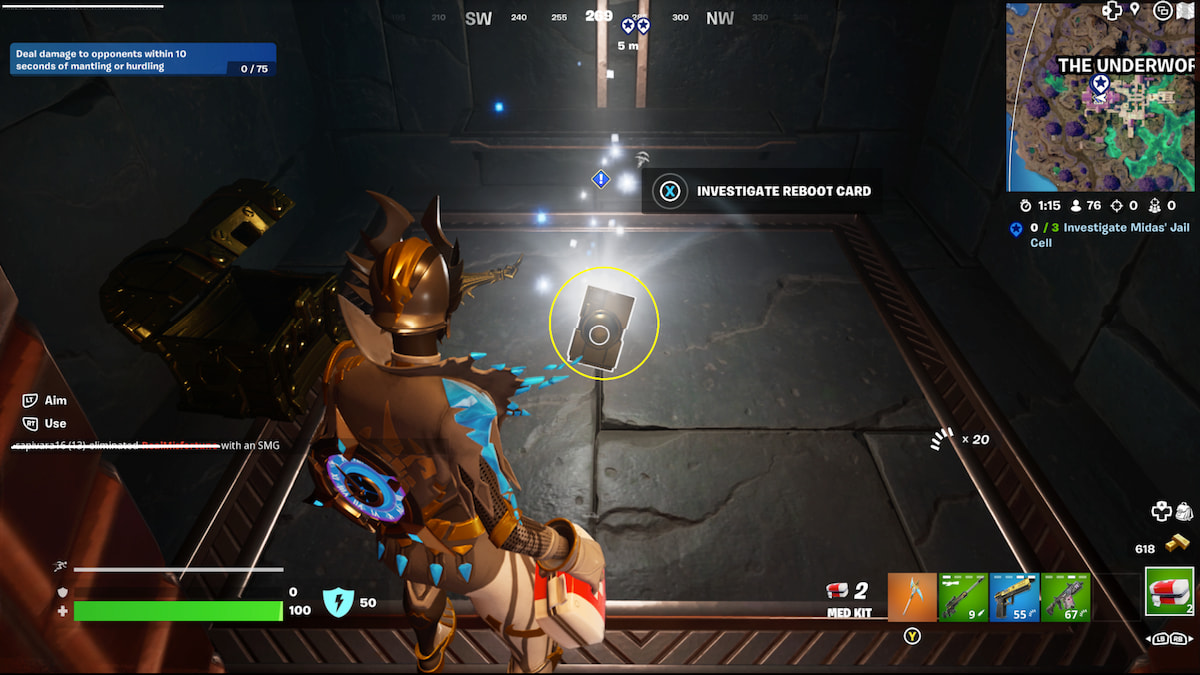
At the Underworld, head down below the temple in the lower levels to find a gold (almost vault-like) door. There are three things you will need to interact with to investigate:
- Jail Door
- Reboot Card
- Handcuffs
To interact with them, approach them and hold X on Xbox, Square on PlayStation, or E on PC.
How to Corroborate with Marigold on Midas’ Escape
After you do your investigating, it’s time to team up with Marigold to dig deeper into Midas’ escape. You can speak to her at any of the Scrying Pool locations on the map:
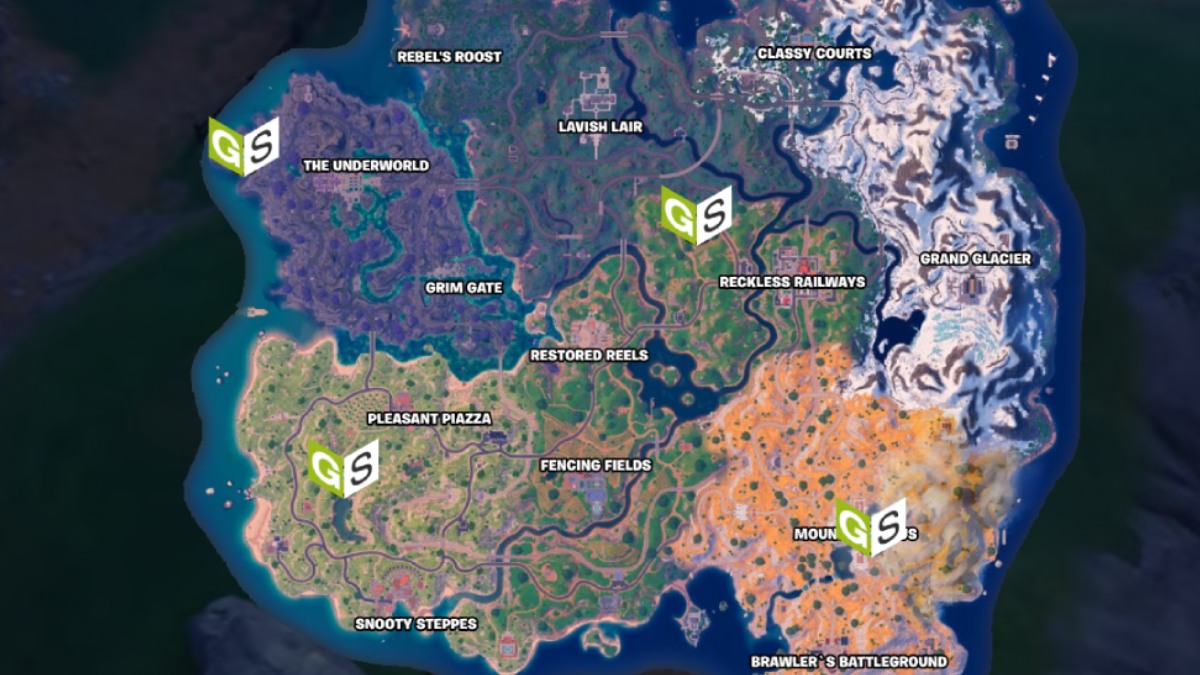
At the Scrying Pool, instead of beginning the usual test, you can select to speak to Marigold instead. She will ask you three questions on how you believe Midas escaped, and these are the answers she’s looking for:
- A guard unshackled one hand from the handcuffs
- He turned the other handcuff to gold
- He pushed the jail door open
Marigold concludes that the Chains of Hades have some connection to Midas’ Touch, but we’ll have to continue further into the quests to find out more.
Where to Get a Chains of Hades in Fortnite
The Chains of Hades is a special new weapon specific to this season, much like Zeus’ Thunderbolt. You’ll need it for two of the challenges in Midas’ Rise, dealing damage to players and hitting an Olympian boss.
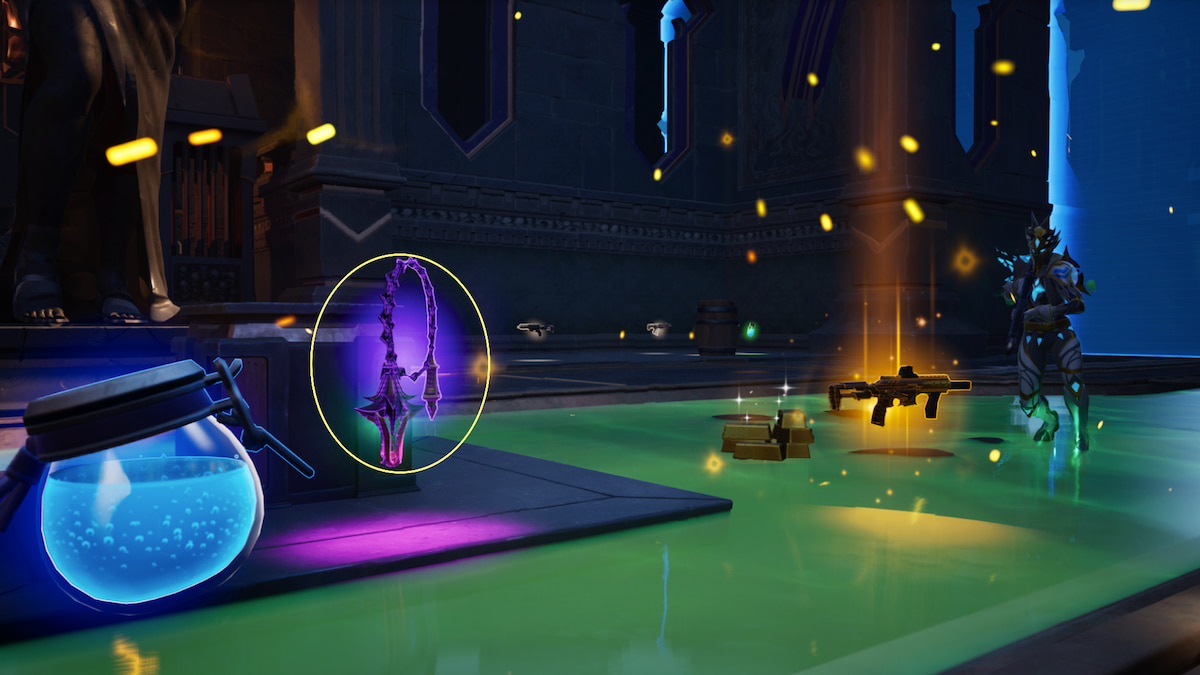
You can find the Chains of Hades in chests at any of the Named Locations on the map as ground loot by defeating a player who has one or by defeating Hades himself at the Underworld POI. I was able to find at least one almost every time I dropped at the Underworld. It works like a melee weapon, swinging at players and pulling them toward you, and it has quite the reach.
I found the best way to rack up damage on players was to pair it with the phasing Agility ability you can get as Cerberus Aspect of Gods or by stepping in the green water around the Underworld and Grim Gate. Plus, you can challenge Cerberus or Hades in the same area to get your hit with the whip on a boss.
How to Complete All Et Tu, Brutus? Quests
- Complete a thorough investigation of Brutus before confronting him – 3
- Hire Specialists in different matches – 3
- Purchase from Midas Vending Machines or Service Stations – 3
- Scan the Marigold for recording devices
- Confront Brutus
Where to Hire Specialists in Fortnite
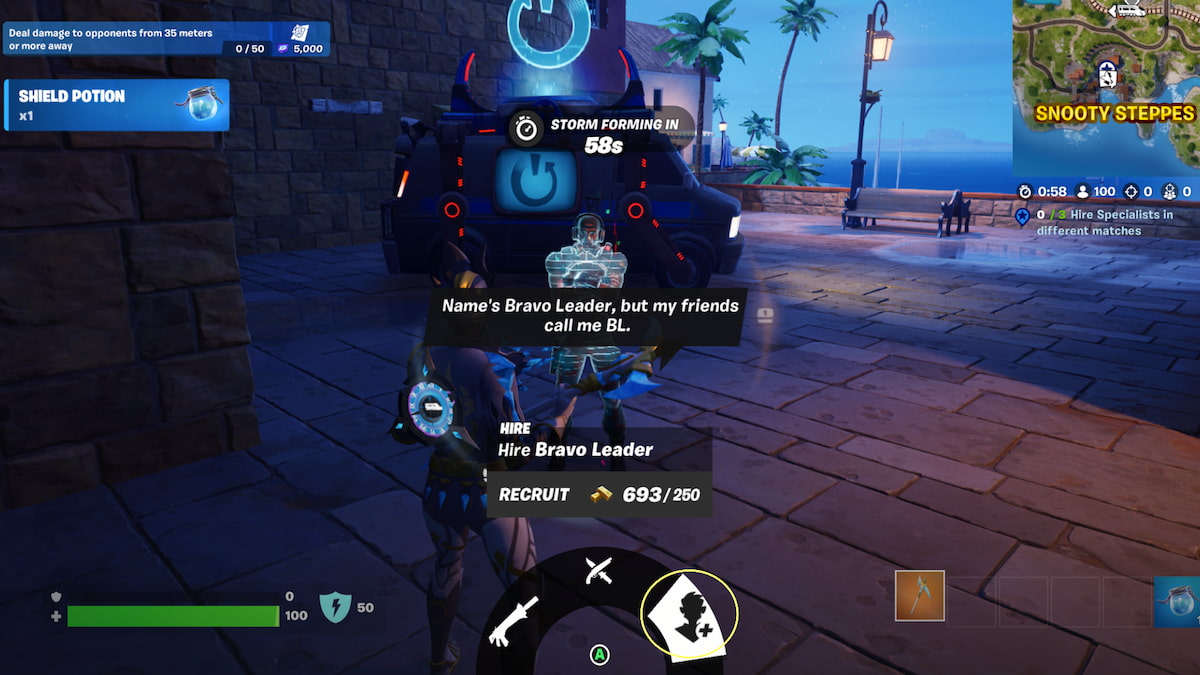
Specialists are NPC characters that you can hire using Gold Bars. It will take playing three different games in order to complete these challenges, and you’ll need to hire an NPC each time, but it can be the same one you did last match.
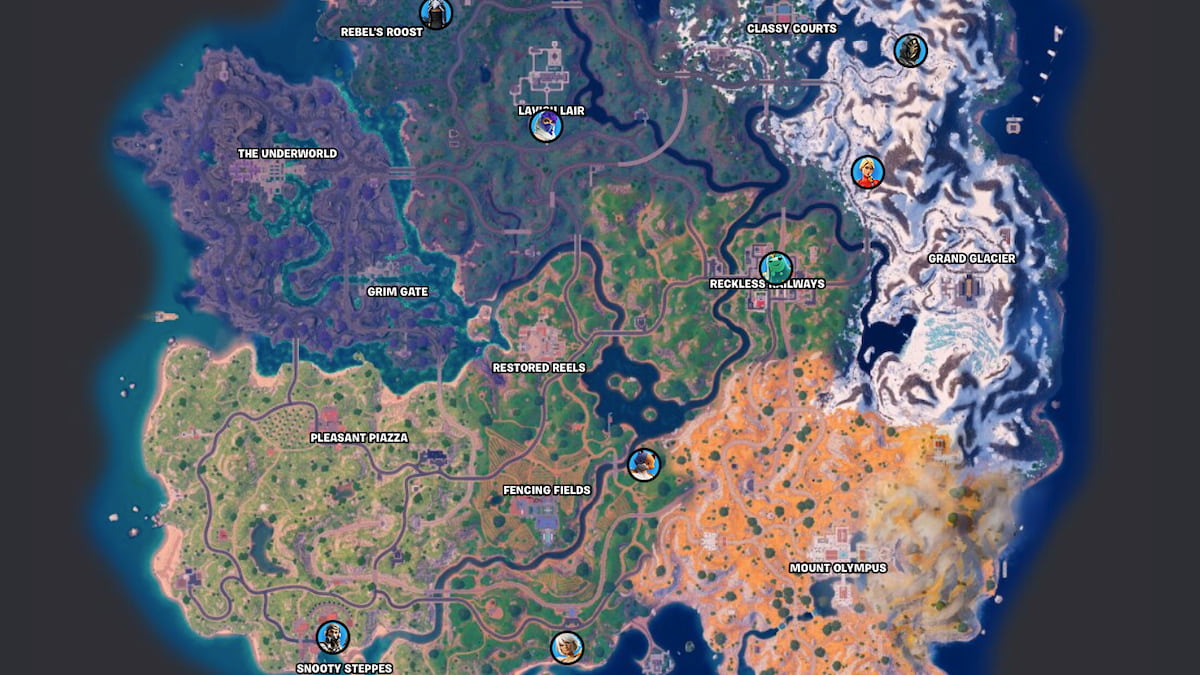
Specialists can be found at different spots around the map and will cost you 250 Gold Bars to hire. Here are spots you can find them:
- Myna (Scout Specialist) – Eastern side of Rebel’s Roost
- Artemis (Scout Specialist) – Lavish Lair
- Spartan Assassin (Supply Specialist) – East of Classy Courts
- Lagunda (Medic Specialist) – Northwest of Grand Glacier
- Poseidon (Heavy Specialist) – Reckless Railways
- Meowscles (Heavy Specialist) – Northeast of Fencing Fields
- Bravo Leader (Supply Specialist) – Snooty Steppes
- Aphrodite (Medic Specialist) – South of Fencing Fields
Where to find Midas Vending Machines and Service Stations
For the next quest, you’ll need to purchase any item from three Midas Vending Machines or Service Stations to complete this next quest. This is a particularly difficult quest because it doesn’t tell you where to find them, and they happen to be scattered all over the place.
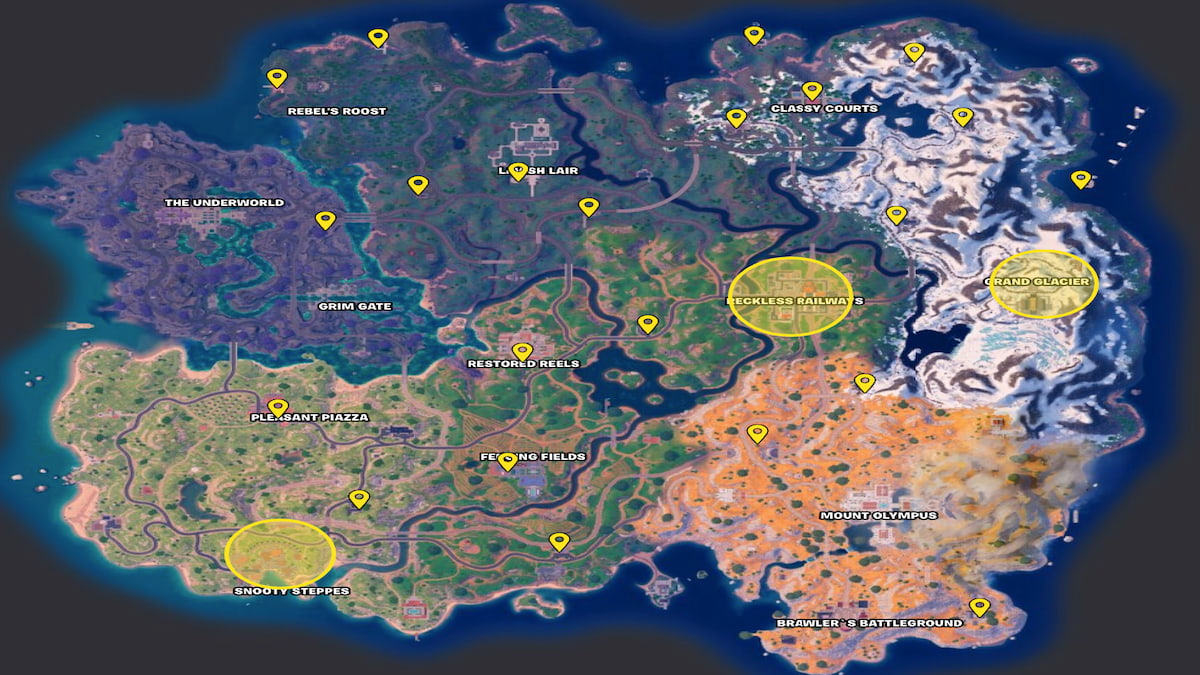
First, ensure you have some Gold Bars saved up for a purchase. Then, keep a close eye on your mini-map at the top right of your screen. A Vending Machine icon will be shown here if there is one nearby. Here are some of the best and most accessible locations you can find them:
- Reckless Railways
- Grand Glacier
- Snooty Steppes
Where to Scan for a Recording Devices on the Marigold
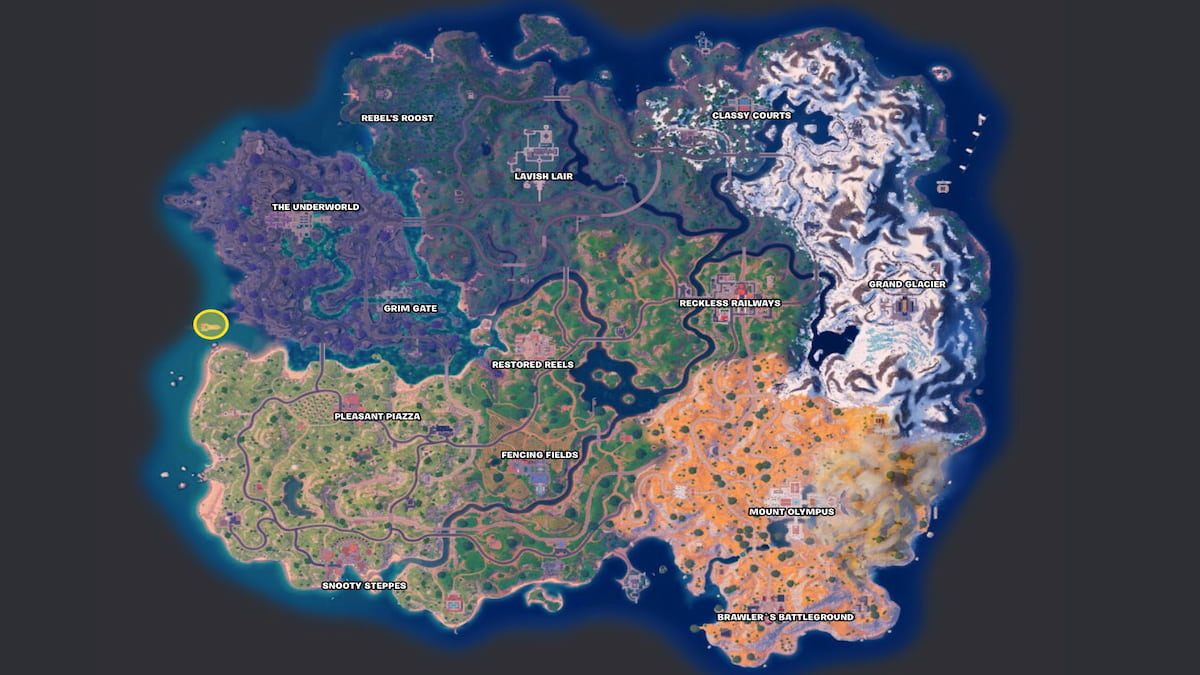
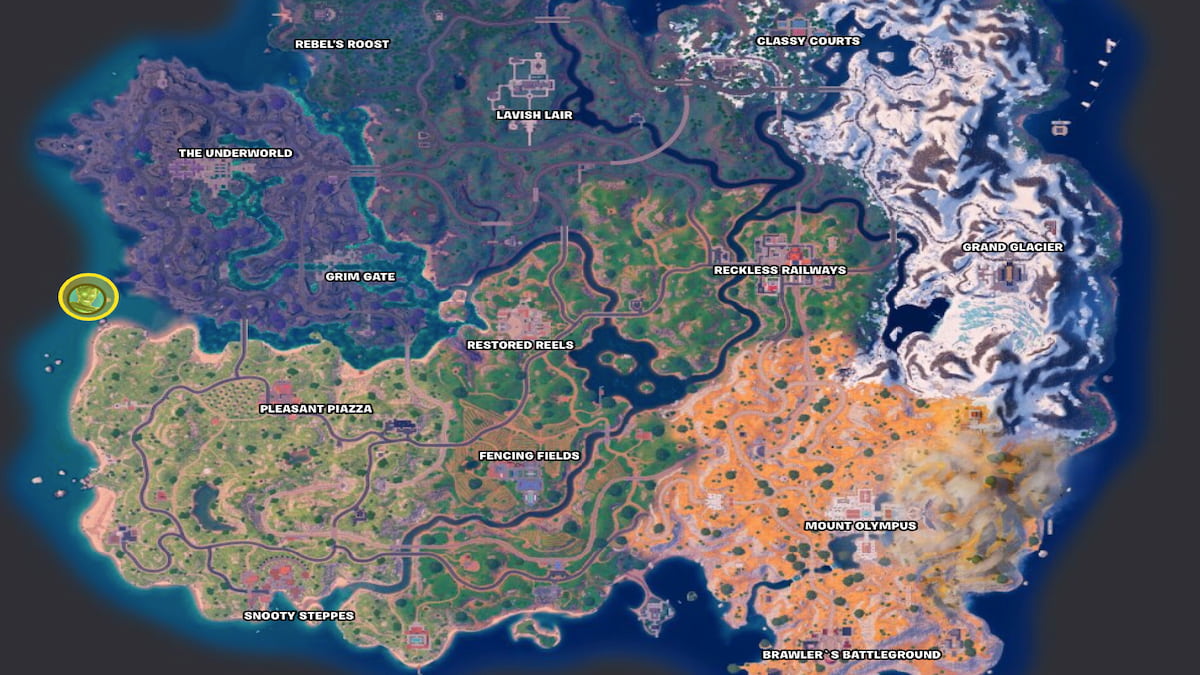
The last part of your investigation on Brutus will lead you to the Marigold yacht. You can find the Marigold off the island’s eastern coast just southwest of The Underworld.
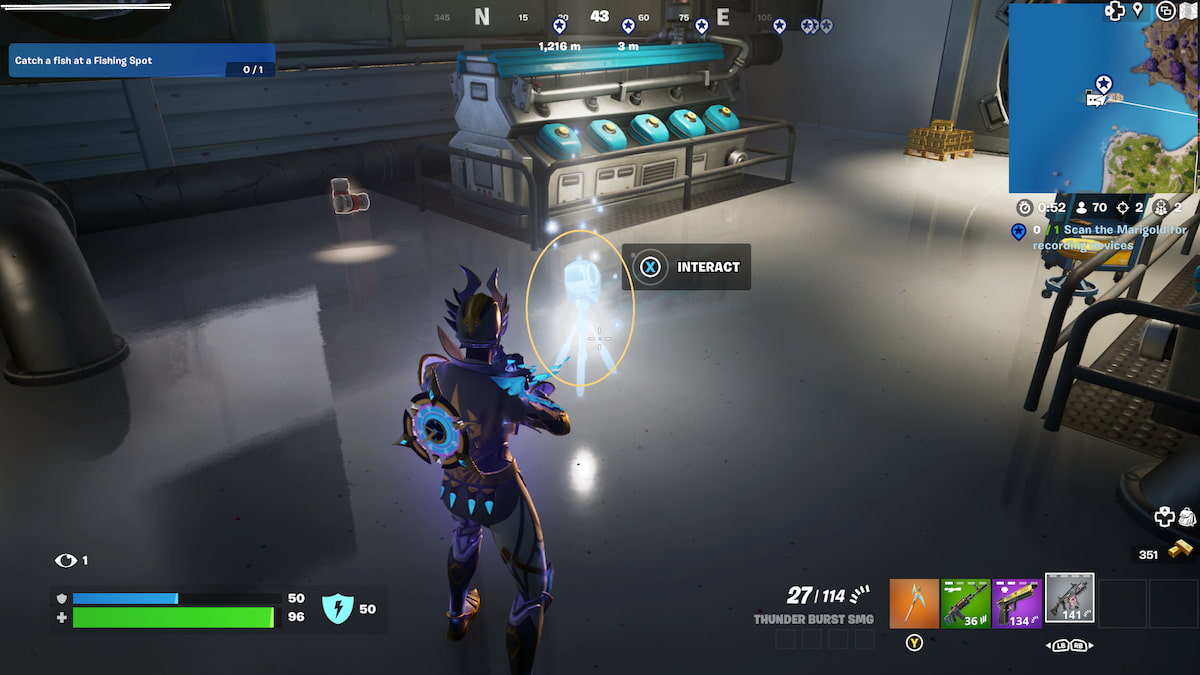
The scanner where you’ll need to interact for the quest is located in the ship’s lower levels. I found the best way to get to them was to land on the very back of the yacht and navigate through the vents until I reached the bottom. This way, you avoid attention from other players. The device you need to interact with is just outside the vault. Approach it and hold X on Xbox, Square on PlayStation, or E on PC to complete the scan.
How to Confront Brutus
Brutus is confronted at any of the Scrying Pools, just like how we talked to Marigold in the last set of quests. Use the Scrying Pool to select Brutus’ image from the pop-up menu. After you finish your conversation, you will successfully finish the Et Tu, Brutus? questline!
How to Complete Jules Vs. The Golden Touch Quests
- (Stage 1) Damage opponents while under the effects of The River Styx – 300
- (Stage 2) Hit structures at Grim Gate to collect a Jar of Essence
- (Stage 3) Deliver the Jar of Essence to Jules
- Mod weapons – 3
- Eliminate players with fully modded weapons – 5
Where is the River Styx?
For the first stage challenge in this week’s set, you must deal damage to enemies while under the effects of The River Styx.
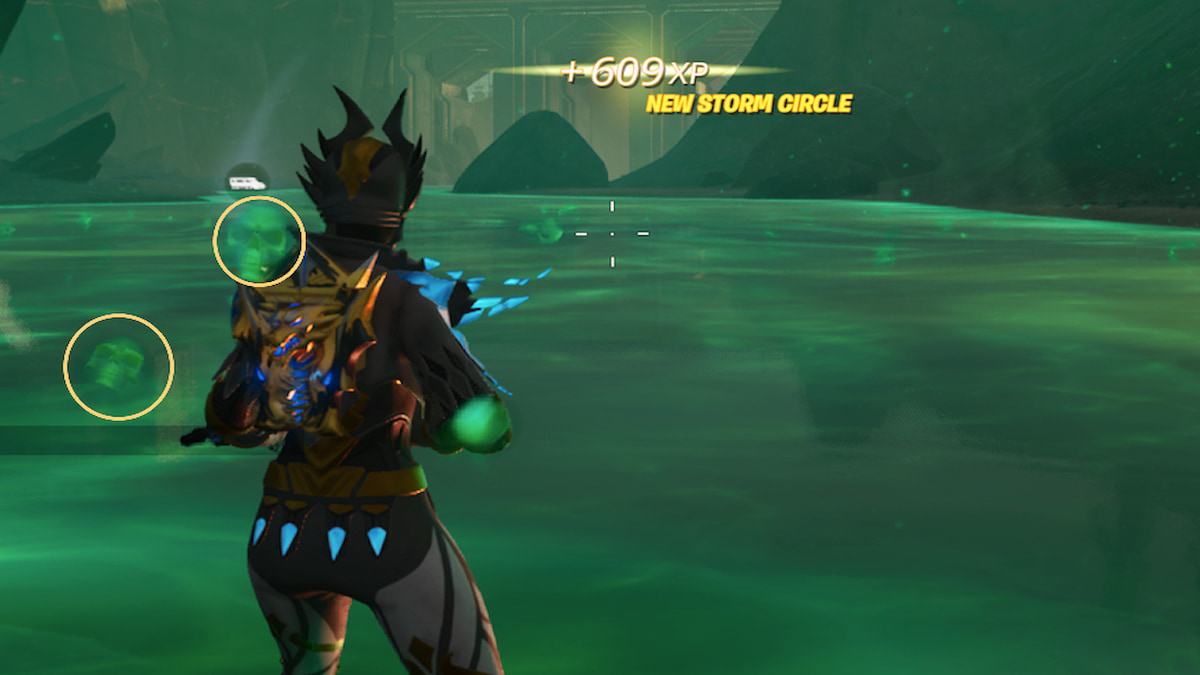
The River Styx runs along the Underworld and Grim Gate area, and you can detect it much easier thanks to its bright green color. You can tell if you’re under the effects of the River by the floating ghost skulls that appear behind your character. They allow you to phase around by double-jumping. As long as you have a skull behind you, you will be under the effects, and all you have to do is shoot opponents until you reach 300 damage.
How to Get Jar of Essence
The next quest will require you to gather a Jar of Essence for Jules. This is fairly simple to do as long as you in the Grim Gate poi.
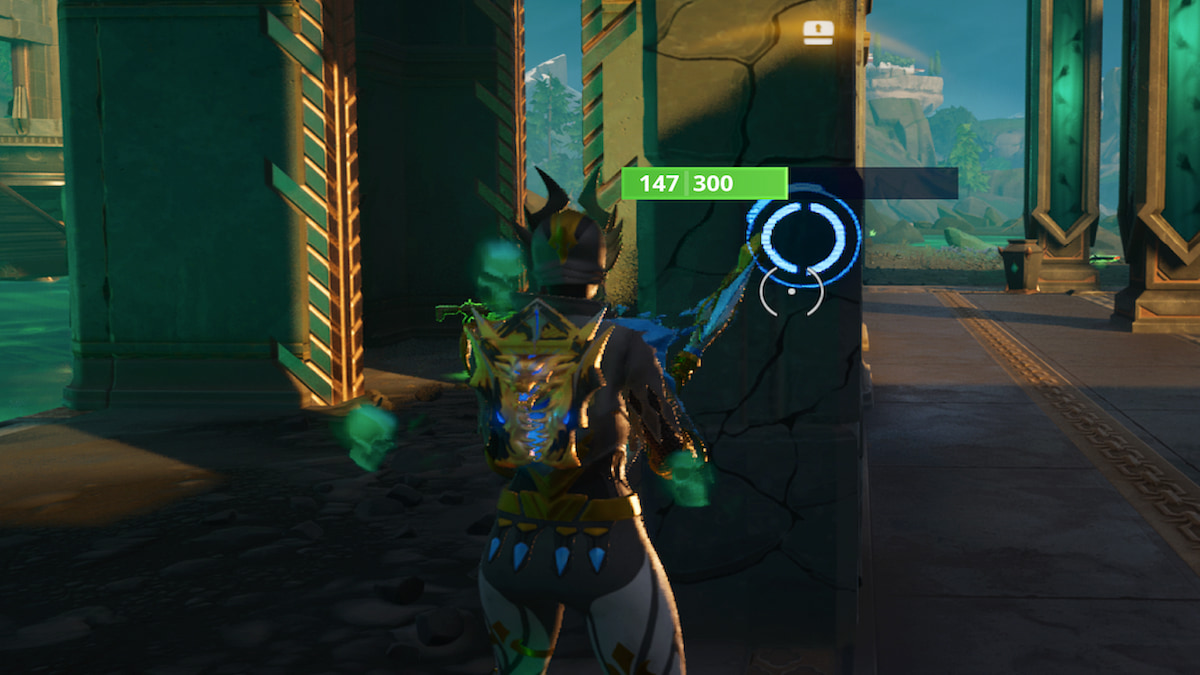
Anywhere in this location, switch to your pickaxe and break through any structure nearby. This can be a wall, props, stairs, or floors. Any structure that you can break with your pickaxe. As you’re breaking them, you will eventually collect what you need.
Where to Deliver Jar of Essence to Jules
Now that you have what Jules needs, you can deliver it to her at her workshop.
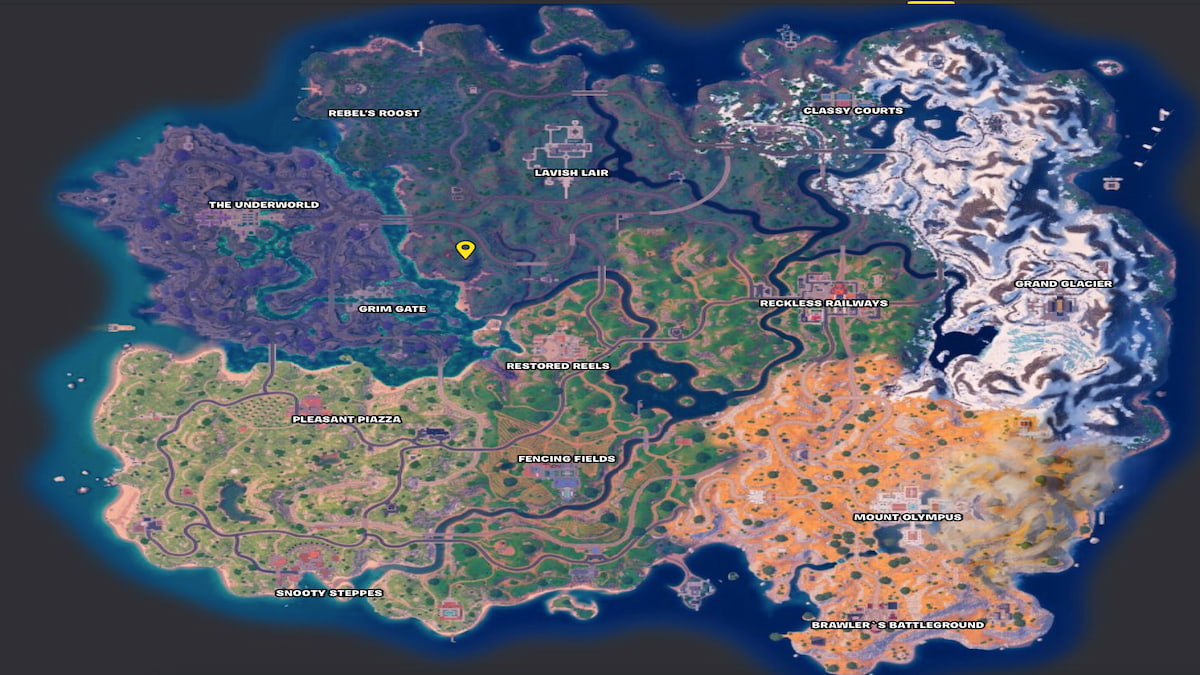
Jules resides at the gas station just northeast of Grim Gate. This isn’t too far away, so you can make your way there as soon as you get the Jar of Essence. She wanders inside the car workshop or outside around it. Interact with her to deliver the Jar and complete the last stage.
Where to Find Mod Benches
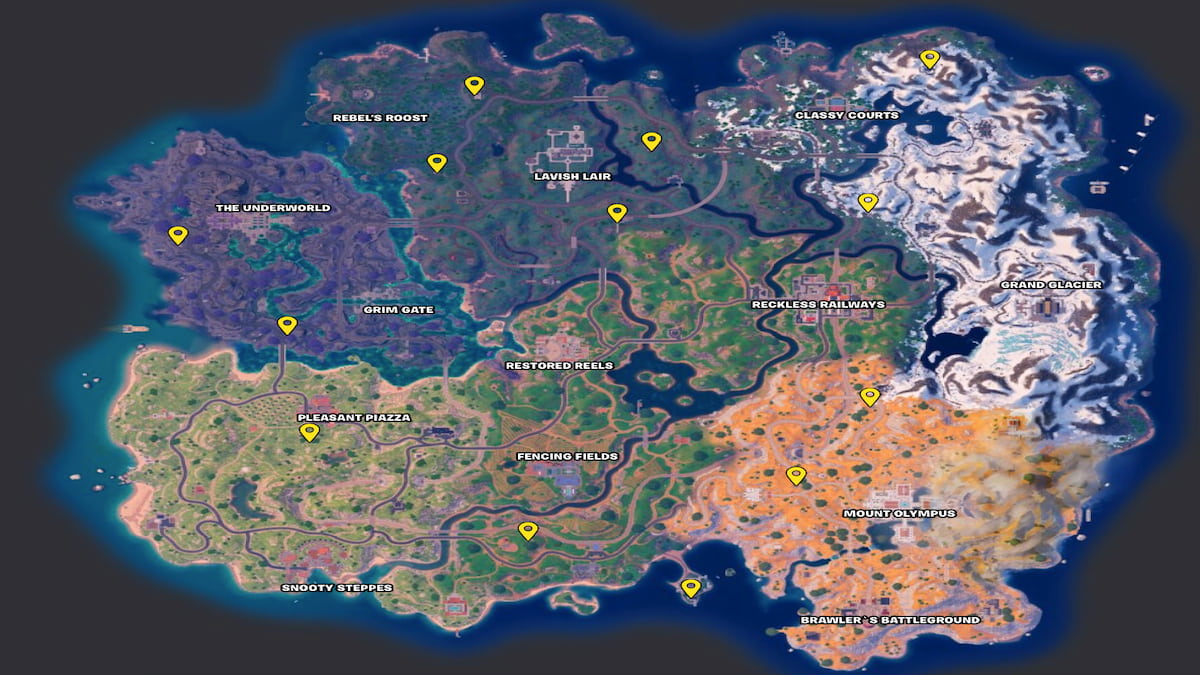
The last two quests of this set require you to fully mod out a weapon and eliminate players with it. Mod benches aren’t show on your map, but there are plenty of places to find them.
Mod Benches are found at almost every vault or bunker spot on the map. Here’s where you can find some:
- Southwest of The Underworld
- Southwest of Grim Gate
- South of Pleasant Piazza
- Southeast of Rebel’s Roost
- Northeast of Rebel’s Roost
- Northest of Lavish Lair
- Southeast of Lavish Lair
- Northeast of Classy Courts
- Southeast of Classy Courts
- Southwest of Fencing Fields
- Northwest of Brawler’s Battleground
- Northwest of Mount Olympus
- Southeast of Reckless Railways
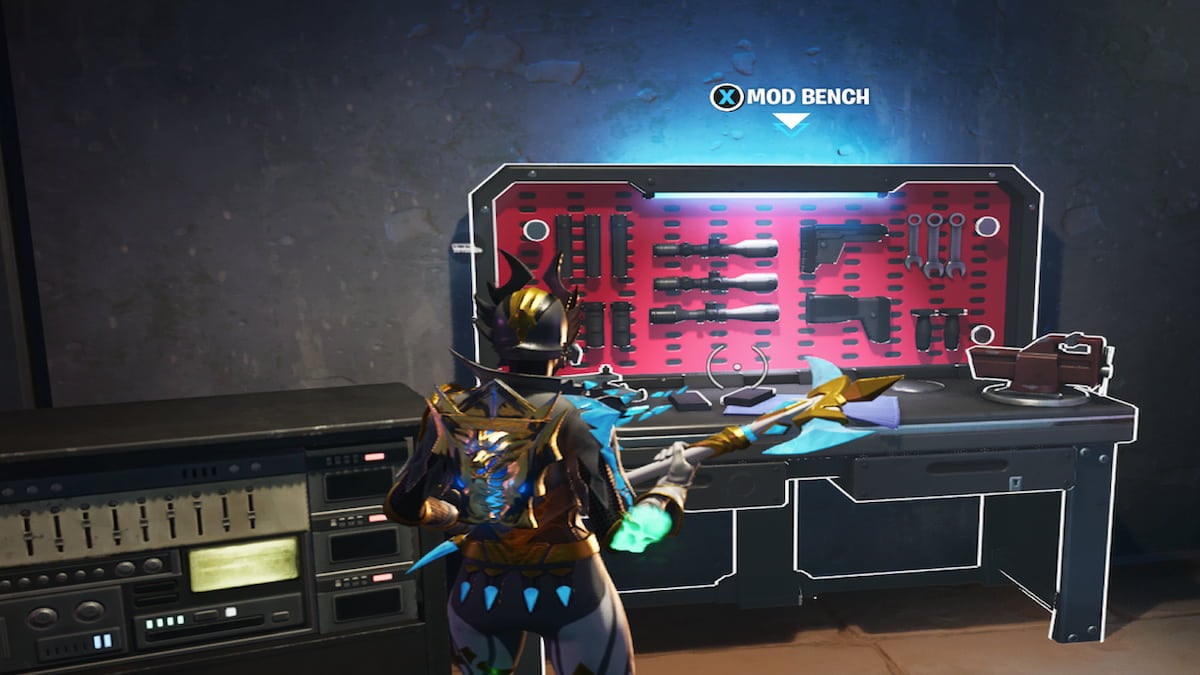
Bunkers open at the third storm circle and Vaults with the keycard off the NPCs at that location. The great thing about these locations is that they have Mod Benches and Rare chests with Legendary weapons. Legendary weapons can be fully modded for you, so you don’t have to add any extra mods.

If the weapon hasn’t been fully modded yet, you can use the Mod Bench to add some. However, each attachment costs Gold Bars. Any attachment will work, but you must have at least one scope/sight, grip, modified mag, and muzzle. When all the mods have been added, all the white rectangles on the weapon’s icon in your toolbar will be filled. Any eliminations you get with your fully modded weapon will count toward your quest and help you finish this week’s set.
How to Complete All Myths of Midas Quests
- Damage players with Midas’ Drum Gun or Drum Guns – 750
- Place top 50 players without consuming healing items – 1
- Eliminate an opponent within 10 seconds of collecting bars – 1
- Consume a Banana of the Gods – 1
Where to get Midas’ Drum Gun or Drum Guns
For the first quest of this set, you’ll need to deal damage to players with Midas’ Drum Gun or any Drum Gun. They can be found all over the map in chests, however, here are some of the best spots to get one every match:
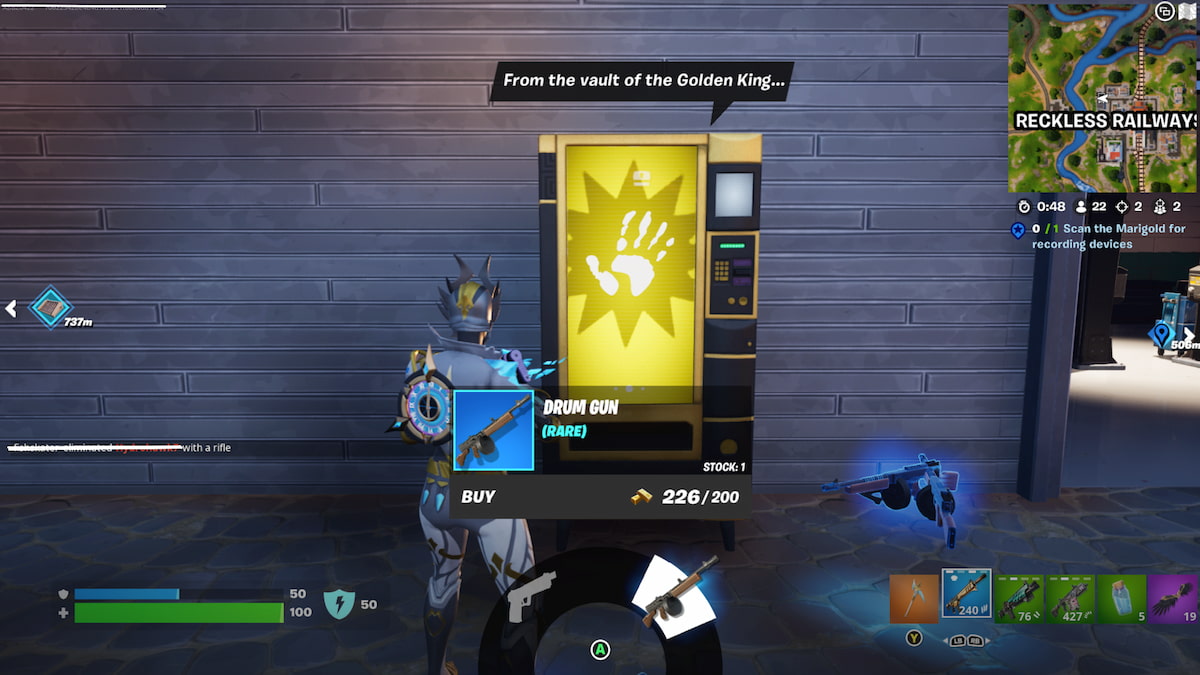
We found a few Midas Vending Machines in the earlier quest set (Et Tu, Brutus?), and they will have weapons straight from Midas vault inside, meaning you’re most likely to find a Drum Gun. It will cost you 200 Gold Bars to purchase one.
Alternatively, the NPC Shade Midas at the Marigold Yacht on the island’s eastern side can give you Midas’ Drum Gun, the Mythic variety. This will also cost you Gold Bars, but it is guaranteed every match as long as you beat other players to it (since it only has one stock).
How to Eliminate an Opponent Within 10 Seconds of Collecting Bars
Gold Bars are found in almost all chests or in Cash Registers and fallen enemies. The best way to knock this challenge out is to drop at a hot drop location on the map. Gold-titled names will be shown on the map for each round, or a safe bet is any of the Olympian-named POIs. Open a nearby chest and then immediately track down the closest player. Or, take down two players as close to each other as possible. This way, you can loot the Gold Bars off the first body before getting the second.
Where to Find the Banana of the Gods
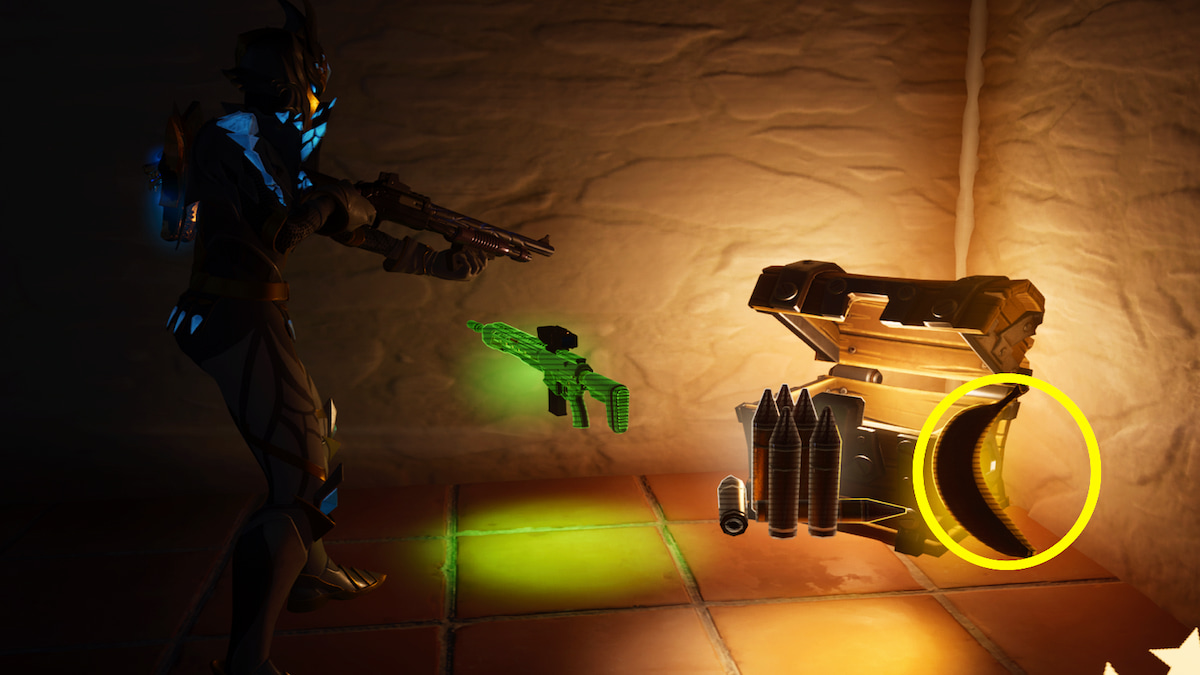
The Banana of the Gods is a legendary banana that looks just like an ordinary banana. However, it contains some god-like powers (health over time, speed, and jump height) transferred to the player when they eat it.
You can find the Banana of the Gods in any chest around the map, but I suggest looking in Rare Chests or God Chests, as these have a greater chance of dropping higher-rarity items. Best spots to look for God Chests or other chests that may contain the bananas are:
- The Underworld
- Grim Gate
- Mount Olympus
- Brawler’s Battleground
These quests are pretty simple compared to some of the other sets, so hopefully, we can complete them quickly and prepare for the final set of quests!
How to Complete All The Great Marigold Yacht Heist Quests
- Blow up a fuel pump
- Catch a Golden Chicken
- Honk a car horn within 10 meters of an enemy player
- Travel distance while flying with Wings of Icarus – 1,000
- Complete a Train Heist or claim the floating island Capture Point
Where to Blow up a Fuel Pump
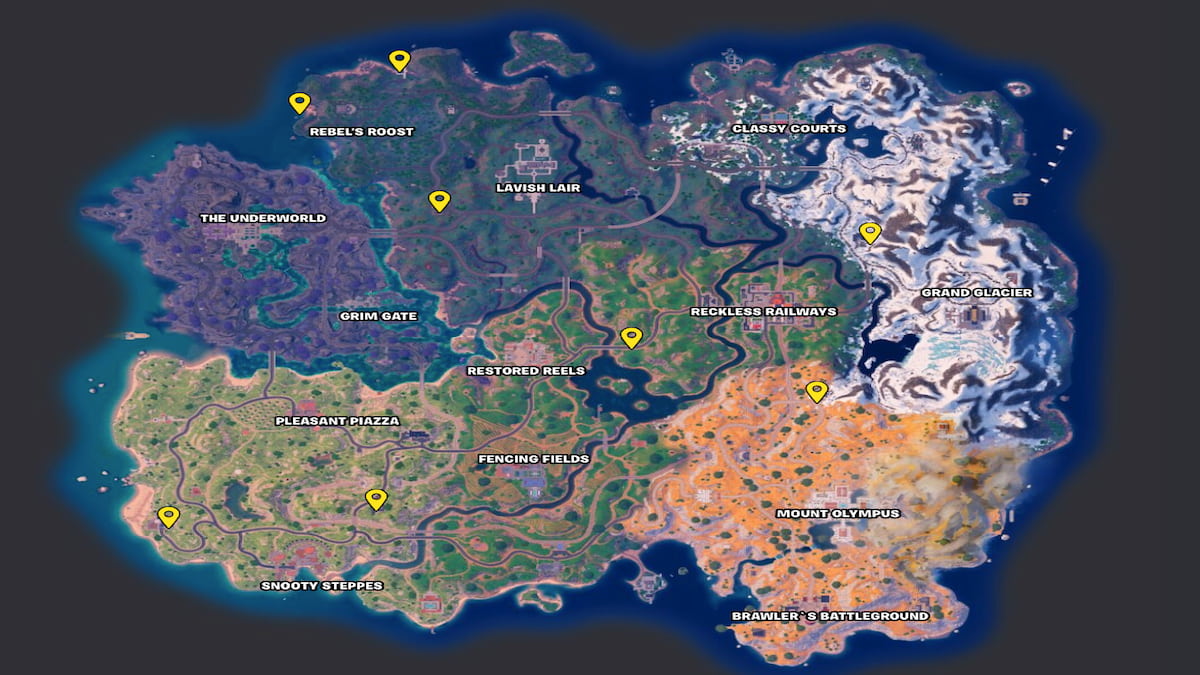
The first quest in this final set requires you to blow up a fuel pump. TNTina doesn’t do anything quietly, and this will be the loud distraction the team needs to get away with this heist. To find a Fuel Pump, you can head to any gas station around the map.
Every gas station has fuel pumps, and some have more than others. Here’s where you can find them:
- Northwest of Rebel’s Roost
- Northeast of Rebel’s Roost
- Southwest of Lavish Lair
- Northeast of Snooty Steppes
- Northwest of Snooty Steppes
- Northeast of Restored Reels
- Southeast of Reckless Railways
- Northwest of Grand Glacier
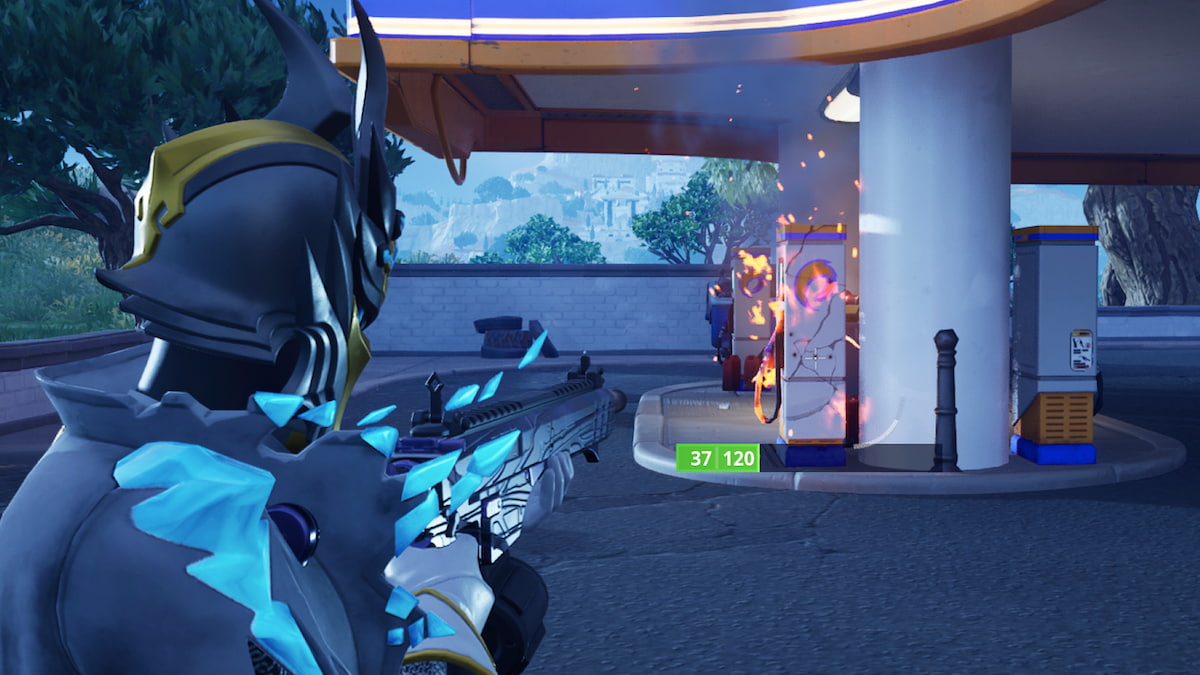
Once you get there, pick up the closest weapon or use your Pickaxe to break the fuel pump and create an explosion. Just make sure you stay far enough away when it explodes, or you might take the brunt of the damage.
How to Catch a Golden Chicken
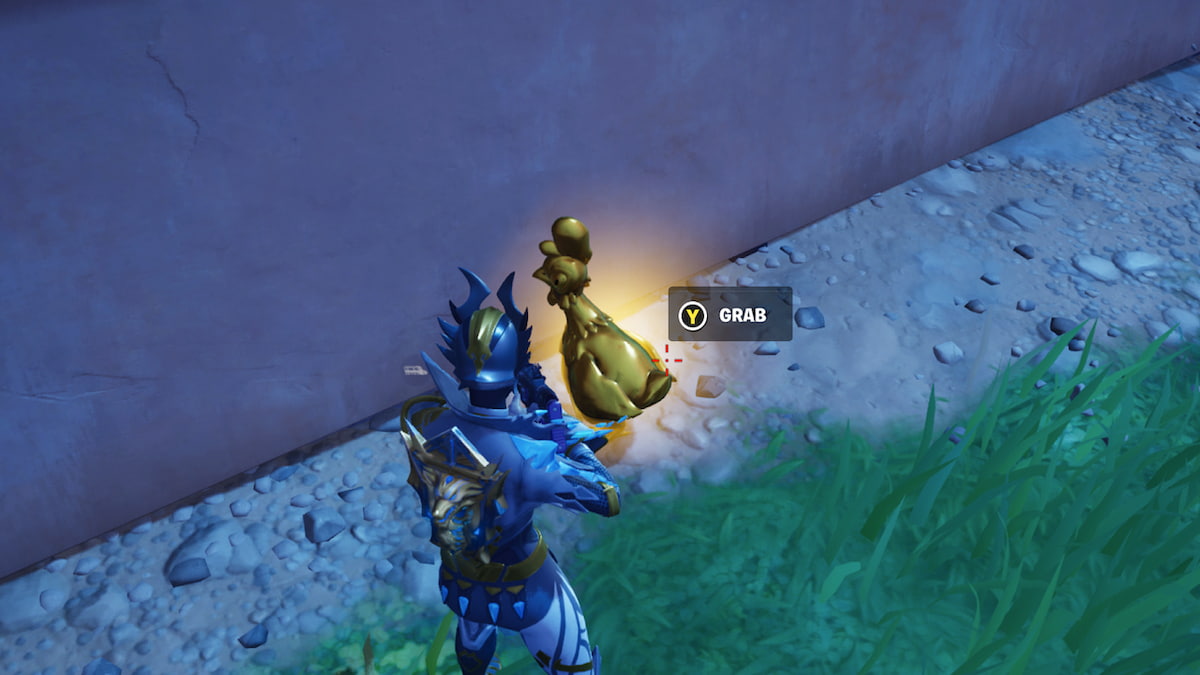
Golden chickens act just like regular chickens only they are covered completely in gold and drop gold eggs that turn into Gold Bars for you to pick up. You can find them randomly among locations where chickens regularly spawn.
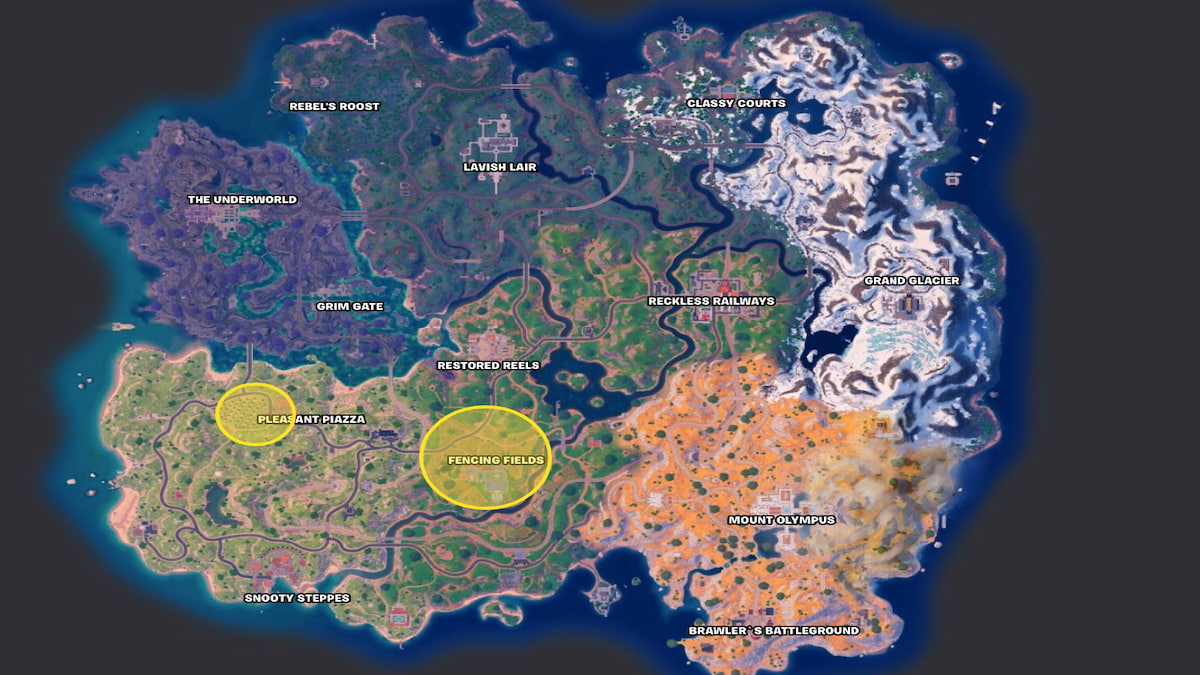
The two spots where I consistently find golden chickens are Pleasant Piazza and Fencing Fields, particularly the outskirts of the locations among the vineyards and orchards. Once you spot one, try to corner it against a wall or fence to make it easier to catch it. When you’re close enough, the prompt should appear on the screen above it, allowing you to pick it up with Y on Xbox, Triangle on PlayStation, or F on PC.
How to Honk a Car Horn
Honking a car horn is fairly simple, but to get this challenge done, you’ll need to time it right when you’re near enemy players. The best way to do that is to land at a hot drop location (named locations marked in gold). Most of them locations will have cars to grab and plenty of players landing there.
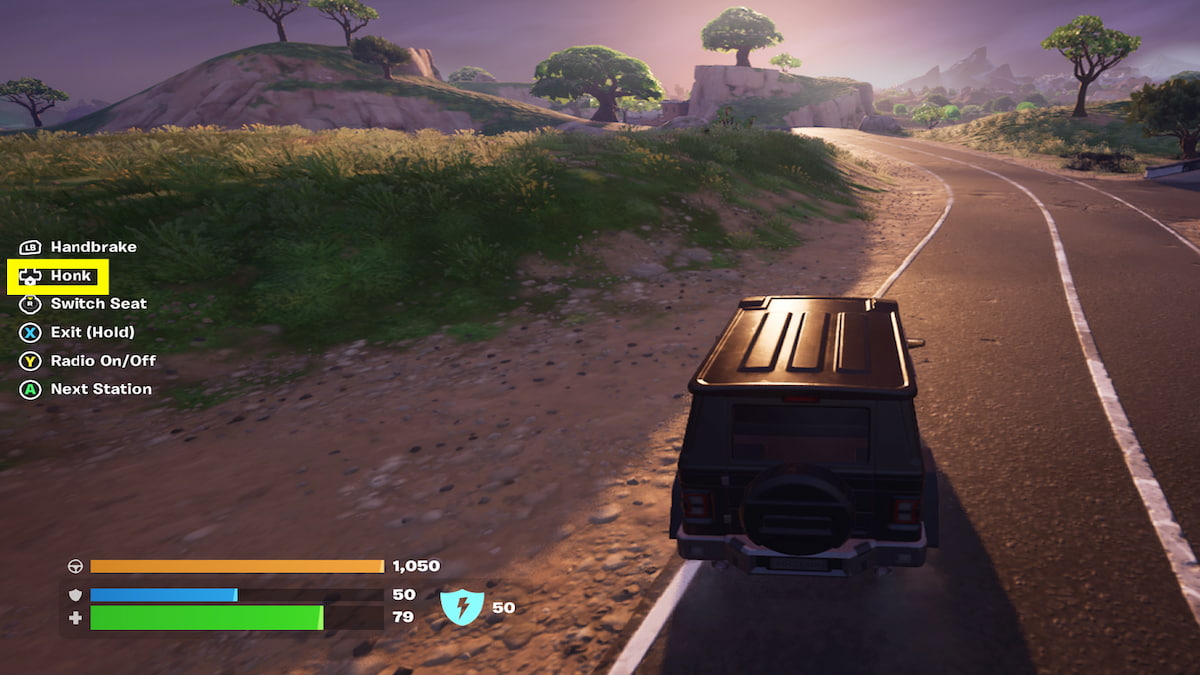
Once you’re in a car, you can press the D-pad down on Xbox and PlayStation, or M2 on PC to honk the horn. Just be sure to press it when you’re within 10 meters of an enemy player, which is to say, at least close enough where you can see them.
Where to Get Wings of Icarus
The following quest requires flying a specific distance using the Wings of Icarus. You can get these all over the place: within chests, as ground loot, and especially around any of the Olympian locations. However, the place I most commonly find them is in God Chests, similar to the Banana of the Gods.
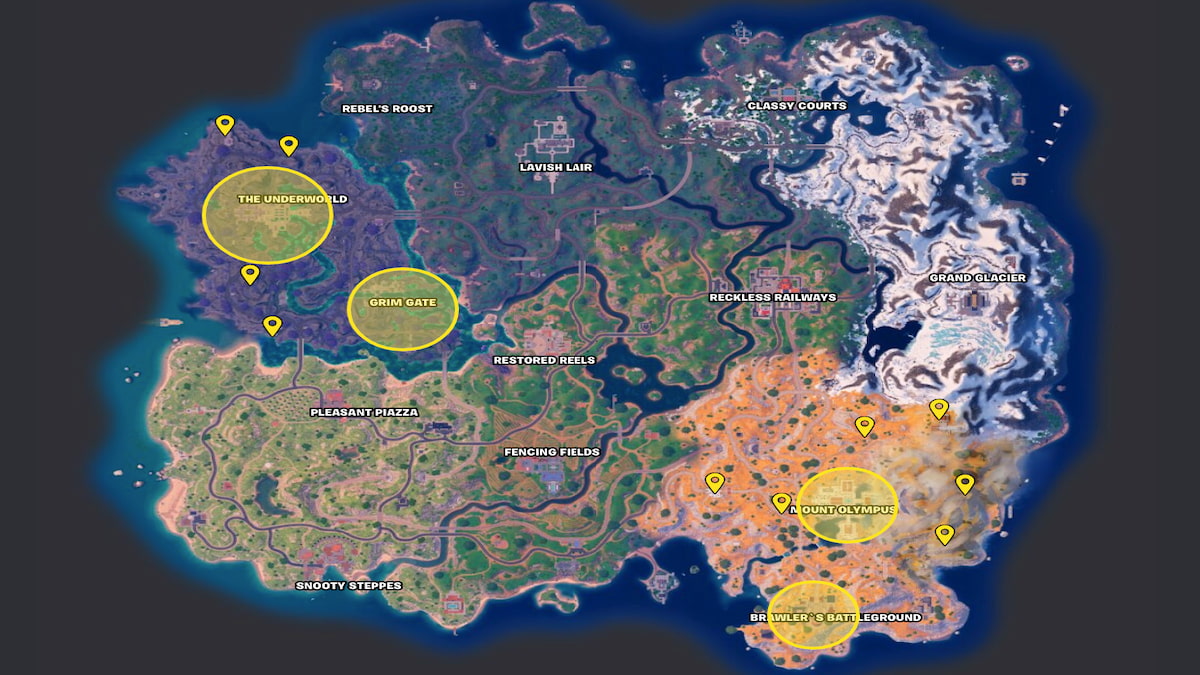
God Chests are special chests that only spawn around the Olympian locations and have a greater chance to drop a higher rarity item. They also carry the god powers more regularly than ordinary chests. Most God Chests I open drop out a Wings of Icarus. You can find these chests around The Underworld, Grim Gate, Mount Olympus, and Brawler’s Battleground, including small temples and buildings on the outskirts of the locations.
Once you have some, use RT/R2 or M2 to initiate flight and then use the sprint button in the air to boost ahead. Try to fly as far as possible to rack up distance and get this quest done. Don’t worry if you aren’t able to do it all in one go either; you can pick up with the distance you left off within the next round.
How to Complete a Train Heist or Claim the Capture Point on Floating Island
For the very last part of the Marigold Heist, you must pull off your own mini-heist: either completing a train heist or claiming the capture point on the floating island. The floating island doesn’t appear until later in the game, so I would suggest trying to complete a train heist first. If you miss your chance for that, then you can focus on the floating island.
The best way to pull off a train heist is to land at Reckless Railways and wait for the train to drive through, allowing you to hop onto it. Or, you could try to land directly onto the train from the Battle Bus by locating it on your map.
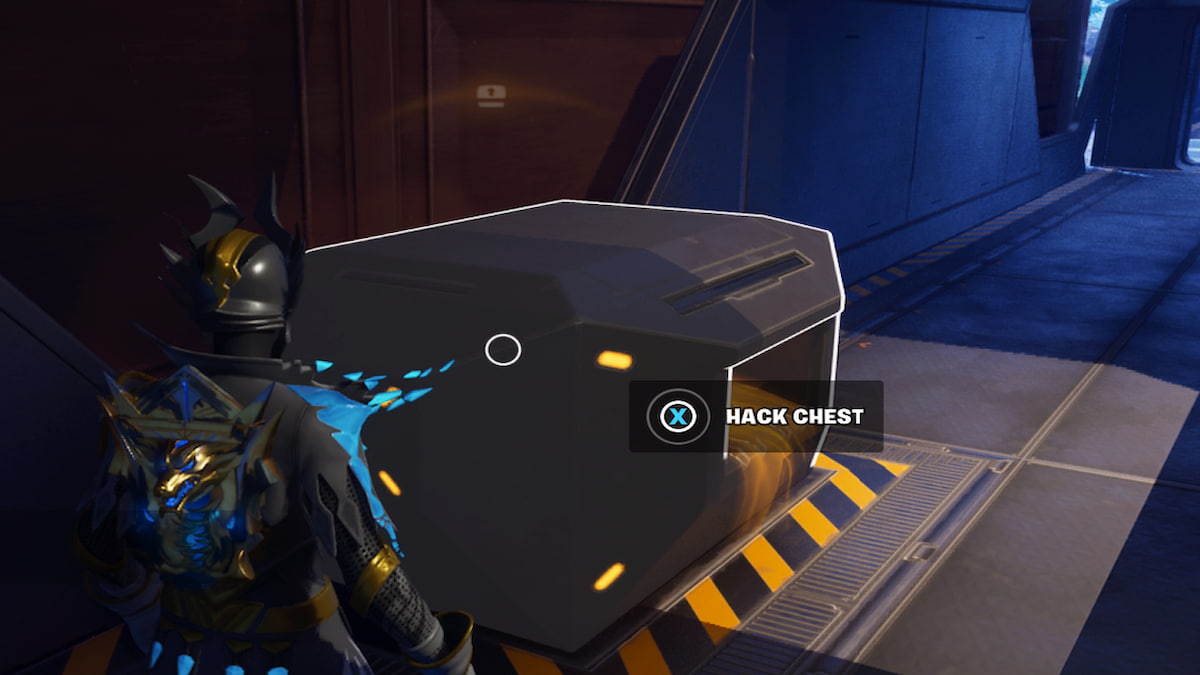
Once you can get onto the train, look for the main chest and interact with it (X on Xbox, Square on PlayStation, or E on PC) to start hacking. You’ll need to stay nearby for it to be completed, which will take a few minutes. When it’s complete, loot will drop onto the floor beside it.
If you aren’t able to capture the train, then you can always try claiming the capture point on the floating island. The floating island spawns toward the mid to late game, and like the train, you’ll be able to spot it on your map.
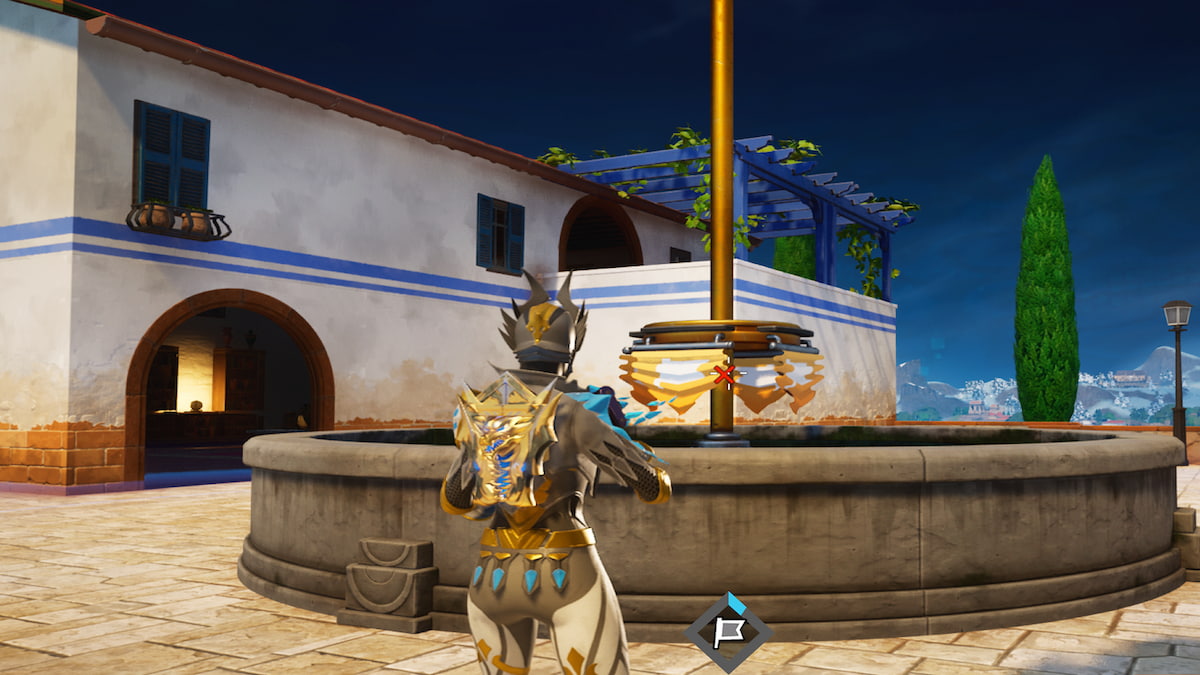
Once you get up to the floating island, either by a rift or one of the ziplines, stand near the flagpole in the radius shown around it to begin claiming. This will also take a few minutes so make sure you have a weapon to defend yourself while waiting.
If you manage to complete either one of these heists, then you’ll successfully finish off the rest of the Rise of Midas quests and earn all your rewards!
All Rise of Midas Rewards in Fortnite
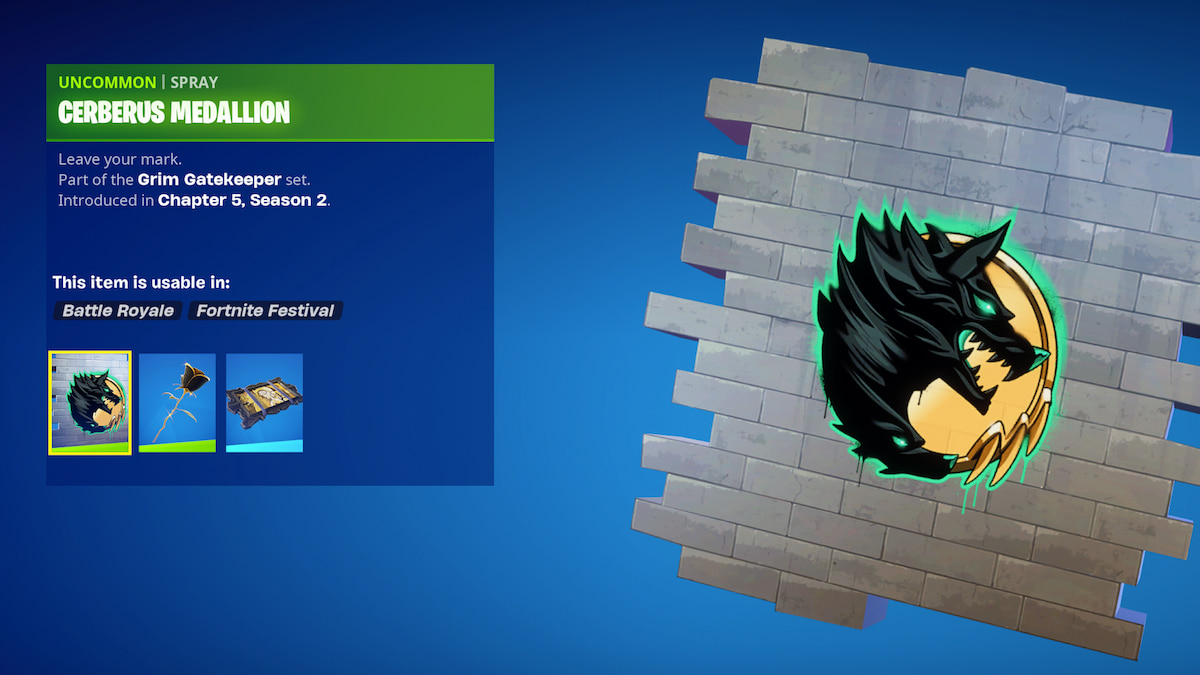
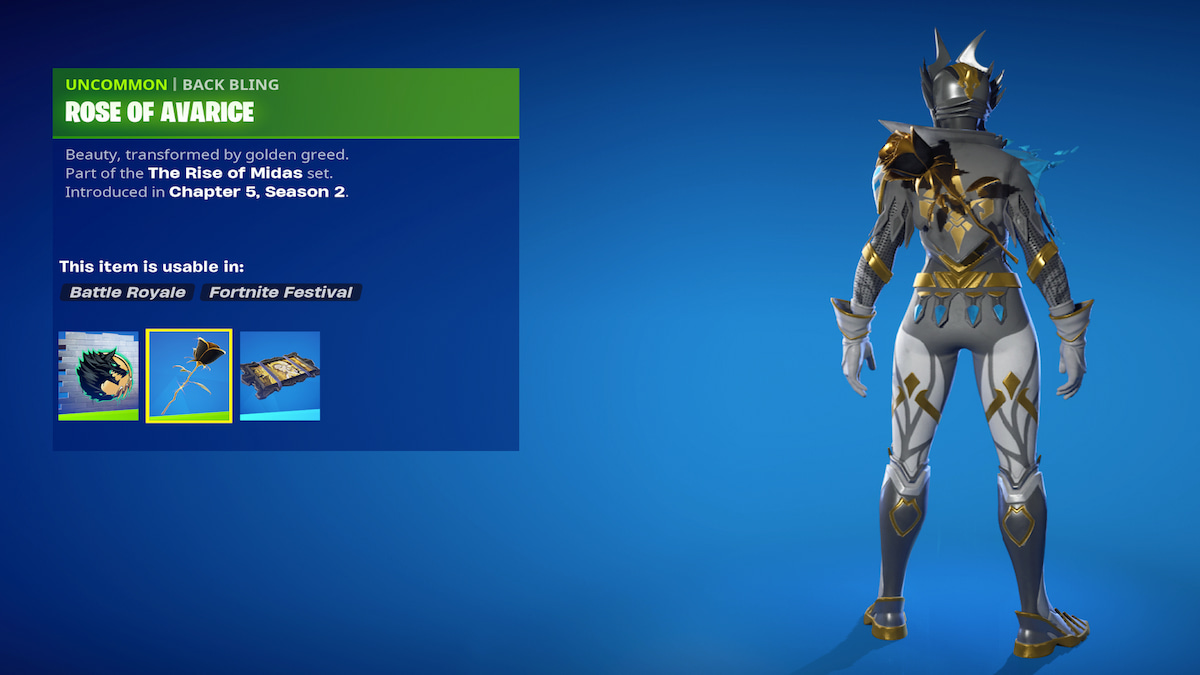
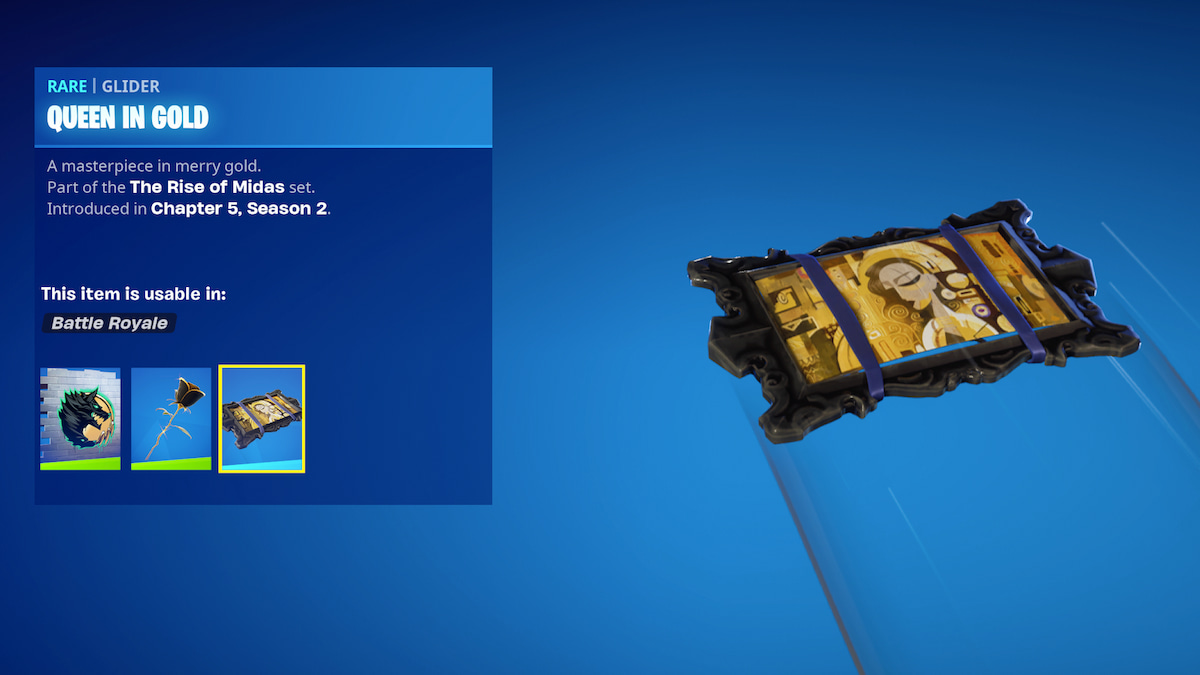
You can collect all the exclusive Midas-themed rewards simply by completing quests for the event over the next few weeks. You can get three different reward items: a Back Bling, a Spray, and a Glider. To get these rewards, complete a specific amount of quests as they roll out during the event. Here’s how many you need for each item:
- Cerberus Medallion Spray – Complete 6 Quests
- Rose of Avarice Back Bling – Complete 12 Quests
- Queen in Gold Glider – Complete 18 Quests
Stay tuned to GameSkinny’s Fortnite guides hub for more Myths & Mortals content, like how to find and accept three Shadow Briefings or get Hades Whip.






Published: Mar 28, 2024 11:29 am