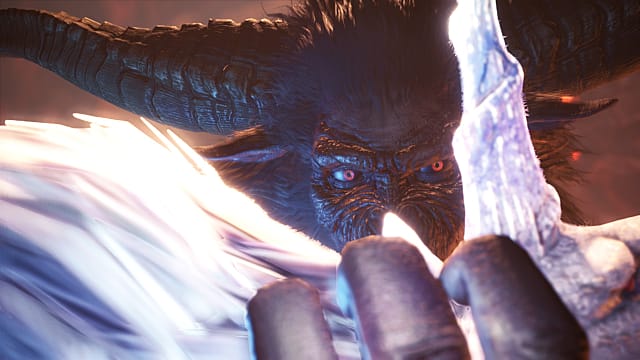
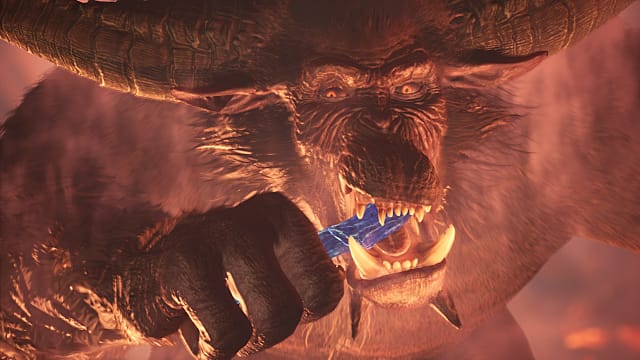
Of all the monsters in Monster Hunter World: Iceborne, Rajang stands among the toughest of monsters, rivaling any of the high-end Master Rank monsters in its ferocity.
Rajang is relentless, deals incredible damage, and moves with a quickness almost unmatched across all of Monster Hunter World. No surprise, then, that his weapons and armor are some of the best in the game, let alone the Iceborne expansion.
Below, I outline everything you need to know about taking on this great ape, including tips on how to beat him and a rundown of his attacks.
How to Unlock Rajang in Monster Hunter: World Iceborne

Complete Icborne’s main story and unlock the Guiding Lands. Then speak to the Admiral in Seliana. He’ll add the “Sterling Pride” quest to your quest list. It tasks you with slaying a Master Rank Kirin in the Hoarfrost Reach.
Here’s a guide on how to unlock and defeat Kirin if you need help or don’t already know how.
Kirin’s demise grants you the second and final quest in the Rajang questline: “Reveal Thyself, Destroyer.” Head to the Guiding Lands for a short walk and a couple of epic cutscenes. Your first major encounter with the ape himself will follow after.
Eat before starting this quest. You can’t eat in this quest until you meet Rajang proper. You can use a Farcaster once the cutscene plays and eat as usual, but if you’re worried about timing, better to play it safe.
Rajang’s Attacks

Rajang is in his first form when his fur isn’t yellow. Because Rajang uses the same attacks across his three forms, you can use his normal state as a way to learn his patterns, hitboxes, and recovery windows.
Below is a list of each attack and how you can use each to your advantage.
Charge
Rajang has two primary charge attacks. Neither has much windup, and neither does much damage. You’ll know the attacks are coming when the beast leans back on its hind legs for a few seconds. A simple dodge to the side is usually enough to avoid either charge.
You won’t have any opportunities for damage after a charge, so set up for whatever attack he uses next.
Grab
Rajang will open up one of his paws and swipe in a broad arc in front of him, and once he does, he’ll grab you and slam you into the ground. You’ll be stunned for about 30 seconds. The odds are he’ll then saunter up to you and slam a fist directly into your chest, sending you back to camp in a cart if no one’s around to help.
Recovery here is a couple of seconds long, and if you’re in a group, you can still damage him while he’s in the animation. Just don’t expect your teammate to last very long.
Spin
A variant charge, Rajang will put both arms to one side and start spinning across the arena, dealing knockback and moderate damage. There’s not much recovery. The attack happens fast, so it’s likely that you’ll get hit.
Five Swings
Rajang will wind up with either fist and take five or six sideways punches at you. The hitbox for each swing lingers until the next one starts and can connect behind and to the side of the monster if you’re close.
Each swing will also propel Rajang forward a short distance, and there is a brief recovery window at the end of the attack, specifically on the tail. You’ll need to be quick, as Rajang isn’t a fan of people behind him, but most light attacks are doable.
Regular Slam
After rearing up on his hind legs, Rajang slams the ground in front of him, dealing moderate damage and causing a knockdown. Even if you don’t take the hit directly, you’ll be crawling on all fours for several seconds, leaving yourself open to further ape attacks.
The recovery window here is short, but his tail — a rare crafting material — is open for damage.
Mega Slam
Though it’s rare in his first form, Rajang is still capable of his mega slam at any point in the fight. There’s much more windup to this attack, where he’ll stand on his legs and get ready to jump into the air. Once above you, he’ll likely be out of your field of view, and about a second later will hit the ground with incredible force.
This attack does massive damage and will send you flying. If you’re at about 2/3 health, prepare for a cart back to camp. Thankfully, the impact takes a lot out of Rajang. Should you avoid a hit, take the opportunity to attack his arms or legs or go for a big damage combo.
Air Blast
The other powerful attack in Rajang’s arsenal is where he jumps backward and expels a ball of electrical energy from his mouth. There’s a brief windup, but once you’ve seen the attack once, you’ll know when it’s coming. The energy ball explodes when it connects with the ground, creating a shockwave proportionate to the size of the energy ball.
In his first form, both ball and explosion are relatively small, but in later attacks, it covers a wide area and can one-shot unprepared hunters. Run and dodge diagonally toward Rajang when he uses this attack, as the recovery window here is generous.
Also note: Rajang reverts to his base form if he uses this attack while enraged.
Barrel Roll
This is the final aerial attack Rajang uses. It is a fast jump-into-slam has a tiny hitbox, so a simple roll-forward is enough to avoid it. Speed is the main factor here, as neither its windup nor the actual attack takes more than a second or so.
Like his other jumping attacks, however, Rajang does have to stand on his legs to start. The animation for starting this attack is also fairly distinctive, as he’ll begin curling himself into a ball before he even makes it airborne. He’ll end up behind you once the animation completes, and there isn’t much recovery, so make ready for his next attack.
Mouth Laser
Last but not least, Rajang’s breath weapon: the Dragon Ball Z-esque mouth laser. The damage for this attack isn’t super high, and if you dodge it, you have a huge opportunity to put in some attacks of your own.
Rajang will prepare for his version of the Kamehameha by hopping into a stable stance and bracing against the ground, followed shortly by releasing the energy from his mouth. It can hit you twice if you get up inside the beam, but because the attack’s tell is so clear, you shouldn’t have much trouble quickly dodging out of the way.
Rajang’s Forms

Rajang has three forms, but he’ll spend the majority of his time in only two: base and enraged.
Rajang Base Form
Rajang’s base form has no electrical charge, and his fur isn’t bright yellow. Attacks here do moderate damage at best, and as with any un-enraged monster, they’re slower to come out and less frequent. He’s less liable to use his bigger moves, too, sticking to punches, charges, and his uncharged jumping attacks.
Rajang Enraged Form
Rajang’s enraged form sees him charging his fur with electricity. He’ll be much more aggressive, more liable to use lasers and high-damage attacks, and he’ll take more to knockdown. Rajang’s recovery windows also shrink while enraged, so you’ll need to take more care when dealing damage.
Rajang Rampage Mode
The third form is called rampage mode and sees our monster taking his aggression to the next level. His attacks will deal maximum damage, recovery windows shrink further, and he becomes much more mobile, jumping and dodging at every opportunity.
The biggest difference about rampage mode is in Rajang’s arms. There are two key things to know about this form:
- No amount of sharpness will pierce the hide on his arms
- Even the largest weapons will deal minimal damage and bounce almost harmlessly off, leaving you with a weaker weapon and open to attack.
You can’t even tenderize Rajang’s arms in this state, as the invulnerability takes precedence.
Attacking Rajang’s tail puts him out of rampage mode more quickly, but if you’re alone, you’ll be hard-pressed to keep track of the tail. Best to go for his head and legs until he’s calmed down.
Final Notes on Rajang in Monster Hunter: World Iceborne
While the above tips outline pretty much everything you need to know about one of the game’s hardest monsters, there are a few small considerations to keep in mind about Rajang, whether in single-player or multiplayer co-op.
First, you won’t be able to grapple onto his head with the Clutch Claw. You grapple his arms instead. The effects are the same for launching and tenderizing, but you won’t be able to weaken his head.
Second, he’s somewhat resistant to traps, so you’ll need to be quick with your Tranq Bombs. He isn’t an elder dragon, thankfully, so you can capture him.
Third, Rajang will initially only appear in the Guiding Lands, but optional quests and investigations become available as you play further.
—
And that’s how to find and how to beat Rajang in a nutshell. For more Monster Hunter: World Iceborne guides and Monster Hunter World guides, check out these articles:
- Monster Hunter: World Iceborne Not Loading on PC Fix
- Best Monster Hunter World Iceborne Greatsword Builds
- Monster Hunter: World Iceborne Poogie Outfits
- How to Get Felyne Zoomaster Canteen Ingredients in Monster Hunter World: Iceborne
- Monster Hunter World Iceborne: How to Find Rare Endemic Life
- Best Monster Hunter: World PC Mods


Published: Feb 9, 2020 10:53 pm