It’s been only a couple of weeks since the release, and Fallout 4 has already received many great modifications. While some make it graphically more alluring, others tend to make it more realistic and easier to run. Then there are the NSFW mods (which are just, there).
Because of the older game engine used in this game, users everywhere started creating mods within days of release. Hence a plethora of modifications exist. As a result, just Google-ing “Fallout 4 mods” will provide scores of results from hundreds of sources. Knowing which ones are genuine can be hard, and even if you get the proper ones you need instructions for their proper installation. To make life simpler for you, here’s all at one place.
We’ve compiled some of the best mods available as of now, along-with a brief description, you can also find a mini-how-to guide for their installation under each topic.
First and Foremost : Enabling mods
Before you get going with downloads and installation of the mods, you need to enable them. The steps are quite simple and take less than 5 minutes. Note that it’s the step zero and there is no way around it. A Fallout 4 mod manager developed by NexusMods is also available to smooth things out for you.
It’s not as hard as it sounds — quite possibly you’ve already done it. If you haven’t, just follow these simple steps for enabling the mods in Fallout 4.
- First, Navigate to your “DocumentsMy GamesFallout4” folder.
- Open the Fallout4Prefs.ini file.
- Find the section titled(marked) as [Launcher] and add the following line: ” bEnableFileSelection=1 ” without quotes or spaces. Save it once done.

It should look the image above when you’re done. The job is half done.
- Next open the Fallout4.ini file.
- Find the section titled(marked) as [Archive]
- Find the line “sResourceDataDirsFinal=STRINGS”
- Change it to “sResourceDataDirsFinal=STRINGS, TEXTURES, MUSIC, SOUND, INTERFACE, MESHES, PROGRAMS, MATERIALS, LODSETTINGS, VIS, MISC, SCRIPTS, SHADERSFX”
Save the file. Congratulations! You can now modify your copy of Fallout 4. All that is left is finding which of these 5 mods you want in your game (you should get them all, if you ask me).
As for the Mod manager here are the steps for its installation taken from this great article on GameSkinny. Give it a look if you want but be sure to come right back.
Setting up the Mod Manager
The first thing you’ll have to do, is head on over to the NexusMods and download the mod manager. The download link will look like this:

After you’ve downloaded the mod manager, extract the contents and place theFallout 4 Mod Manager folder into your Fallout 4 directory.

When you open the Fallout mod manager you will be greeted with this screen:

When you want to install a mod, click on the install button, highlighted here with a red rectangle. After you click the install button, it will ask you to find the downloaded mod file.
In this demonstration, the mod ‘More Armor Slots’ has been installed.
After you have found the download file, a window like this will pop up. If it says “Looking Good!” at the bottom, you’re all clear for a good install.

Click that install button one last time, and there you go, mod installed!
Don’t forget to make sure the boxes on the left side are checked. If you leave them unchecked, they won’t activate when you launch the game!

So, here are the best mods available so far for Fallout 4; note that this is just a list and not a count-down.
Creature Follower Mod
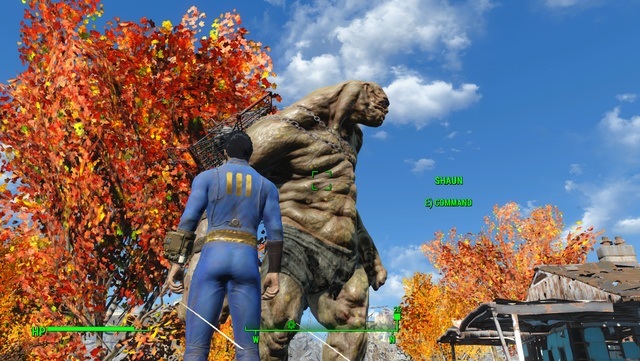
Alright, this mod is downright brilliant. Creature Follower allows you to choose a character to follow you around while leaving your companion slot empty. You can choose from deathclaws, supermutants, synths, wild dogs, and Yao Guai ( the mutated bears of the wasteland).
To summon your favorite wasteland companion you’ll need some console codes. There are many such creatures and everyone of them has a different console code, as it is not possible to include all, here are a few to get you acquainted. The rest can be found here.
Open console and click anywhere to select a random ref-id, this cannot be player or other NPC’s ref-id. Alternatively you can go to Vault 111 exterior and click on the radstag in console
Use the console command :
For deathclaw:
“bat shaunclaw”
and again
“bat shaunclaw”
——————————————————–
For yao guai:
“bat shaunbear”
and again
“bat shaunbear”
——————————————————–
For gen1synth:
“bat shaunbot”
and again
“bat shaunbot”
——————————————————–
For cat:
“bat shauncat”
and again
“bat shauncat”
Once again, these are not all of the available console codes and you can get many more — Eyebot, Assaultron, Sentrybot, or Alien followers and quite a few more — from the provided link.
Enhanced Blood Textures
In a game like Fallout 4, graphics play a very important role. They try to make the game as close to reality as possible. This increases the quality of overall gaming experience. But often certain details don’t live up to the expectation. One such thing in Fallout 4, is the blood texture. Don’t get me wrong, the default blood texture is just good enough, it could be better. dDefinder1, a member of NexusMods, proved this by creating the Enhanced Blood Textures mod.
This mod gets you a great looking blood spatter and is quite realistic. It is installed by the mod manager but some extra steps are required to tweak the mod. To install it, follow the steps shown above for installation using Mod Manager. Once done you’re set, to tweak it further follow these steps-
- Once again open fallout4.ini
- Find section titled [Display] and add these lines to it :
fDecalLifetime=800.000 (this increase the time the decal remains)
fDecalLOD0=70000 (this increases the distance blood appears)
FO4 Rain
Speaking of reality, FO4 Rain mod brings that extra stretch of realism to the game. The mod changes the earlier barely visible rain drops to a thicker and chunkier downpour. Not only this, but the ripples it creates upon hitting the water have also been revamped and give a much better feel.
The mod is perfectly good alone but can be complemented with the Louder Rainy Sound mod (just download it and extract the sound folder into your Fallout 4/Data folder).
To install FO4 Rain, just download the file and copy the ‘textures’ folder to Falout 4/Data folder. You’re good to go after this.
Lowered Weapons in First Person Mode
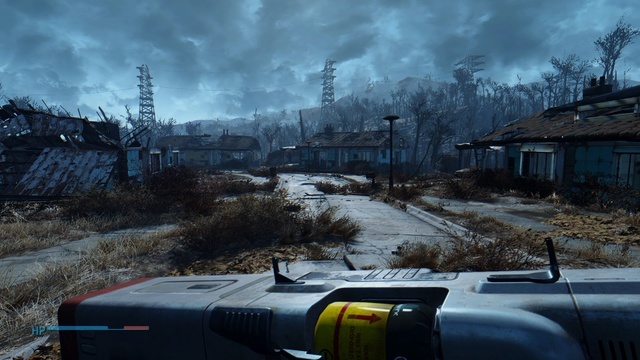
FPS mode has always been the popular choice while shooting your enemies, but Fallout 4 has a very irritable, kinda bug, which has you staring down the scope whether you’re shooting or taking a stroll. The Lowered Weapons mod fixes this particular problem. With this mod you now have lowered weapons when not engaged in combat.
To install just download the file and copy the ‘meshes’ folder to ‘data’ folder in your Fallout 4 directory. Again it’s a perfectly good mod to use, but you can disable the aim zoom to make it… here it comes…. more real. To disable the zoom do this
Open fallout4.ini and add this at the end:
[Camera]
f1rdPersonAimFOV=XX.0000
f3rdPersonAimFOV=XX.0000
Craftable Ammunition
Workstations in Fallout 4 allow you to craft a number of different items including weapon mods and grenades, but it lacks a very important thing, ammo crafting. Replicating the ammo crafting style of Fallout: New Vegas, this mod lets you craft every single type of ammo in the game at your chemistry station. Just follow the given steps and you have it.
- Go to the “UsersYour NameAppDataLocalFallout4”.
- If you cannot see the AppData folder, you have Hidden folders set to hide.
- In “UsersYour NameAppDataLocalFallout4”, remove the read-only state on plugins.txt by going to Properties and clearing the read-only tickbox.
- Open plugins.txt and on a new line, add the line below:
- CraftableAmmunition_Perks.esp
- Close plugins.txt and make it read-only once again.
- Go to “SteamSteamAppscommonFallout 4Data” and extract the CraftableAmmunition_Perks.esp into the folder.
The mod should now be installed.
Bonus Mod: Atom Bomb Baby
Why stop at graphics tweaking and spawning characters when you can go on to creating weird things that go ‘BOOM’. The Atom Bomb Baby mod does just that. The mod is best described in the words of the creator, trainwiz, himself. ‘Have you ever sat and thought, “man, I want to launch my baby out of a catapult?”. I know I have. In retrospect, this is why my wife left me,’ he says.
To install, copy ‘meshes’ folder to ‘data’ folder in Fallout 4 directory and you’re done.
So here was a list of 5 best Fallout 4 mods so far. Be sure to comment your favorite ones below.







Published: Nov 27, 2015 08:42 am