And so begins part two of this Majora’s Mask game guide. We’ll continue from where we left off: The Dawn of the First Day.
Okay, so you’ve made it to Clock Town! As you exit the Clock Tower into South Clock Town, note the yellow Deku Flower diagonally to your right. You won’t be using it now, but it’ll be very important in a chain of trading quests. It is also absolutely essential to our end goal of the first three days.
If you walk forward, you’ll see a staircase in front of you and to the right. It’s in the corner of the area, and there is a bright red mailbox right next to it. Ascend the stairs and pass through the opening to the Laundry Pool.

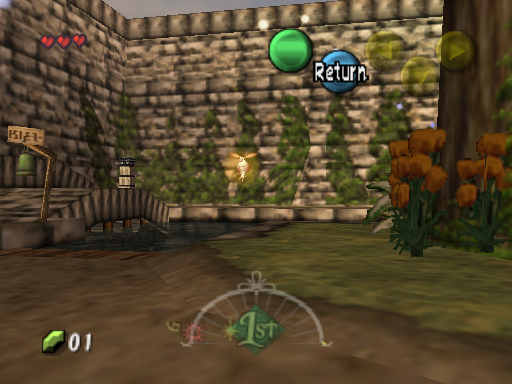
Floating above the water is a little glowing fairy-like thing. This is a fragment of the Great Fairy of Clock Town. If you had gone to the Fairy Fountain in North Clock Town like Tatl wanted you to, the fairy fragments there would have requested you go find this fairy. So it’s like skipping a step.
Deku Link has the handy ability to hop across water. He only has three hops before he drowns, so it’s kind of annoying sometimes. However, in this case, it’s perfect. Hop across the water near the fairy, and you will, for lack of a better word, collect it. The fairy will beg you to return it to the Fairy Fountain, so off we shall go! Return to South Clock Town.
Once back in South Clock Town, head toward the yellow Deku Flower. Don’t get too close, though, or you’ll trigger a cutscene that you don’t need to see until later. Walk straight past the Deku Flower and head up the ramp behind it. Turn right, and notice the Owl Statue to your right; go up another ramp, and pass through the opening to your left into North Clock Town.
Turn left as you enter North Clock Town to see the entrance to a cave at the top of a set of ramps. Head over to it. Through this opening, you will find the Fairy Fountain. By bringing the fairy fragment to the others, the Great Fairy of Magic can pull herself back together.
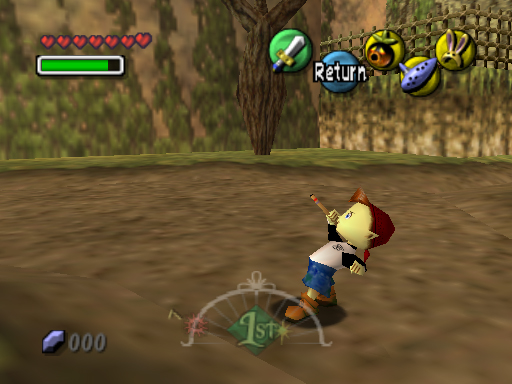
She’s so pleased with you that she gives you the bubble blast ability. Basically, you blow a bubble and use it to hit things. This power is controlled by your fancy new magic meter (another gift from the Great Fairy). Your Magic Power can be replenished by potions or green jars that sometimes spawn from grass.
The Great Fairy also points you in the direction of the man in the observatory which can be reached through West Clock Town. He has knowledge of the Skull Kid, but you can’t get to the observatory to see him without joining a secret society.
 The Bombers are a group of five little boys who do good deeds and help people. When you exit the Fairy Fountain and return to North Clock Town, you’ll see their leader (Jim) trying to pop a balloon by shooting at it.
Before you go about joining the Bombers, shoot down the other balloon (the red one) that has a man in green dangling from it. This is Tingle. He is a thirty-five year old man who believes he is a fairy. Yeah, I know. But he makes awesome maps.
You should probably have the five rupees you need to buy his map of Clock Town, but there is a circle of grass behind him which you can destroy with your spin attack to get some more.
You’re done with Tingle for the moment, so return your attention to Jim. To impress him, use your fancy new bubble blast power to pop the bubble and speak to him.
In order to join the Bombers, you have to win a timed game of Hide and Seek. Don’t worry, though. You only have to do this once. Ever. Well, unless you’re crazy like me and decide to play through this game again multiple times. You also have to play it again as Human Link if you want the Bomber’s Notebook. It records the secret code as well as other side quests that arise, so it’s pretty handy.
See, the Bombers have this secret code that you have to know. One of the members guards the entrance to the passage that leads to the conservatory, and you have to tell him the code before he’ll let you pass. The code is made up of the digits 12345, but they are in a random order that is different for every save file.
You could spend a few hours guessing random combinations, but I, personally, believe that playing Hide and Seek is easier.
Anyway, talk to Jim after popping the balloon, and he’ll ask you if you’d like to try to pass his test. Say yes, and he’ll explain the rules. Basically, just find them all as soon as possible.
And the game begins!
The Bombers can be found in North, East, and West Clock Town. My strategy is simple: catch the ones in North, then work your way clockwise (get it?) through East and West Clock Town to get the others.

One of the Bombers is over by the tree near the ramp leading to the Fairy Fountain. Jim is in the opposite corner. All you have to do to catch them is come in contact with them. Of course, they’ll run from you to make it harder. Woo.
Anyway, after you’ve caught the first two, head through the doorway directly across North Clock Town from the Fairy Fountain. This will take you to East Clock Town. There’s a bomber standing in front of what looks like an alley. He’s directly across from you as you enter East Clock Town. He is, however, not a participant in this game, so just ignore him for now. Later, you’ll tell him the secret code to gain access to the passage behind him which leads to the conservatory.
There are two other Bombers in East Clock Town. Head up the stairs to the right of the Bomber guarding the passage. One of the Bombers is at the top. When he sees you approaching, he’ll use the Cucco he’s holding to safely drop down to the ground beneath him. Jump off after him and try to catch him as he lands. If you, like me, have trouble with this, just chase him around. You’ll get him eventually.
In East Clock Town, there is a building shaped like a giant treasure chest. Next to it is a small, raised area with a Deku Flower. Use it to launch yourself up to the awning nearby and catch your forth Bomber.
Head down the stairs behind the treasure chest building and enter South Clock Town. You’re just passing through, though. Go toward the Clock Tower, up the ramp to the left, and through the passage across from the Owl Statue you saw earlier. This will take you West Clock Town. The final Bomber will be right in front of you. Catch him, and you’ve won the game.
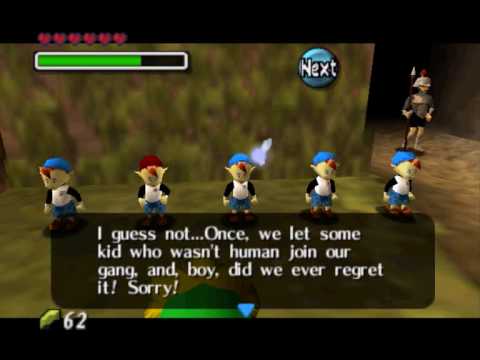
Unfortunately, even though you’ve won, the Bombers are horribly racist and won’t let a Deku Scrub join their ranks. They once let a non-human join, and it didn’t work out too well for them. This non-human was, of course, the Skull Kid.

But they’ll still tell you the code. Write it down. I’ll repeat that for emphasis. WRITE IT DOWN. You don’t want to chance forgetting it and having to play Hide and Seek all over again, do you? Exactly. So write it down, put it in your phone, comment on this article, just record it in some way so that you can access it later if you forget.
My code is 43512. See, look at me recording it for future reference. I didn’t do that the first time I played Majora’s Mask, and I had to play Hide and Seek again. Which was fun, let me tell you.
In the next installment of this guide, I’ll go over everything from your first trip to the conservatory to your first trip back in time. Look for it soon!


Published: Oct 18, 2013 11:42 pm