Between the Empire and the New Republic, there are eight ships in Star Wars Squadrons, four for each faction. They all have their strengths and weaknesses, and each one is useful in certain situations.
Some Star Wars: Squadrons ships are good if you’re trying to kill a star destroyer, while others are best when going against other starfighters in dogfights. Still, others are strong in support roles and keeping allies in the fight.
Since there are so many modules you can unlock and add to your starships, such as new weapons, engines, and hulls, this list will primarily look at how good each ship is in its vanilla construction.
Of course, there are situational strategies in the campaign, multiplayer, and fleet battles that require changing fighters on the fly, but overall these are the best for the Empire and the New Republic.
Best Ships for the Empire
Tie Interceptor
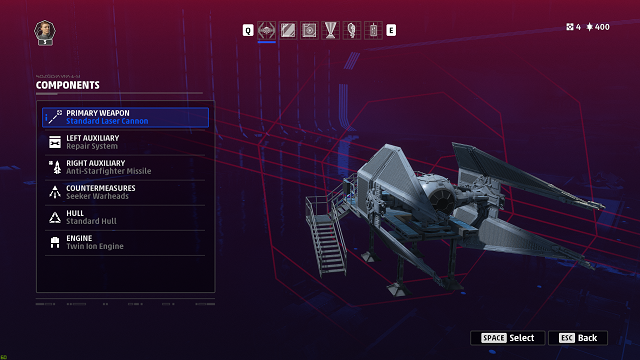
Vanilla build:
- Primary weapon: Standard laser cannon
- Left auxiliary: Repair system
- Right auxiliary: Anti-starfighter missile
- Countermeasures: Seeker warheads
- Hull: Standard
- Engine: Twin ion engine
Stats:
- Max Hull: 775.0
- Max Speed: 170.0
- Max Acceleration: 256.0
- Maneuverability: 85.0
Even though the Tie Interceptor doesn’t have shields (just like the Tie Fighter and Tie Bomber), it’s fast and nimble. This is the perfect ship for dogfighting and taking on other fighter squadrons. It’s the only ship that can go toe-to-toe (stat-for-stat) with an A-Wing right out of the hangar.
Its speed can get it in trouble when going after Y-Wings, especially, and U-Wings sometimes. It’s easy to blow by both in the heat of combat, where Y-Wings are inherently slow, and U-Wings aren’t often at full throttle because they’re providing support.
Interceptors should never really be used for attacking flagships or capital ships head-on. Turbolaser fire will melt Tie Interceptor hulls, and that goes two-fold if the larger ships’ turbolasers are active.
If you must attack a flagship or a capital ship with a Tie Interceptor, it’s best to make quick strafing runs along the top of the ship. Divert power to your primary weapons systems, hit the target, and then divert power to your engine and speed out of there.
Tie Bomber

Vanilla build:
- Primary weapon: Standard laser cannon
- Left auxiliary: Assault shield
- Right auxiliary: Multi-lock missile
- Countermeasures: Chaff particles
- Hull: Standard hull
- Engine: Twin ion engine
Stats:
- Max Hull: 2,500.0
- Max Speed: 115.0
- Max Acceleration: 169.0
- Maneuverability: 75.0
Tie Bombers are beefy. Like the New Republic’s Y-Wings, they have a very high Toughness stat, making their hulls laser sponges. If you’ve played any amount of Squadrons, you’ve likely noticed that it takes sustained fire from overpowered lasers to bring down a Tie Bomber in relatively quick order.
That makes these Imperial ships perfect for assaults on flagships and capital ships.
The default loadout comes with the multi-lock missile module, which is great against AI and human fighter squadrons. It can lock on to three enemies at once and has a relatively short cooldown. Proton bombs are also unlocked by default, and those can be used to wreak havoc against larger ships.
Aside from the Tie Reaper, Tie Bombers are the only other Imperial ships to have access to shields early on in Squadrons. Though shields are an auxiliary attachment here and can only be used a few times before needing resupply, the availability makes these ships a standout.
The only real downside to Tie Bombers is their slow speed. They can be flanked easily and become sitting ducks for flagships and capital ships without proper power management.
Tie Reaper
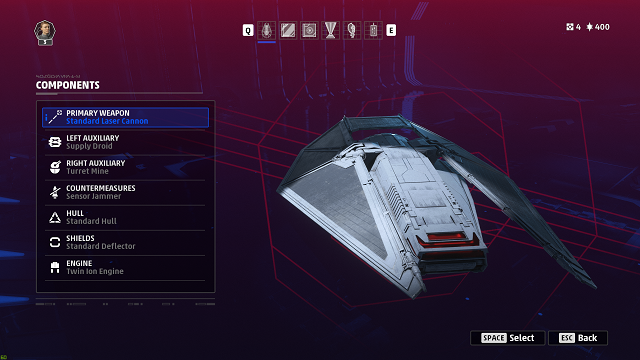
Vanilla build:
- Primary weapon: Standard laser cannon
- Left auxiliary: Supply droid
- Right auxiliary: Turret mine
- Countermeasures: Sensor jammer
- Hull: Standard
- Shields: Standard deflector
- Engine: Twin ion engine
Stats:
- Max Hull: 1,000.0
- Max Shields: 1,000.0
- Max Speed: 130.0
- Max Acceleration: 144.0
- Maneuverability: 70.0
Tie Reapers are first and foremost support ships. They are meant to resupply allied starfighters in dogfights and fleet battles or protect important objectives.
Supply droids do as they say: resupply allies with auxiliary weapons and health. Turret mines are just like peaceable turrets in other shooters (such as Call of Duty) and provide sustained fire on enemy ships within a particular radius. They are best used when protecting an objective. The sensor jammer is a countermeasure that completely removes an enemy lock and keeps other enemies from locking on to you, though it has a very long cooldown.
Unlike Tie Bombers, Tie Reapers have a legitimate deflector shield, which operates the same way as deflector shields for New Republic ships. This makes it a good second option for attacking large vessels, though its firepower stat is the lowest of any Imperial ship.
Tie Fighter
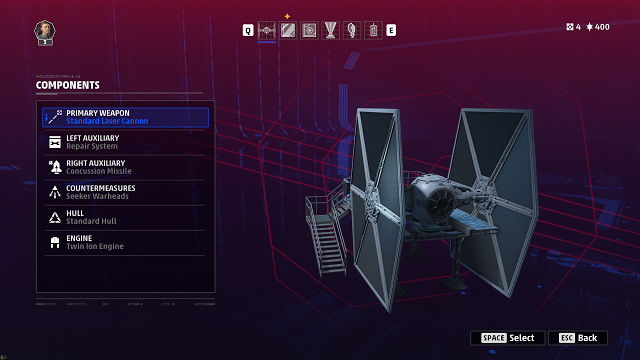
Vanilla build:
- Primary weapon: Standard laser cannon
- Left auxiliary: Repair system
- Right auxiliary: Concussion missile
- Countermeasures: Seeker warheads
- Hull: Standard
- Engine: Twin ion engine
Stats:
- Max Hull: 1,550.0
- Max Speed: 150.0
- Max Acceleration: 211.0
- Maneuverability: 80.0
Tie Fighters have decent firepower and top-tier hull strength, and they come stock with a hefty right-auxiliary payload in the concussion missile. For dogfights, they are the second-best option behind Tie Interceptors. They can also take on capital ships if pilots are fast and reroute power correctly.
But Tie Fighters are so low on the Imperial Navy’s ships list because they are the most fragile starfighter. Their hulls are about as tough as those found on X-Wings, except Tie Fighters don’t have shields, and they aren’t as quick or maneuverable as Tie Interceptors. They are also rather easy targets to pick out in dogfights.
Shields can be purchased for 1 requisition very early on in Star Wars: Squadrons, so you can provide some protection after your first fleet battle. But Tie Fighter shields are attached as auxiliary modules, meaning they have cooldowns. They also don’t provide any of the secondary benefits of shield modules found on Tie Reapers or any ship in the New Republic fleet.
Best Ships for the New Republic
X-Wing
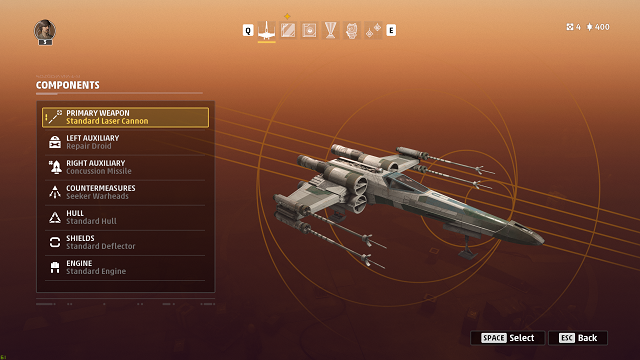
Vanilla build:
- Primary weapon: Standard laser cannon
- Left auxiliary: Repair droid
- Right auxiliary: Concussion missile
- Countermeasures: Seeker warheads
- Hull: Standard
- Shields: Standard
- Engine: Standard
Stats:
- Max Hull: 1,200.0
- Max Shields: 800.0
- Max Speed: 145.0
- Max Acceleration: 160.0
- Maneuverability: 75.0
Much like Tie Fighters, X-Wings are the most balanced, new-player-friendly ships in the New Republic Navy. In fact, they are probably the most welcoming ships in all of Star Wars: Squadrons. If you’re just starting with space combat sims like this, the X-Wing should be your go-to. The campaign begins with one for a reason.
X-Wings are powerful, speedy, and tough; they have the same hull stat as Y-Wings, but increased maneuverability. They stand apart from Tie Fighters because their shields are equipped as their own module.
Similar to other New Republic ships, X-Wings can customize their deflector shields in flight, covering the entire ship or just the front or rear. And since shields don’t take up an auxiliary slot, X-Wings have more weapon choices than Tie Fighters, too.
X-Wings are capable of taking Ties head-on in dogfights, and they can adequately take on flagships and capital ships. Outside of the Y-Wing, the X-Wing is perhaps the best ship for taking on Raiders and Star Destroyers.
Y-Wing

Vanilla build:
- Primary weapon: Standard laser cannon
- Left auxiliary: Automatic ion cannon
- Right auxiliary: Proton bomb
- Countermeasures: Particle burst
- Hull: Standard
- Shields: Standard
- Engine: Standard
Stats:
- Max Hull: 1,200.0
- Max Shields: 1,200.0
- Max Speed: 110.0
- Max Acceleration: 121.0
- Maneuverability: 70.0
There’s really not much of a difference between Y-Wings and Tie Bombers. Both have near-identical strengths and weaknesses and can mangle enemy flagships with heavy weapons and proton bombs from the moment you hop into the cockpit.
Y-Wings are tougher than Tie Bombers; their hull stat is nearly maxed out. However, they don’t pack as much firepower in their laser cannons. They are also a touch slower than Bombers, but not by much.
Y-Wings come stock with an automatic ion cannon, which is perfect for getting enemies off your back. It won’t completely save you, but it does provide a security blanket that can also disable other ships, which your allies can pick off.
Just as with Tie Bombers, Y-Wings can hold their own in a dogfight, but they’re best suited for assaults on larger vessels and prolonged sieges. Don’t become complacent with their shield and hull stats, though, especially if you’re going up against turbolaser — or turbolasers covered by buzzing Tie Interceptors.
U-Wing

Vanilla build:
- Primary weapon: Standard laser cannon
- Left auxiliary: Supply droid
- Right auxiliary: Turret mine
- Countermeasures: Sensor jammer
- Hull: Standard
- Shields: Standard
- Engine: Standard
Stats:
- Max Hull: 1,000.0
- Max Shields: 1,000.0
- Max Speed: 130.0
- Max Acceleration: 144.0
- Maneuverability: 70.0
U-Wings are the support ships of the New Republic. They’re a bit slower than Tie Reapers, but they are roughly as powerful and tough as their Imperial counterparts. They even have the exact same loadout for weapons and modules as Tie Reapers, placing them squarely in the same position in the hierarchy of light-side ships.
For easy recall (and so you don’t have to scroll back up to the Tie Reaper section), Supply droids are what they sound like; these modules resupply allies with auxiliary weapons and health. Turret mines are autonomous, sustained-fire bots best used when protecting an objective. The sensor jammer is a countermeasure that eliminates an enemy lock and stops other enemy vessels from locking on to you for a short time.
U-Wings can take on larger ships, but they’re best used patrolling the fringes of a fight, taking out stragglers or badly damaged fighters and supporting allies.
A-Wing
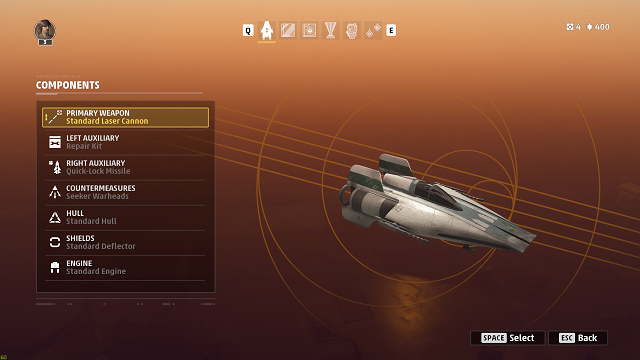
Vanilla build:
- Primary weapon: Standard laser cannon
- Left auxiliary: Repair kit
- Right auxiliary: Quick-lock missile
- Countermeasures: Seeker warheads
- Hull: Standard
- Shields: Standard
- Engine: Standard
Stats:
- Max Hull: 500.0
- Max Shields: 500.0
- Max Speed: 160.0
- Max Acceleration: 196.0
- Maneuverability: 80.0
A-Wings are probably my favorite ships. They’re as fast and nimble as Tie Interceptors, and they’re the perfect ships for dogfighting (no surprises there). Their high speed stat can also cause headaches against the game’s slower starfighters or if you don’t know how to handle its engine.
Like Interceptors, A-Wings shouldn’t ever really lead the charge against flagships or capital ships. If you’re feeling like a hotshot, quick strafing runs underneath Star Destroyers are best.
So why is the A-Wing last on this list? Because they’re a high-risk, high-reward ship not made for every type of pilot. A-Wings require a lot of systems micromanagement.
Even though they have built-in shields, their shield value is the lowest of all New Republic ships. Having shields on such a fragile starfighter can easily lull you into a false sense of security. Every hit on a Tie Interceptor is to the hull, but in an A-Wing, it’s easy to get cocky.
Ultimately, the Choice is Yours
The final tip I’ll leave you with, pilot, is this: you will get the most out of these ships once you begin unlocking new modules and weapons with requisition. The starfighters listed above are ordered based on the early game, vanilla loadouts, and what I found successful.
As with many “tier lists,” the order of ships here is also heavily influenced by playstyle and comfortability. Ultimately, the Star Wars Squadrons best ships are the ones you feel most comfortable flying — and the ones you succeed with the most. Good luck out there, and may the Force be with you.



Published: Oct 4, 2020 04:27 pm