Xenoblade Chronicles’ maps are huge and stuffed full of locations and landmarks to uncover. You’ll come across many of these through the story itself, but there’s a good many Xenoblade Chronicles secret areas to find as well.
You should seek out these secret areas not just because you’ll get hefty experience bonuses, but because many of them are required for specific side quests.
We’ve rounded up all the Xenoblade Chronicles secret areas and how to find them, plus the quests they’re associated with.
We’ll be presenting these in sort of chronological order, based on which general locations you’ll come across first. But note that some of these aren’t actually accessible until later in the story.
Tephra Cave Secret Areas
Tephra Cave is your first real “dungeon”, and its got two secret areas hidden in the depths. But you won’t be able to access them until much later, after events unfold inside the Mechonis. It’s not a secret when it happens, though; you’ll know it.
Bafalgar’s Tomb Location
Once you access Bafalgar’s Tomb, you’ll unlock a number of quests from Shura, an NPC you’ll find here.
- Fast travel to Villa Lake in Tephra Cave’s first floor, and once you’re at that point in the story, the blocked area to the northwest of the lake will be unblocked.
- Go through the room with the Arachno pods and high-level Vang, and head into the eastern cave.
- Take the northern path at the crossroads.
Heavenly Window Location
- In the room with the high-level Vang, exit through the north.
- Then just follow the path. It’s long, but mostly devoid of danger. You’ll find a heart-to-heart along the way in the Bone Corridor as well.
Bionis’ Leg Secret Areas
The Bionis’ Leg houses just two secret areas as well, despite being massive. Fortunately, you can get to these right away and (mostly) without any trouble.
Observation Platform Location
- Go to the Daksha Shrine location on the lower level of the leg.
- To get there, start from the Kamos Guidepost landmark near the Refugee Camp, and head northeast to the Viliera Hill location. Enlarge your map if it’s easier.
- Keep going northeast until you reach a small, paved path behind Viliera Hill. Follow that path to Daksha Shrine.
- You’ll see a red quest item on a dais towards the back of the area. Grab it for part of the Giant’s Key/Treasure quest chain if you want, but you’ll get chased by a level 37 unique monster, so be aware of that.
- Skirt the eastern edge of the location, heading towards the climbing spot marked on the map. Follow the path into a cave, and you’ll find its full of high-level monsters. Keep out of the Dark Hox’s sight line and work your way around the cave edge.
- You’ll emerge onto the Observation Platform — and there’s another high level monster waiting, so if you aren’t ready, jump into the water to get away from it.
Believer’s Paradise Location
This one’s a lot less dangerous, and it’s got a heart-to-heart between Shulk and, when you get him, Dunban.
- On the upper level, explore the northwest portion of the map until you find the Zax Guidepost landmark. If you’re having trouble, start from the platform where the Mechon boss fight takes place, and just go northwest from there.
- Go east from the Guidepost and follow the elevated path through a cave that leads you to the Believer’s Paradise
Ether Mine Secret Area
The Ether Mine only has one secret location, and it’s not very secret.
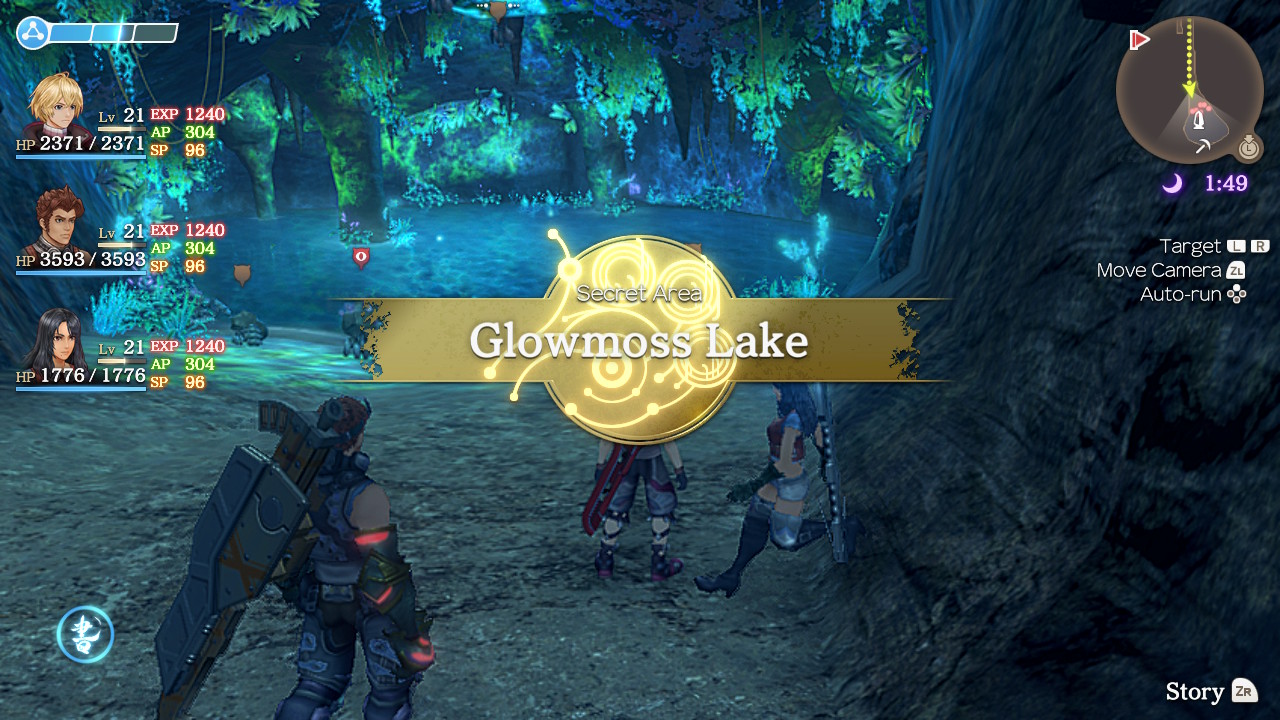
Glowmoss Lake Location
- Take the long tunnel in Test Pit 1 all the way down to find Glowmoss Lake.
- There’s a level 29 unique monster (Elegant Marin) so you might want to just pop in far enough to uncover the location and then come back later when you’re stronger.
Satorl Marsh Secret Area
This one’s a bit of a stinker if you don’t know where to look. Fortunately, you do know now.
Shining Pond Location
You’ll need to find the Shining Pond to complete Mementos of a Lost Son, and it’s also where you’ll find A Mysterious Delicacy for Zazadan.
- Go to the Dark Swamp and work your way to the bottom/southern edge. You will take damage from the poisoned water; there’s no way around that.
- You’ll find an incline leading out of the swamp. Just follow that up, and you’ll find the Shining Pond secret area in a cave.
Makna Forest Secret Areas
Makna Forest covers a huge chunk of land and has four secret areas, the most for one location in the game.
Divine Sanctuary Location
Divine Sanctuary is involved in the Rest in Peace quest and it’s also where the Nopon Challenge of the Sage quests originate.
- Go to the Waypoint Beacon, a landmark on the eastern side of Bridge One.
- Drop down to the ledge below, and follow the path through a cave that leads to a cliffside ether deposit.
- Venture into the other cave in this cliff edge, and it’ll take you to the Divine Sanctuary
Seahorse Islet Location
You’ll need to reach Seahorse Islet for the Challenge of the Sage, since it’s the Proof of Courage location. It’s pretty straightforward.
- Travel northeast along the river in Makna Forest until you reach a small island.
- You found the secret area.
Sparkling Pool Location
The Sparkling Pool is where Melia and Sharla’s “No Boys Allowed” heart-to-heart takes place, and you’ll also need it for the Secret Innovation quest.
- Travel to the Twisted Tree Gate landmark.
- Head northwest until you get to the Eks Watering Hole location.
- Climb up the giant tree root sticking into the watering hole.
- Follow the path south until you reach the Sparkling Pool.
King Agni’s Tomb Location
King Agni’s Tomb isn’t exactly hidden, but it is sealed. You won’t get access to it until you take on the Mystery of the Makna Ruins quest chain from Lupa in Frontier Village.
- Complete Mystery of the Makna Ruins 1.
- Accept Mystery of the Makna Ruins 2 from Lupa.
- Travel to the Pod Landing Site landmark, and follow the path around to the southwest.
- Investigate the Tablet Seal to open the tomb.
Eryth Sea Secret Area
There’s just the one secret area in Eryth Sea, and you’ll want to turn auto-run on for sure.
Faras Cave Location
Faras Cave isn’t required for quests, but outside the usual Exp boost, it does have some good collectibles.
- Fast travel to Hovering Reef 9.
- Leap into the sea.
- Swim southwest to the little nub sticking out of the map’s edge.
- Be patient.
Valak Mountain Secret Areas
Valak Mountain has but two secret areas, and they’re nowhere near as annoying to get to as Faras Cave was — sort of.
Befalgar Pedestal Location
You’ll need Befalgar Pedestal for both the Valak Mountain Research quest and to gather Morning Dew Ice for the Believing Again quest.
- Start at the first landmark, Zokhed Pass.
- Go to the right, up one of the inclines, and turn left at the fork.
- Follow the path south to another fork, and turn left again.
- The Befalgar Pedestal is at the end.
Three Sage Summit Location
This one’s a bit of a pain thanks to some slightly obtuse platforming needed to get there. But it’s worthwhile, because you’ll find the Glory Sobos locations here, and they drop items needed for the Replica Monado quests.
This is also the where you need to go for the Final Giants’ Ruins quest.
- Start from Zokhed Pass and go west.
- Take the second incline, the one that takes you up to Serik Waterfall. You’ll need to melt some ice, then go west.
- On the slide-y part of the pass, you’ll need to jump right as you leave the ledge. Assuming you make it, you’ll grab onto a climb-able surface. Climb up, and follow the path around until you get to the Three Sage Summit.
Sword Valley Secret Area
Sword Valley has just one secret area, Monado Wound, and it’s not the most impressive in terms of rewards. You just get experience and the chance to revisit the site of the game’s opening scene.
Monado Wound Location
- Go to the Ether Storage location. It’s the giant round part in the middle of the map, south of Gate Three.
- Head west. That’s it, plus lots of Mechon.
Fallen Arm Secret Area
The vast Fallen Arm has one secret area for you to find: Distant Fingertip. You’ll need to get there for the For My Loved One quest to find the Tear of the Sky location, and there’s a heart-to-heart one there as well.
Distant Fingertip Location
- Go to the end of Digit 2. If you’re having trouble finding it, it’s west of the Digit 2 Plains landmark.
- Head all the way to the back/north of Digit 2 until you get to a climbing wall. It’s in the back-right niche on the Digit 2 map.
- Then it’s the climbing equivalent of Faras Cave. Keep climbing and heading up until you reach the Fallen Arm’s upper level. The path takes you to straight to the Distant Fingertip landmark.
Mechonis Field Secret Areas
Mechonis Field has two secret areas to find, one of which is absolutely not secret at all.
Great Battle Scar Location
The Great Battle Scar is the most obvious secret location in the game. Still, it’s worth finding if only because it leads to the second secret area.
- Travel to the Upper Bulkhead Bridge landmark on the fourth floor.
- Go east, and follow the path around the outside of the Mechonis, including the ventilator shaft rides. It’s pretty much just sitting there. You can head down the slide to grab an Energy Aubergine for The History of the Machina quest, though.
Machina Refuge Location
The Machina Refuge has a shop and also continues the quest line you (should have) started on the Fallen Arm with To My Loved One. You’ll meet Bozatrox and complete the Best Boots quest.
- Fast travel back to the Great Battle Scar, and ride the ventilator shaft up again.
- Turn right this time, and follow the path around.
- Go down the slide, but try and control your descent by running back up the slide.
- Aim for the left platform, the one with an incline going down.
- Follow that path, and climb up the ladder to find the Machina Refuge
Agniratha Secret Area
Seven Sage Cloister Location
The capital city of Mechonis hides one secret area for you to uncover, and while it might seem tedious to get to, you’ll be glad for the chance it offers you to level up.
- Complete all quests in Agniratha
- These can be found in the City Planning Terminal, the Military Status Terminal, the Strategic Intel Terminal, and the Civil Protection Terminal. Most of them are requests to take down specific Mechon types, with a few centered around Telethia.
- Once that’s taken care of, go to the Central Tower landmark again, and access the Capital Control Terminal to get the Cloister Key.
- Now, head up to the Data Center on Agniratha’s highest floor. The Cloister Key lets you open the previously locked doors, and the Seven Sage Cloister is inside.
—
That’s all Xenoblade Chronicles‘ secret areas, but be sure to check out our other content including:
- Xenoblade Chronicles heart-to-heart guide
- Xenoblade Chronicles Giants Key quest guide
- Xenoblade Chronicles thunderstorm guide and how to change Xenoblade Chronicles weather
- Xenoblade Chronicles Out Like a Light quest guide
- Xenoblade Chronicles White Eduardo guide
Check out our other Xenoblade Chronicles guides here on GameSkinny.


Published: Jun 4, 2020 02:26 pm