Editor’s note: Updated 11/15/18 with more tips.
Red Dead Redemption 2 is a behemoth of a game. When you first begin, you’ll find yourself essentially on rails for about two hours or so. Here, the game teaches you many of its basic mechanics, priming you for the massive open world to come.
But when you reach Horseshoe Overlook near Valentine, the training wheels come off … mostly. The game does provide you with more tips and tricks as you discover new things, but you have to discover them before it will tell you how to do them — or if you can even do them at all.
That’s why I’ve whipped up this beginner’s tips and tricks guide to Red Dead Redemption 2. After about 10 hours with the game, it’s obvious there are a few things — even those as simple as “how to reload” or “how to upgrade stamina” — that aren’t clearly explained or can be easily overlooked if you’re not seeking them out.
Below, we’ll cover:
- How to reload
- How to fast travel
- How to upgrade your abilities
- How to understand cores
- Why upgrading your camp is important
- Why you should keep your horse clean
- Why you should clean your guns regularly
- How to pay a smaller bounty
- How to auto-hogtie NPCs
- And more
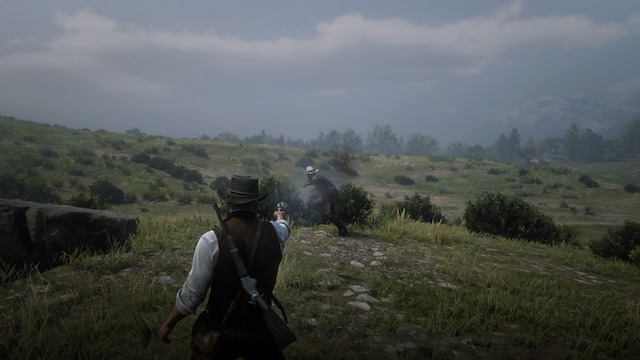
How to Reload in RDR2
OK. Let’s start with something relatively simple: reloading.
Red Dead Redemption 2 doesn’t tell you how to reload your weapon, and if you’re like me, you won’t really notice it doesn’t tell you until you’re in a firefight pressing the wrong button.
To reload, press “Circle” on PS4 and “B” on Xbox One. Being that most games map reload to either “Square” or “X” respectively, you’ll probably find you’re hopping around while bullets fly instead of reloading — at least once or twice in your first encounter.
Do Missions Before Exploring the Open World
This is something I learned the hard way: do missions before exploring Red Dead 2‘s open world.
You can start exploring as soon as you reach Horseshoe Overlook. However, you might find that you can’t do certain things, like fishing, or that it’s pretty damn hard to get money for camp upgrades.
The secret is this: Red Dead Redemption 2‘s early missions either unlock specific items and services or provide a good source of income.
For example, here’s what you can unlock just in by completing missions in Chapter 2 (alongside the mission’s name):
- Exit Pursued by a Bruised Ego: Horse Brush and Legendary Animal map
- Money Lending and Other Sins: Ledger and Camp Upgrades (see below)
- The Spines of America: Fences (to sell loot)
- A Fisher of Men: Fishing Pole (Fishing)
- A Strange Kindness: $300 Gold Bar
Unlock Fast Travel Early
It’s possible to ride anywhere you want on Red Dead 2‘s expansive map. But for certain things, like picking up bounties, getting a haircut, or selling skins to the trapper, you’ll just want to get to city hubs as fast as you can, which means fast travel.
To pseudo fast travel, you can set a waypoint on the map, engage cinematic camera mode, and start riding: your horse will take you to the destination (or in the vicinity of your destination) by itself. There’s no need to hold “X” (PS4) or “A” (XB1). Note that this system is a bit fickle: start on roads and your horse will automatically ride; start off-road, and your horse will only gallop while you press or hold the ride button.
However, the game doesn’t tell you that you can unlock true fast travel very early on. Here’s a guide on how to unlock fast travel as soon as possible.
- Complete the first part of the first quest from Leopold Strauss
- Collect the debt from Wrobel first since it’s the fastest
- Unlock the ledger (automatically happens after completing the above)
- Spend $325 (after spending $220 on the first upgrade) to unlock fast travel from Arthur’s tent to anywhere you’ve previously visited
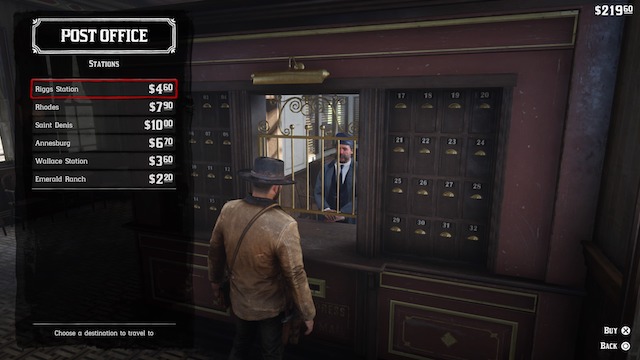
Use Stagecoaches and Trains to Travel Faster
Another thing the game doesn’t tell you is that you can also travel by stagecoach and train from the beginning of Chapter 2.
Open the map and look at Valentine — or any other major hub — and look for the signpost symbol and envelope symbol, which denote the town’s stagecoach and train respectively.
Trains will take you to all the major hubs on the map immediately, and they are typically cheaper and faster than a stagecoach. However, stagecoaches will take you to smaller areas, such as ranches not near rail tracks, that trains won’t go.
If you find that the stagecoach symbol is locked, it’s because of one of three things:
- You’re riding a horse and opened the map
- You’re wanted and have a bounty on your head
- You’re currently in a mission
Note: Stagecoaches won’t appear next to the stagecoach sign until after you’ve designated a destination by purchasing a ticket. Your horse will also appear once you’ve reached your destination.
Increase Abilities by Using Them
Red Dead Redemption 2 doesn’t have a skill tree system. That means you won’t get experience points for taking out lawmen, hunting legendary animals, or dominating at poker.
Instead, you will upgrade your abilities by actually using them. The game hints at this and mentions it in places, but doesn’t outright tell you early on. With so much going on, it’s easy to miss that by riding your horse, you’re increasing your bond with it, for example.
So, if you want to upgrade Dead Eye, use Dead Eye — a lot. If you want to increase your horse’s stamina, ride it — a lot.
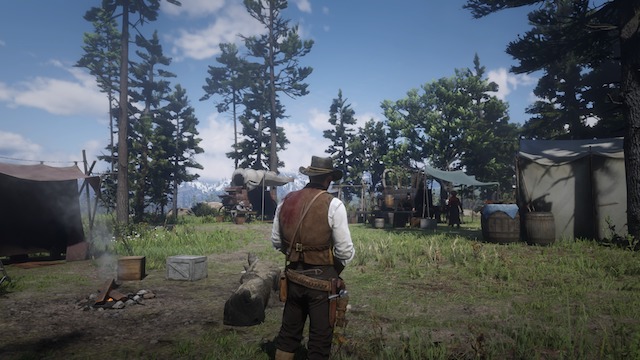
Don’t Neglect Your Camp
When RDR 2 starts in earnest, you’ll get a camp at Horseshoe Overlook. Here you can sleep, eat, cook, shave, change clothes, craft upgrades, and more.
You can even grow the camp by getting the ledger.
But you also have to keep it stocked with ammunition, food, and medical supplies. You can donate money or luxury items such as stolen watches and belt buckles to increase your camp’s savings. When you buy upgrades or restock from the ledger, the cost first comes out of the gang’s savings; whatever else is needed comes out of your pocket.
So why contribute your own money to the savings? Isn’t it the same as buying out of your own pocket? Well, not really. Giving to the savings and upgrading your camp incentivizes NPCs in the camp to contribute to the savings as well. This is essentially giving you “free” money, so it’s worth doing.
You can also donate items to each of the camp’s “vendors” to increase morale, such as giving a freshly killed deer to the butcher.
Do Chores Around Camp to Increase Abilities, Morale
Doing chores around the camp also increases morale. For example, chopping wood increases morale, honor, and Dead Eye. The game doesn’t tell you that you can do this until, well, you actually do it — and fully complete the task in question.
Explore Off the Beaten Path
Explore off the beaten path to find ingredients, natural food items, challenges, side-quests, encounters, rare wildlife, camps, and much more.
A lot of Red Dead Redemption 2‘s gameplay lies outside of the main missions. If you stick to the road, you’re bound to miss a lot of it.
Look for Gang Camps to Loot
Although mostly few and far between, you will occasionally come across gang camps and bandit camps while exploring the wilderness.
You can often find them by looking for smoke from their campfires. You can either climb to a vantage point and scan the horizon for smoke, or you can also look up toward the tops of trees, where you can sometimes see smoke rising into the sky.
Usually, the outlaws in these camps will warn you to stay away or else they’ll shoot. Use this as an opportunity to get the jump on them. Use Dead Eye to quickly take out the (usually) three to four men in the camp.
Loot their corpses and camp, the latter of which has the chance of containing expensive valuables and precious resources for your abilities.
Study Animals While Hunting
This might not seem necessary at first, but studying animals in RDR 2 is important for several reasons.
Studying animals puts them into your compendium. Here, you will learn valuable information about them, such as:
- Where you can find them on the map
- What types of foods they like (for bait)
- What weapons you should use to hunt them
- What types of ammo to use when hunting them
- What tactics you should use when hunting them
To study animals, press and hold “R1” on PS4 or “LB” on Xbox One when you get close to them to add them to the compendium. You can also study animals from farther away by using your binoculars.
To access the compendium, open the game menu and go to “Progress”. Then choose “compendium” in the middle.
Pick Flowers and Harvest Plants for Ingredients
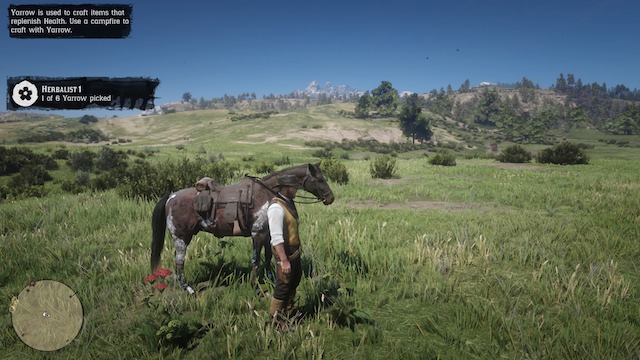
While hunting provides you with skins for crafting, meat for eating, or both for selling, there are tons of flowers and plants in the wilderness that will fulfill all three needs as well — and don’t require stealthy hunting to acquire.
For example, wild carrots are a perfect food for both Arthur and his horse, while American Ginseng can be used to craft health tonics and Violet Snowdrop can be consumed to increase stamina.
Some can be immediately eaten or used when harvested, while others have to be combined with other ingredients before being used.
Your compendium tells you where to find and how to use each plant, just like it does for animals while hunting.
Loot Carriages and Rob People
As you ride through the world, you’ll inevitably come across carriages and lone riders.
Carriages are great sources of income throughout the game, and especially after you unlock fences in the Chapter 2 mission, The Spines of America. First of all, carriages often have lock boxes on the back. You can shoot the locks off or use the lock breaker to open them silently. Inside, you’ll find loot and, sometimes, money.
You can also sell carriages to Seamus at Emerald Ranch after completing The Spines of America. Average, less ornate carriages sell for less money than their more grandiose counterparts.
On the other hand, robbing people and lone riders can also be lucrative, if also more dangerous. Often, riders won’t go down without a fight, so be prepared to shoot. One of the best ways to avoid a shootout is to lasso your victims before they see you coming or have a chance to draw their weapons.
Also, try to rob people at night or off the road. Any witnesses will alert the law — and some witness might even be the law.
Buy Masks From Fences and Wear Them
After you unlock fences, you’ll be able to buy masks. These are especially useful when holding up carriages, robbing people, and clearing out banks.
Your bandanna works well, but masks hide your entire face — and look terrifying to boot. Wearing masks will also still allow you to wear your bandanna and not be recognized by the law.
Camp in the Wilderness
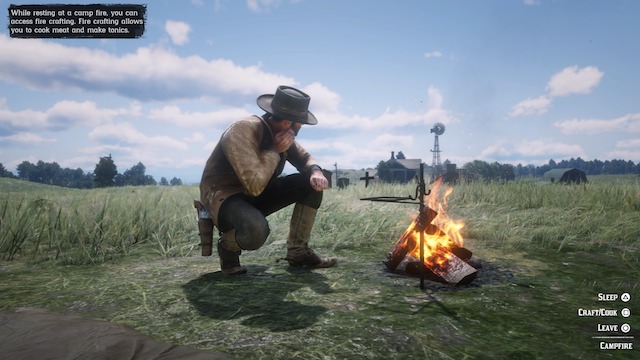
Sometimes it’s easier to camp in the wilderness than travel all the way back to Horseshoe Overlook. To camp anywhere on the map, open your item wheel and select the campfire under the “items” tab.
You can craft, cook, and rest after you’ve made camp. This is a good way to pass time if you want to stay in the same area, change time of day, or craft certain items such as coffee or potent bitters.
Be Careful Trimming Your Hair or Beard
Hair grows in Red Dead Redemption 2.
When you first get to Horseshoe Overlook, you might be enticed to use the shaving station by Arthur’s tent to change his look. However, shaving or cutting your hair means you will lose access to hair and beard styles at the barber.
If you cut your hair or beard too short and want a specific style that requires a longer cut, use a hair tonic. You can find these at vendors and in the world as loot. Hair tonics will increase the rate at which your hair grows.
You can also sleep to increase the length of your hair or beard, although this method is slower than using a hair tonic.
Cores, Cores, Cores
We have a whole guide on cores, but the idea behind them is worth repeating because their importance can’t be overstated.
Both you and your horse have bars and cores. Arthur has bars and cores for health, stamina, and Dead Eye, while horses have bars and cores for stamina and health.
The bar around the core is your “temporary health“: this bar depletes first when taking damage, running, or using Dead Eye. When the bar around the core depletes, the core begins to deplete.
Bars regenerate over time, but cores do not. You must use tonics or provisions to refill cores.
Lose your health core and you die. Lose your stamina core, and you can’t run. Lose your Dead Eye core, and you can use Dead Eye.
Clean Your Guns Regularly
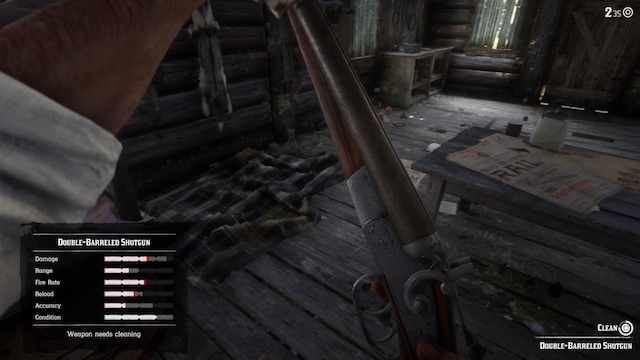
Like in other games with weapon durability, Red Dead Redemption 2‘s weapons degrade the more you use them. Cleaning your guns with oil will make sure their stats stay at maximum — or return there.
The more you use your weapons, the dirtier they’ll become. This contributes to wear, meaning you’ll be less accurate or you won’t be able to reload as fast.
You can find oil on corpses, in camps, and at gunsmiths. You can even get the gunsmith to clean your gun(s) for you and grab oil to take with you. You can also buy accessories, such as holsters, that will decrease degradation over time by a certain percentage.
Visit the Gunsmith
Aside from cleaning your gun(s) and selling items, guns, and ammunition, the gunsmith provides a few other services you’ll want to take advantage of.
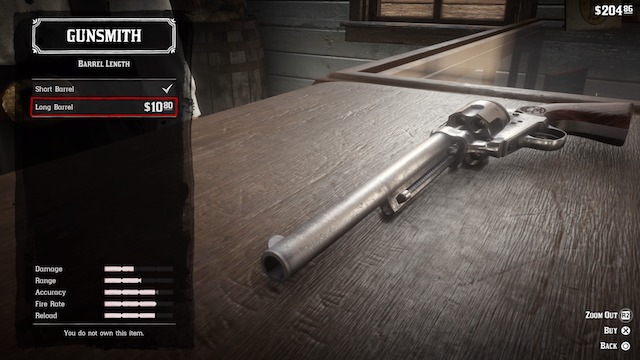
You can find all the weapons you’ve purchased in the game at the gunsmith, and you can also customize your weapons at the gunsmith. Note, they do have to be clean before you can customize them.
Customize Your Guns
Some gunsmith gun customizations are purely for aesthetics, such as gun grips, engravings, barrel colors, etc. However, other options make your gun(s) better.
Grips, barrels, sights, and more improve accuracy or range. Some improve damage output and rate of fire. Just know that upgrades like these aren’t necessarily cheap, with some going for $15 a pop.
Ammo Types Matter
Not all ammo is created equal.
For example, regular revolver ammo is simply your standard ammo. It deals good damage and has decent range. However, buy express revolver cartridges and you get around a ~10-15% increase in damage.
Get high-velocity rounds and you get about the same increase to range.
You can find these ammo types and more on corpses, in shops, in lock boxes, on shelves, etc. Essentially — and like with other items in Red Dead Redemption 2 — always be looting; there’s nothing better than getting ammo for free.
To change ammo types, simply bring up the weapon wheel, highlight the gun you want to change the ammo of, and press “left” or “right” on the D-pad.
Keep Your Horse(s) Clean
There’s a lot that goes into bonding with your horse(s). Aside from keeping them fed and riding them, you need to keep them clean.
There are two ways to do this: brush them and wash them. Both are relatively simple tasks. The first requires you get the horse brush and the second requires you simply find an area of clean water (rain will even work).
However, they’re both important because your horse(s) won’t recover health and stamina as quickly if they’re dirty.
Save Money By Getting Caught by the Law
As outlaws tend to do, you’ll eventually get a bounty on your head. To pay it, you can do one of two things: you can go to one of RDR 2‘s post offices, which are typically located near stagecoaches or in train stations, or you can get caught by the law.
In every single case, getting caught is cheaper. For example, a $15 bounty can turn into a $13 payment by getting caught. I’m not sure there’s an exact ration, but you will always save money by surrendering to the law.
What’s more, you don’t lose anything by spending a night in jail, other than your wanted status. Sitting through a short cutscene is well worth the money you save.
However, this doesn’t work with bounty hunters.
How to Surrender to the Law
Surrendering to the law is easy. All you have to do is go into the red area on the map (this will either be a bubble or an entire territory, depending on how wanted you are), keep your guns holstered, find a lawman, look at them using “L2” or “LT” and choose the “surrender” option.
Automatically Hogtie NPCs
There are myriad reasons why you wouldn’t want to kill an NPC. Whether it’s for a mission or your own nefarious (or hilarious) purposes, there are times you’ll need to capture someone instead of offing them.
You probably already know you can equip your lasso, hold “L2” or “LT“, and then press “R2” or “RT” to wrangle them. If they’re on a horse, this is really the only option you have.
However, if they’re on foot, you can run after them and auto-hogtie them. All you have to do is equip the lasso, run at them, and tackle them with “Circle” or “B“. When you tackle them, Arthur will automatically tie them up.
—
Hopefully, this beginner’s guide will make your first few hours of Red Dead Redemption 2 more enjoyable, as well as more focused on killing lawmen than on wondering where something is or how to do something.
Be sure to check out our other Red Dead Redemption 2 guides:
- How to Customize and Get New Guns
- How to Bond With Your Horse & Customize It
- Legendary Bear Pelt Location & Tips
- How to Manually Save
- Cheats Guide




Published: Oct 28, 2018 05:29 pm