The True Arena — a series staple since Kirby Super Star Ultra — is a boss rush mode which features only the toughest of the toughest from Kirby’s adventures, and it typically gives players no end of trouble. The latest iteration, found in the new Planet Robobot, is quite possibly the toughest one yet: diabolical attack patterns and a final boss with four phases render it one of the hardest challenges in Kirby history.
That’s why I’ve put together this guide for any players struggling with the mode. Here, you’ll find detailed strategies on each boss, recommended Copy Abilities, how to utilize offense/defense, and how to conserve your cherries.
Oh, and it goes without saying that MAJOR SPOILERS WILL FOLLOW! Please complete the main game first before reading this guide!
Copy Abilities
As you’re given the option to select any Copy Ability you choose beforehand, it can be more than a little overwhelming to decide which one’s the best fit for you (unless you’re doing a No Copy Ability run, in which case, uh, good luck). Through my extensive playthroughs of the mode, I’ve decided the best Copy Abilities for The True Arenas are either those that offer strong defensive capabilities or absolute offense.
For the former, many have drifted towards Archer. Its long-range attacks provide a safe distance, and its Camouflage ability provides an invincible defense alongside the handy Snipe attack. But it’s not perfect — it’s not a particularly strong ability, and you’ll get hurt if you move or Snipe at all during Camouflage.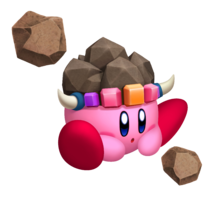 That’s why I recommend what I ultimately used to clear the mode: Stone. The Smash Drop maneuver deals huge damage and transitions into an impenetrable defense immediately afterwards. You don’t have to keep your finger on the Circle Pad, either; you can just sit and wait for the enemy’s attack to end. Its offensive options are limited, but moves like Stone Upper and Turbo Stone are insanely useful quick attacks (especially the latter, but we’ll get into that later).
If you’re in the market for more offensive-based abilities, Hammer is probably the way to go. Easily the strongest of the weapon-based abilities, it deals massive damage quickly and is great for both ground and aerial attacks. Many have also found success with ESP, as its effective attacks can be safely fired from a distance.
Conserving Cherries
I have good news and bad news. The good news is that after nearly every battle, you’ll obtain a food item to heal yourself. The bad news? It’s a cherry, which provides the lowest healing power in the game. And yes, as evidenced by similar compensation in previous True Arenas, this is done on purpose. However, there’s something you can use to your advantage: you can carry one cherry at a time on the touch screen.
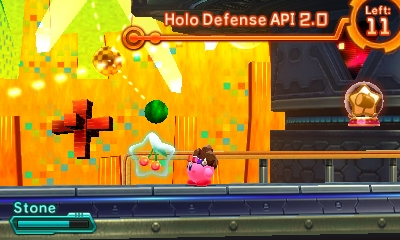
So, when’s the best time to use it? As you may’ve figured out, The True Arena is all about not getting hit. A task easier said than done, obviously, so you’ll be relying on those cherries. They heal just less than a third of Kirby’s health, so it’s best to approximately gauge that when Kirby gets hit in battle, so you can immediately use the next cherry available if he suffers more damage.
Ultimately, you’ll want to only use them them in battles so you don’t gulp down cherries as soon as they come your way, so get working on memorizing those enemy attack patterns. And just a reminder: cherries aren’t available before the first Mid-Boss All Stars/Cores Kabula matches, so plan accordingly.
Offense and Defense
So how do you fend off the likes of Haltmann and Galacta Knight? As The True Arena goes on, boss attacks will grow quicker and deadlier, and you’ll have your hands full studying them all. The more I tackled it, the more I realized that patience is your ally, which ties into my number one strategy: let the bosses come to you.
I cannot stress this point enough; it’s far more beneficial to keep your guard up and wait for the bosses instead of constantly chasing after them and being shot down by sudden movements. For example, have you noticed that going after the flying/teleporting mini-bosses never ends well? It can take a little while for them to reach the ground, but you have a higher chance of maintaining a full health bar.
But what attacks should you use? While you shouldn’t be afraid to use standard attack when bosses are in idle positions (at least for the earlier bosses), I’ve found dash attacks are the most effective. They’re quick, strong attacks go through every boss; in certain cases like Stock Mecha Knight, you may end up behind them while they’re launching an attack, so you can score some free hits!
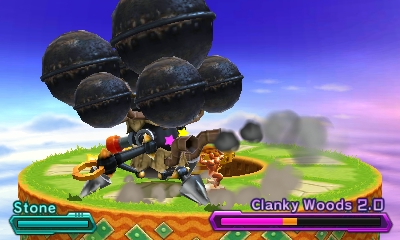
This is a big reason why I suggest Stone over Archer; while the latter’s dash attack has pitiful distance and ends up getting Kirby hurt, Stone’s Turbo Stone maneuver renders you completely invulnerable the whole time. It’s an incredibly safe option that packs a wallop, so don’t be afraid to use it! (…except in one case, but we’ll get to that later)
Oh, and be aware of your surroundings. Bosses like Haltmann and Miasmoros like to cover the ground in patches of electricity, poison and flame, and they can pop up with little warning. Learn to recognize the attacks that spawn them.
Finally, in the case you didn’t pick Stone, remember that dodging and guarding are your friends. Bear in mind that attacks shielded by guard will inflict chip damage, so you can’t rely on it forever.
Bosses
We won’t cover every boss in The True Arena, so we decided to cover the five bosses that’re giving players the most trouble, starting with…
Holo Defense API 2.0 (Holo-Coily Rattler 2.0)
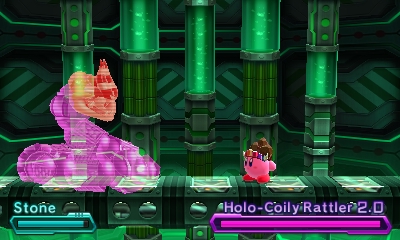
The majority of the holograms are pushovers: Kracko and the Sphere Doomers have very predictable idle patterns where they’re largely idle, and the Ice Dragon practically comes to you to get hurt. But Coily Rattlers second coming can be rather frustrating; for one thing, its weak point (the head) is situated right at the top of the screen, and the snake tends to slither about at a moment’s notice.
Again, remember my number one rule: let Coily Rattler come to you. While it can take a while since it likes to spend time firing projectiles from the background, dash attacks work wonders when it coils around the battlefield. While that attack leaves behind electricity, Turbo Stone will protect you from such danger. (additionally, a well-timed Stone Smash can punish its dust-telegraphed divebombs). Keep your attacks at a distance while letting Coily Rattler do all the moving, and you’ll be hearing its death rattle before long.
Dedede Clones/D3 2.0

The golden Dedede clones are giving players no end of trouble, and it’s easy to see why. Getting caught in just one of their mob-driven attacks can ruin your chances of success, and it’s hard to keep tabs on all three.
Stone is once again your friend here, but be warned: do not get stuck in a corner. The Dedede Clones still target you when Kirby’s in Stone Form, and they’ll trap him by crowding together and flopping all about. If you don’t believe me, just look at the screenshot below.

Not a situation you want to be in. As tempting as it is to dash through all three while they’re sliding around, you’ll want to carefully gauge where you’ll end up before deciding to do so. My recommendation is stand your ground around the center, this way you won’t be forced into a corner. If you’re using another ability, place emphasis on dash attacking so you’re always mobile.
In comparison, the big scary D3 cannon isn’t all that tough. Its moves are telegraphed well-ahead of time and the blue lines on the ground let you know what direction its heading in, so you can quickly plan your dash attacks and Stone Smashes and the like.
Pres. Haltmann 2.0
Planet Robobot‘s main antagonist is where things start getting especially rough. His mecha suit gives Kirby no end of trouble, what with all the missiles, shockwaves, laser beams, and screen-covering cash. Where does one even begin a counter-offensive?
Again, by letting him come to you. Haltmann is at his most vulnerable whenever he’s circling around the battleground with his blades, especially if you’re using Stone. Careful uses of Stone Smash in the first phase will deal nice damage, and dash attacks during the second half–when the arena widens up–are always a safe option.
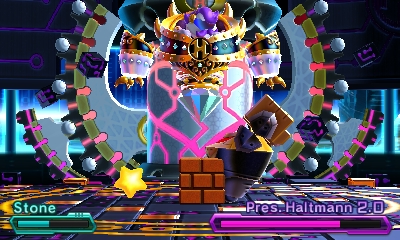
In nearly every other instance, keep your guard up. Shock waves, missiles, and electricity will be gunning for you within the second phase, and tempting as it may be to target him in midair, he can suddenly toss shock waves right in your face. Wait for when he comes gunning for you to put the president out of business.
Galacta Knight
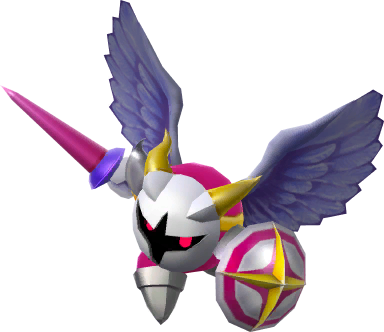
This masked warrior has always been one tough cookie since his debut in Kirby Super Star Ultra, and his Planet Robobot appearance is no exception. His fast, twitchy movements tend to take players off-guard, and his heightened defenses result in low damage on Kirby’s part.
Like Haltmann, vulnerable as Galacta Knight may seem in mid-air, you’re better off defending and dodging his aerial attacks. His attack patterns can shift unexpectedly (like in the second firing of his thunderbolt summons) and it won’t end well for you. If you’re using Stone, you won’t have to lift a finger to dodge his dimensional rips and sword beams.
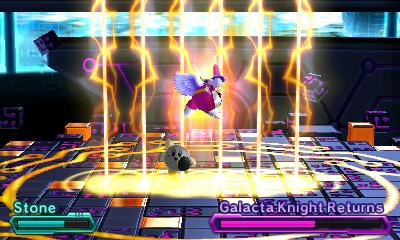
The best chance for attack is when he’s positioning himself on ground for a new attack, so be sure to get in a dash attack before he flies off. While it’s a safe maneuver, watch for his shield: it’ll put a stop to any damage from your end, so time your attacks wisely. You’re almost at the end, so don’t give up!!
Star Dream Soul OS
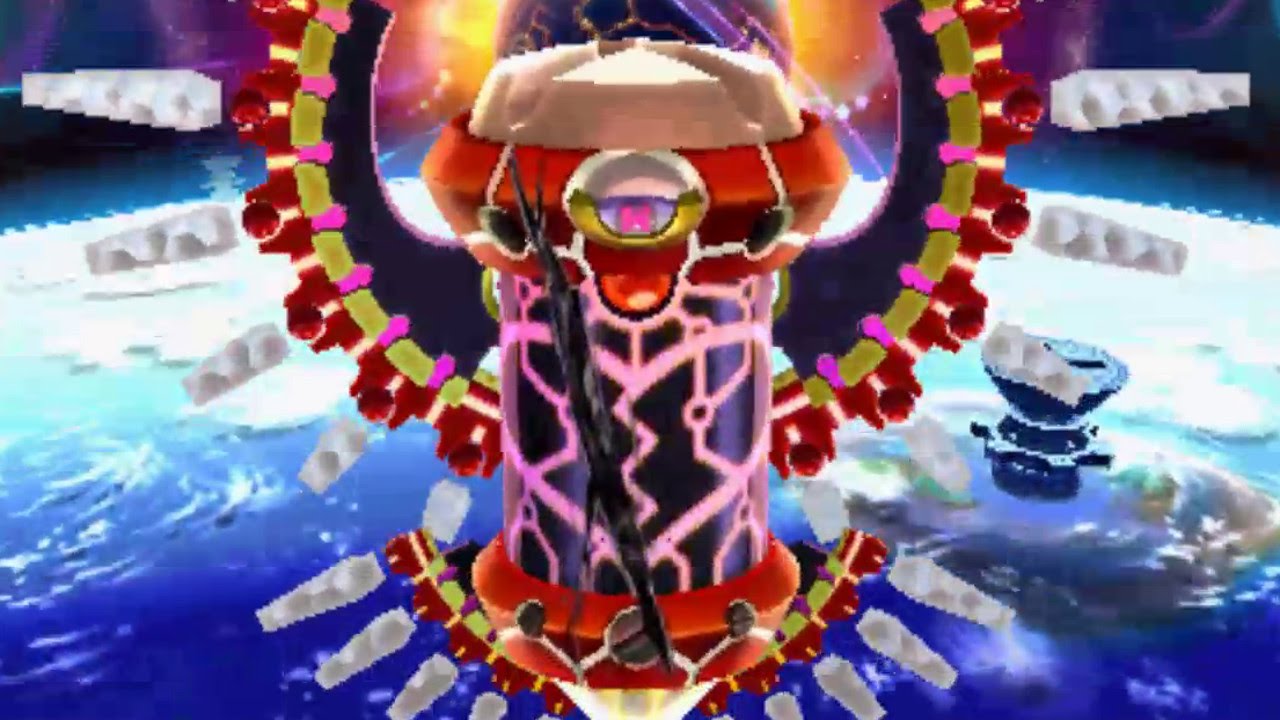
And here we are: the nightmare that is the four-phase final boss. Exhausting as the rest of The True Arena was, these are nothing compared to the heart-pounding finale. Expect sore fingers by the battle’s end.
And why’s that? Because you will be spending the first three phases rolling, rolling, and rolling. Barrel rolling with the shoulder buttons serves as an automatic dodge for just anything the Star Dream throws at you, be it beams, asteroids and ship debris.
But you won’t want to dodge everything, for you have to fill up the Planet Buster Meter. After destroying whatever projectile was headed your way, move the reticle over the debris to fill the meter. It can be pumped up to three shots, but it’s quicker and more efficient to fire ’em off as soon as you get one. Basically, maintain a proper balance of filling Planet Buster movements and dodging projectiles for the first two phases, and you’ll probably turn out OK.
The third phase will be your toughest trial. After Star Dream sheds its armor to reveal a familiar face, it’ll start a countdown from 5 to 0 (in the form of holographic numbers, which you must dodge). Once it reaches 0, it’ll launch an instant kill program that’ll put an end to your True Arena run.
The key here is your Planet Buster meter, as this is where you should concentrate on filling it all the way through. In particular, you must fill it during the third phase by shooting down all the piano keys. Once that’s done, instantly fire it once Star Dream presents itself again, and you’ll be on your way to victory. Expect to finish it off just in the nick of time.
Once you’ve reached the final phase, you’ve likely sustained heavy damage. You’ll be back in control of regular Kirby, and while the pillars probably won’t be hard to take down, things may get tricky once the heart comes out to play. Remember the golden rule of letting it come to you, especially when it splits in two near the end, and you should squeak by.
After it’s taken down, DO NOT UNDER ANY CIRCUMSTANCE PUT DOWN THE 3DS. The heart will launch a last-ditch effort to defeat Kirby by unleashing three instant-kill shockwaves: the first one high up on the screen, the second right in the middle, and the final blast will cover the top and bottom. You can simply wait on the ground for the first time, but you MUST fly in the middle of the screen to dodge the final one. And no, Stone or Archer’s Camouflage won’t help you here.
Get past that and…
Congratulations! You beat The True Arena!
Give yourself a pat on the back, and have some of Kirby’s favorite strawberry shortcake while you’re at it. You deserve it. In the meantime, there’s a number of other veritable challenges in Planet Robobot, be it finding all the golden stickers or getting platinum medals in Kirby 3D Rumble and Team Kirby Clash. Hop to it!
Are you struggling with other bosses in The True Arena? Let us know in the comments below!



Published: Jul 13, 2016 12:38 pm