Tallnecks are towering machines that roam small areas of the Horizon Forbidden West map collecting data on their surroundings. Though they meander in one place, finding their locations and activating them will reveal large portions of the map, marking points of interest like Campfires, Ruins, and much more.
To do so, you’ll have to reach the top of each Tallneck and override its systems. Some of these platforming puzzles are relatively easy and, as you might expect, others are relatively more difficult. Finding your first gives you the First Tallneck Overridden bronze trophy while finding all 6 Tallnecks gives you the All Tallnecks Overridden silver trophy.
Where to Find & Activate All Tallnecks in Horizon Forbidden West
Tallneck: Cinnabar Sands

You’ll find your first Tallneck in the Forbidden West after completing The Embassy story quest in Barren Light. It will be automatically marked on your map after that quest is over.
When you arrive at the location, you’ll need to take care of a patrolling Skydrifter, which will call a few Scrappers to it. Defeat them, and then start climbing the satellite array the Tallneck is circling. When you get to the top and can’t go any further, drop the ladder on the southwest side.
Climb down the ladder, and use the handholds to the upper left to circle around to the Power Cell on the southeast side. Drop down, and grab it. Then jump down to the generator underneath the array. Insert the Power Cell, then climb back up to the console on the second story of the satellite array.
Activate the console, and the array will reposition. Climb back to the highest point (where you previously dropped the ladder), and shoot the wire couplings holding the satellite in place. Once the satellite fully repositions, climb to the top, and use your Glider to reach the Tallneck’s head.
Tallneck: The Stillsands
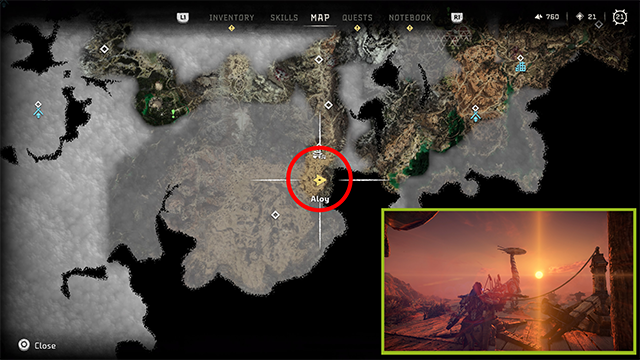
This is likely the second Tallneck you’ll activate in Horizon Forbidden West. After completing the Dying Lands story quest, you’ll gain access to The Base, which allows you to explore the lands west of the mountain range.
Once you do, travel south of The Base for about 1,200 meters, keeping alongside of the mountain range until you hit the desert. When you arrive at the Stillsands location, you’ll find the Tallneck circling a small set of ruins in a central area, with more ruins to its north, east, and south.
Go to the central area to find a ballista in the center. Interact with it, and aim at the blue glowing areas on the Tallneck’s haunches. Shoot the ballista to attach a weight to it.
At this point, machines will spawn. Take them out, and head to the southern ruins to find another ballista. Repeat the process, and defeat the machines that spawn. Finally, go to the eastern ruins for yet another ballista; defeat the machines first, then repeat the process one more time.
With the Tallneck down, interact with its head to activate it.
Tallneck: The Stand of the Sentinels
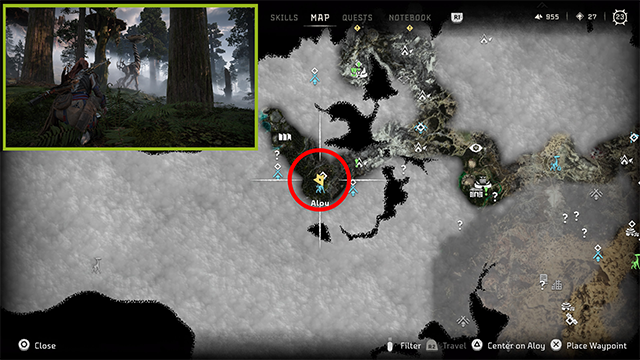
You’ll come across this Tallneck during the Seeds of the Past story quest, as you make your way to the Demeter subordinate function. There are high-level Stalkers in this area, which can two- or three-shot you depending on your level, so make sure to bring Shock weapons and traps with you, along with some healing items and patience.
Start the climb on the northeastern side of the area; open the in-game map to find a path in the middle, and follow that to the northeast end to find a wooden ramp leading up toward a grapple point.
Follow the path left past the Campfire. At the end, knock down the ladder so you can easily climb back up if you fall. Look across the gap and down; you’ll see several yellow ladder handholds. Glide over, and use these to climb around (going left) and under the platform to get to the top of it. Be sure to knock down the ladder here, too, in case you fall.
Continue left across the rope bridge. Here, Aloy will mention that “this might be high enough to jump on the Tallneck, but it’s not enough to reach the head. The Tallneck is missing some parts, and you can’t climb to the top at this point. Instead, jump over to the Tallneck, and ride it to the northwestern corner of the outpost. Jump over to a platform there.
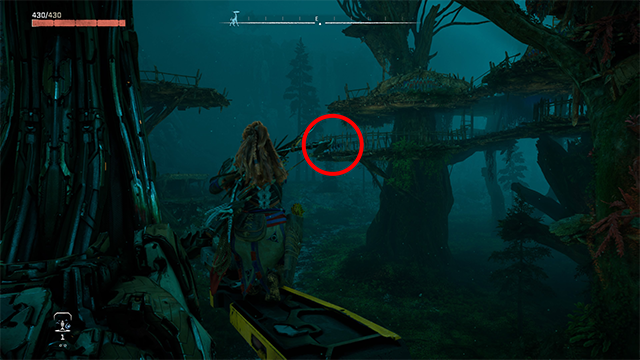
Be careful here; there will be two Clamberjaw in this area. One is on the lower platform, and one is on the higher platform. Bring some Purgewater weapons or traps to make things easier.
Once you take them out, climb up the platform where the higher Clamberjaw was. Turn right, and shoot down the ladder. Climb that ladder, and then use the zipline to reach another platform. There, climb to the platform above.
Aloy will mention this should be high enough to reach the Tallneck’s head, and she’s right! Follow the path right until you see two short wooden pylons painted with blue streaks. Jump from here, climb up, and activate another Tallneck.
Tallneck: Landfall
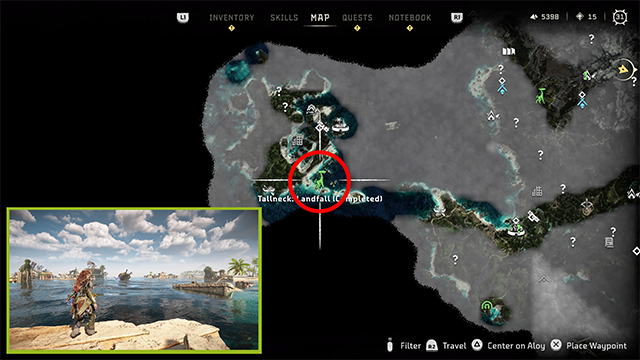
You won’t be able to reach Landfall until near the end of the Horizon Forbidden West campaign, during the Faro’s Tomb story quest. This Tallneck is located in the bay in the southeastern portion of the island. Be wary of the Glinthawks in this area. Swim underwater and examine the Tallneck to mark the locations of the missing parts to the northeast.
To reach the first Glinthawk nest location, go to the ruined building just south/southeast of the objective marker. Take care of the Glinthawk, and push the crate into the water. Opposite the crate, you’ll see a ladder you can shoot down. Go into the room behind the ladder, and use the crack in the wall to pull the crate toward you with your Pullcaster. Jump onto the crate, then jump over to the ladder to climb up. Platform over to the nest, take out the second Glinthawk, and grab the part.
Now go to the second objective marker further north. Mind the Snapjaws, and swim through the bottom floor of the building to reach a landing on the second floor. Grapple up to the top floor. Turn around to deal with the Glinthawk and grab the part out of the Scrapper pile.
Swim back to the Tallneck, and install the power converters on the backside (where you initially examined the machine). After the cinematic plays, swim over to the buildings with the objective mark.
Swim to the bottom of the eastern-most building to find holes on the northern and western sides. Use these to get inside and climb up. You can jump over to the Tallneck from the roof of this building when it comes around the northeastern point.
Tallneck: The Shining Wastes

This Tallneck can be found about 1,080 meters west/southwest of The Base in an area known as The Shining Wastes. It’s west of the Tenakth village of Arrowhand. It’s locked until the second to last story quest in the game, The Wings of the Ten.
You’ll activate this Tallneck automatically as part of that mission. I won’t spoil how you activate this one or use a screenshot that accurately depicts what you’ll see, because it’s one of the best moments in Horizon Forbidden West. Enjoy!
Tallneck: Salt Bite (Cauldron Iota)
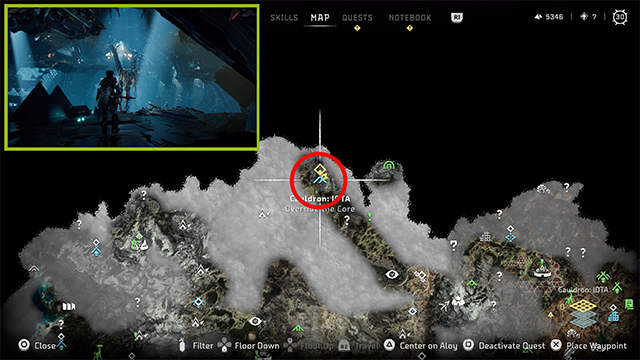
After activating your fifth Tallneck, you may be wondering why the trophy for activating all Tallnecks hasn’t popped. That’s because there’s a “secret” one located in Cauldron Iota. It’s won’t be marked on your map like the others.
The Cauldron is located in the extreme northern portion of the map in the Forbidden West; it’s 500 meters northeast of Salt Bite and about 2,000 meters northwest of Plainsong. The Tallneck in question is near the end of the Cauldron, its production halted by an earthquake.
Enter the Cauldron via the crevasse on the northwestern side, and follow the path through to the Tallneck. Defeat the Rollerback that appears when you enter the chamber to expose the Cauldron core. Override it, and the Tallneck will block the platform leading out.
The alternate exit can be found below the core. Drop down to find another locked door to override. Follow the path to the Tallneck’s head. Drop down, and fight the machines here before climbing up the back, southeastern wall. Use the flying machines to get over to the head
Ride the Tallneck head back to the energy shield, then use your Pullcaster to grapple to the platform on the right. Override another door to reenter the Tallneck’s main area, just higher up than before. Climb over to the Tallneck, now with a head, to activate it.
And those are all of the Tallneck locations and how to activate them in Horizon Forbidden West. For more tips and guides, head over here.




Published: Feb 21, 2022 10:33 am