This is your first level 60 dungeon in the Heavensward expansion. It also brings a whole new meaning to the word pain, as far as incoming damage goes. This dungeon does not drop loot, and is primarily intended as just story progression. You will get Tomestones of Law for completing the dungeon though, to start your gear grind.
Regula van Hydrus:
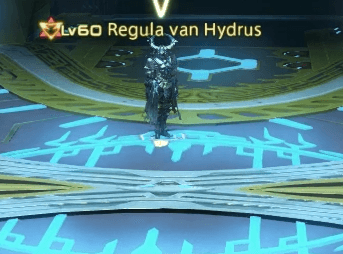
Probably the most disappointing boss in this dungeon. Sure it was obvious you were going to fight him eventually, but all in all the fight was a bit underwhelming.
Attacks:
- Bastardbluss: A moderate damage frontal cleave attack.
- Judgement: A moderate damage attack, appears to be a small circle AoE centered on Hydrus.
- Magitek Turret I: These randomly pick a focus target and tether to that target. Any player who stands in front of the target will temporarily break the tether and take the damage instead. Everyone should focus on these turrets. If they aren’t destroyed they will self-destruct doing considerable damage.
- Magitek Slug: Hydrus will use this while turrets are out. It’s a straight line room length AoE, targeted at random.
- Magitek Spread: A room-wide AoE dealing moderate damage, with a safe zone behind Hydrus.
- Magitek Turret II: This turret uses a circle AoE called Aetherochemical Grenado, instead of the single-target damage attack of the other. However, the self-destruct mechanic is the same.
Harmachis:
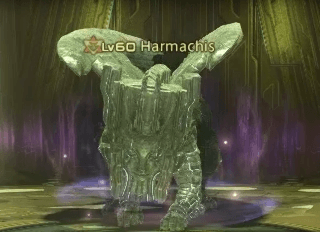
This is by far the most interesting boss I’ve ever faced. Throughout the fight it will morph into other recognizable enemies and perform a unique ability from that enemy’s type.
Attacks:
- Weighing of the Heart: Harmachis takes on another form for a short time. Snake form grants a damage-up stack. Naga form allows Harmachis to petrify a target. Machina form appears to target players and drop them to 1 HP. Then it starts over at snake form again.
- Cthonic Hush: A frontal AoE breathe attack that deals moderate damage and inflicts poison.
- Riddle of the Sphinx: A ground Target AoE, targeted towards players at random.
- Ka: A wide conal AoE.
Ascians:
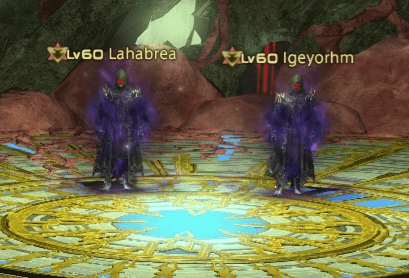
This is technically a three-part fight. The first two parts are a seamless transition, followed by a cutscene that takes you into part three. I’ll list attacks based on the Ascian as parts one and two depending on who you choose to target first. The recommended method is to take on Igeyorhm first. Whoever you target first, the other becomes un-targetable until you hit the 50% threshold on the first. At that point they swap.
Igeyorhm:
Igeyorhm uses ice elemental attacks. Getting hit by certain attacks will freeze players. This freezing potential is why it’s best to get her phase out of the way first. While you’re fighting Igeyorhm, Lahabrea is un-targetable and uses fire-based and laser attacks.
Attacks:
- Dark Orb: A moderate damage attack.
- Sea of Pitch: Ground lingering AoE DoT.
- Blizzard Sphere: Placed around the room being hit by the AoE blast freezes the player. Lahabrea will place fire orbs in a smaller circle in the middle. There is also another pattern that the spheres are placed in, see the video for specifics.
- Shadowflare: A room-wide AoE, dealing moderate damage.
Lahabrea:
Lahabrea uses fire-based attacks. Just like when fighting Igeyorhm, now Igeyorhm will be un-targetable using ice-based and laser attacks.
Attacks:
- Dark Orb: Same as Igeyorhm’s.
- Sea of Pitch: Same as Iggeyorhm’s.
- Dark Fire II: Several ground target AoE circles placed around the room.
- Permafrost: (Technically Igeyorhm’s attack.) Igeyorhm freezes the floor and deals damage to everyone.
- Shadowflare: Same as Igeyorhm’s.
Acian Prime:
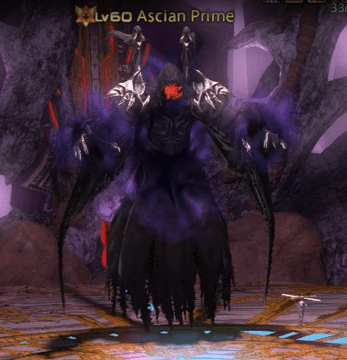
This is the stage-three fight after the cutscene. Basically, it’s Lahabrea and Igeyorhm combined into a single form. That means there are ice and fire attacks in this stage.
Attacks:
- Height of Chaos: A hard-hitting frontal cleave.
- Ancient Eruption: AoE circles are placed under each player.
- Shadowflare: The same as previous phases.
- Annihilation: Ascian Prime summons a giant Blizzardsphere and Firesphere. Prioritize destroying the Blizzardsphere here and let the healer heal through the fire damage. During this attack a large room AoE will go off as well with safe zones, just rotate towards the safe zones while destroying the spheres.
- Universal Manipulation: A room-wide AoE that inflicts multiple status ailments as well as doing moderate damage. To avoid this attack run to an empty void area. (I failed to do so in both uses.)
- Entropic Flame: A multi straight Line AoE.
- Chaos Bleed: After the second Universal Manipulation. Orbs will be tethered to every player. It appears you can avoid the orbs by letting them hit Ascian Prime.
That wraps up everything you need to know to clear The Aetherochemical Research Facility. If you have any comments, questions, or concerns leave them down below. For more expansion content, be sure to check out my Heavensward guide list.



Published: Jul 3, 2015 01:48 pm