Just a few short days ago, Elder Scrolls Online dropped its first major DLC since the release of the Morrowind expansion. With two new dungeons (and a new Trial) in the mix, plus a colossal difficulty spike, the “Horns of the Reach” DLC is already leaving plenty of unprepared players gored.
Luckily, we did the dungeon delving for you and walked away with a few tips and tricks to help you through defending the besieged Falkreath hold. So paint those white flags red, and charge into this guide — then show those Reachmen what happens when you mess with the bull.
ESO: Falkreath Hold Dungeon Overview
The first and most important thing to realize is that the “Horns of the Reach” dungeons (Bloodroot Forge and Falkreath Hold) are definitely in the DLC-difficulty category, and more in line with the overall power of the White-Gold Tower than, say, Fungal Grotto.
Many “trash mobs” are familiar enemies to long-time players by now — the humanoid enemies that mimic a player class and pose a medium threat are still around, and have added a Warden substitute equipped with a bow, Cliff Screecher, and Insect Swarm to their ranks.
The truly dangerous members of the Dreadhorn clan are apparent soon enough, however, as three new Minotaur enemies have joined the fray.
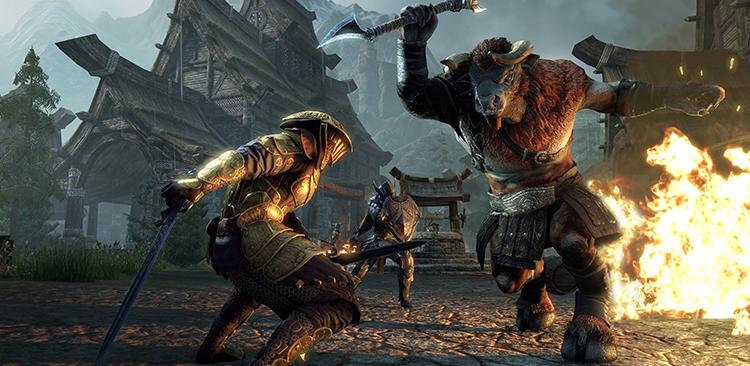
The first, Dreadhorn Wallbreakers, wield massive axes and can easily one-shot squishier party members on Normal — and tanks on Veteran. Block or dodge roll the heavy attacks, but otherwise just treat them like the gigantic damage sponges that they are.
Dreadhorn Tramplers also boast the capability to destroy a player — though mostly only in Veteran mode. Sidestep or block their bull rushes and avoid the flames.
Earthbinders are an upgrade on their human allies most of the time, and do many of the same things, but also boast the ability to damage shield themselves. These minotaur mages also create massive delayed AoEs in the form of magma rocks that burst from the ground — and then burst into the air for massive bleed damage.
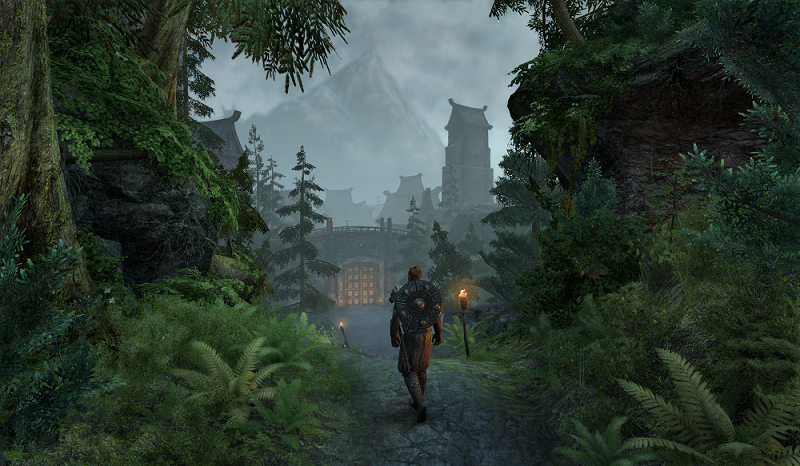
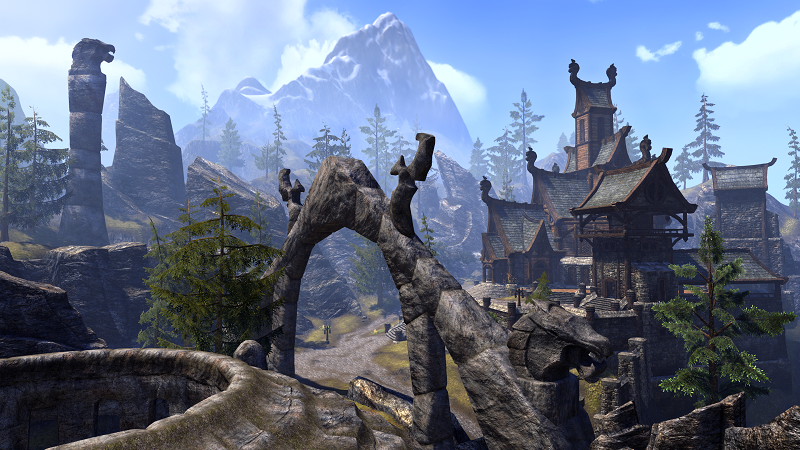
Lastly, the dungeon design in this DLC makes “grouping” clusters of enemies together to lay down the Area of Effect damage a bit harder than usual. Whether you’re in the woodlands out front or the urban environment of Falkreath Hold itself, be prepared to defend against enemies coming from multiple sides and elevations throughout, or your party will be burning Soul Shards faster than you can say, “Ole!”
Boss 1: Morrigh Bullblood
At least Falkreath Hold eases you into the difficulty curve, giving you “only” a handful of human enemies and a single Wallbreaker alongside the first boss of the dungeon. Luckily for us, Morrigh isn’t exactly turning up a ton of new tricks, being a fairly straightforward fight until around half health or lower. Her spinning blade attack does have a stun and silence component, though. So watch out for that.
Once Morrigh dips below half health, she will occasionally protect herself with a wide-area golden shield as fire rains from the sky. Unfortunately for her, we’ve had plenty of practice with her trump card, thanks to the Vaults of Madness, and know to hide inside her shield until the attack is over.
Boss 2: Siege Mammoth
This woolly wonder is found milling about just past Morrigh, stomping about the gate to Falkreath Hold. Have the tank close distance and keep it facing along the outer wall, while any ranged characters keep their distance and melee users stick to the back of the creature.
Its primary attack — a horizontal swing of its gigantic tusks — is a heavy damage cone that can chunk tanks and leave your damage and heals either dead or dying. Block or simply walk backwards to avoid this.
Usually it will follow up a tusk swing or two with a wild charge, knocking anyone in front of it back and down. Tanks that attempt to keep their back to the wall will soon be forced to face the mammoth towards their back line, but letting it charge back and forth along the gate wall keeps your crew mostly safe.
Siege Mammoth’s last attack, triggered in the second phase subtly cued by its entire back being set ablaze, is a rear-and-stomp that sends some of the flames from its body out in waves. These hurt badly in normal mode, and will regularly one-shot any non-tanks in Veteran. Dodge roll or avoid them, or die.
With the mammoth extinguished, it’s time to head inside the Hold. Help Eeryka evacuate and secure as much of the Hold as she can – usually by fighting off waves of Dreadhorn Tramplers, Earthbinders, and Reachmen – and eventually you’ll come upon…
Boss 3: Cernunnon and his amazing friends
See the gigantic glowing blue Bone Colossus up ahead? See how he splits into little spheres that travel inside Tuecille, Mokveda, and Erbogar? Most importantly, see those little altars?
Engage the three (though be careful of Tuecille, as its Veteran counterpart’s heavy attack deals 65k+ damage when unblocked), and be sure to keep the fight inside the swirling circle of smoke. When you see “the Vortex tugs at your soul”, it’s the games way of telling you that if you leave this circle, you will die.
Take out Erbogar (the archer) first, and have a DPS pick up the orb he drops upon “death” and walk it to a nearby glowing altar — but move fast, as the orb increasingly slows and damages its carrier over time. Once the orb is deposited, Erbogar will finally fall (rather than rise at 30% health, as he does if you fail).
Repeat this process with Tuecille, and finally Mokveda before Cernunnon rises from its glowing pit and engages you itself. Stay spread out to avoid killing each other with the splash damage from his meteors (cued by a charged glowing ball of energy in his hands), and make sure to keep your guard up if tanking — as his bone blade also deals roughly 65k+ damage unblocked.
Break his bones down to roughly 70%, and Cernunnon will retreat back to his circle to resummon his three minions for another round. Kill them the same way as before to end the phase and drag the Colossus back to this plane, where you can finish him.
Follow the retreating Nords into the halls of the dead, keep your eyes on the way the draugr bodies glow after they fall, and keep moving until you find…
Boss 4: Deathlord Bjarfud Skjoralmor
Aside from having what is easily the game’s hardest name to correctly pronounce with a straight face, the Deathlord doesn’t have very much going for him.
Melee attacks and a few draugr servants comprise most of Bjarfud’s repertoire, and nothing is particularly that threatening…
…except a red Damage over time that builds up under each player, and will eventually start dealing lethal amounts of damage. To cleanse this, have at least one character head to a sacred glowing urn found in the corners of the room, and begin cleansing the nearby glowing draugr corpses with X. Once enough are cleansed, the damage ceases for a time.
Luckily, this time is usually enough to chew through the Deathlord’s astonishingly low health pool. So claim your prize, and head outside the Halls into The Thane’s Hall. Inside you’ll meet the current head of Falkreath, and face…
Final Boss: Domihaus the Bloody-Horned
Domihaus, more than anything, is a DPS check. In his first phase he smashes the ground repeatedly, bringing up rocks that chase each individual player and are incredibly lethal. Avoid these and channel damage into him until his next attack.
For the second move in his rotation, Domihaus turns himself to perfectly invulnerable stone and summons four Atronachs — one of each element — to do some of his bloody work for him. Down them quickly, because this attack is not triggered by the death of the elementals, but by time. So any leftovers when he wakes up will stick around and continue fighting.
After taking a significant amount of damage (at around 65%), Domihaus will begin to Shout (cued by the message at the bottom of your screen telling you this). Quickly run behind the nearest pillar, putting it between you and Domihaus, or his Fus-Ro-Dah imitation will quickly leave you Fus-Ro-Dead.
At 20% or so health, he summons a horde of elementals without freezing himself at all. And another horde. And another after that.
At around 10%, try to keep all the atronachs corralled near the boss so that they die as a result of AoE damage, and burn him down as soon as possible.
The Bloody-Horned may also bring to bear a series of sharp spikes in circular patterns around him, slowing and steadily dealing damage to all players not in the outer circle near the pillars. Typically, this is the best time to avoid the center and attempt any rezzes — so if you die, try to die as close to the edge as possible.
A series of fireballs is also in his arsenal, most of them irritating at best. However one fireball — denoted by a “charge” where he gathers the fire into his hands — is perfectly capable of taking out any target that missed the cue or isn’t blocking, dealing roughly 65k damage in Veteran Mode.
Usually, after forcing players to the edge of the arena with the hovering shards, Domihaus will then glow and raise his arms to the sky. That’s everyone’s cue to jump back into the center of the circle, as the outer ring is about to be filled with flame.
Veteran mode is more of the same with significantly increased stats, though a quick look at the pillars after a Shout reveals the real danger of the encounter — much like Valkyn Skoria before him, Domihaus is “timed”. It would behoove your party to bring the best damage they can find — if the fight takes too long, eventually the players will simply run out of pillars to hide behind, and be subjected to the full might of the master Minotaur’s Voice.
With enough courage and determination (and damage, armor repair kits, and soul shards), you can triumph over the Bloody-Horned and save Falkreath Hold.
—
That wraps up this guide to the Falkreath Hold dungeon in ESO. But we still have some questions. What emboldended the Dreadhorn clan so? What led to the alliance of Minotaur and man? Where did these weapons of blood and fire come from? For that, my friends, we’ll have to mount an offense against the other Horn of the Reach, and the source of the problem…
The Bloodroot Forge. Stay tuned for another guide on this second dungeon for Horns of the Reach! In the meantime, check out the rest of our ESO guides for more help with the game:
- ESO Morrowind: A Guide to Playing the Warden Class
- How to Craft Trifling Glyphs of Magika, Stamina, and Health in ESO
- A Light in the Darkness: Navigating ESO’s Bahraha’s Gloom Delve
- In Pirates’ Wake: THe Rundown on ESO’s Shark Teeth Grotto


Published: Aug 17, 2017 03:34 pm